
Hands can be one of the trickiest things to draw. Since they can reveal so much about a person or character’s personality, it’s important to get them right. If you’re trying to show a powerful character, you may want their hands to be balled up in a fist. A softer, gentler person may have their hands folded in their lap. The short, stubby fingers of a child look completely different from the long slender fingers of its mother or the large, muscular ones of its father. As you can see, there are a lot of things to consider before you begin your drawing.
Artists have been studying human anatomy and especially hands for centuries. You can see the painstaking approach Leonardo da Vinci took if you examine his hand drawing studies, which include internal anatomy and show a variety of positions. In your quest to draw realistic-looking hands, you have to study how its many moving parts—bones, tissues, ligaments, and tendons—are connected.
In this article, we’ll take a look at one way to draw hands. By following along as we complete a drawing of long and elegant hands with beautiful nails, you’ll see a template developing that can be used to draw hands of other shapes and sizes.
List of Supplies
Professional Colored Pencils - Set of 120
Sketchbook, 9” x 12”, 100 Sheets - Pack of 2
Steps to Drawing Feminine Hands with Nails
When drawing hands, it’s helpful to draw them from life. You can draw your own or a friend’s and be able to see the shape of the palm, the finger joints, and the length of each section between joints as well as the color variations in the skin and nails. Another useful tool is a wooden hand model with flexible joints. These models are made to accurately replicate the scale and proportion of the human hand and can be bent into any position you like. For now, study the examples shown here and follow this easy step-by-step drawing mini-tutorial.
Step 1
This hand-drawing tutorial is of two hands, one placed straight up and the other curving around the first one’s wrist. Use a 2 HB pencil to draw general shapes, making a light sketch of the shape of the palms and the wrists. Next, place tiny marks to indicate where the finger joints are. Draw a line from each mark to the next to show the bones of the fingers. Draw circles at the base of each finger, where it attaches to the palm to indicate the largest joints.
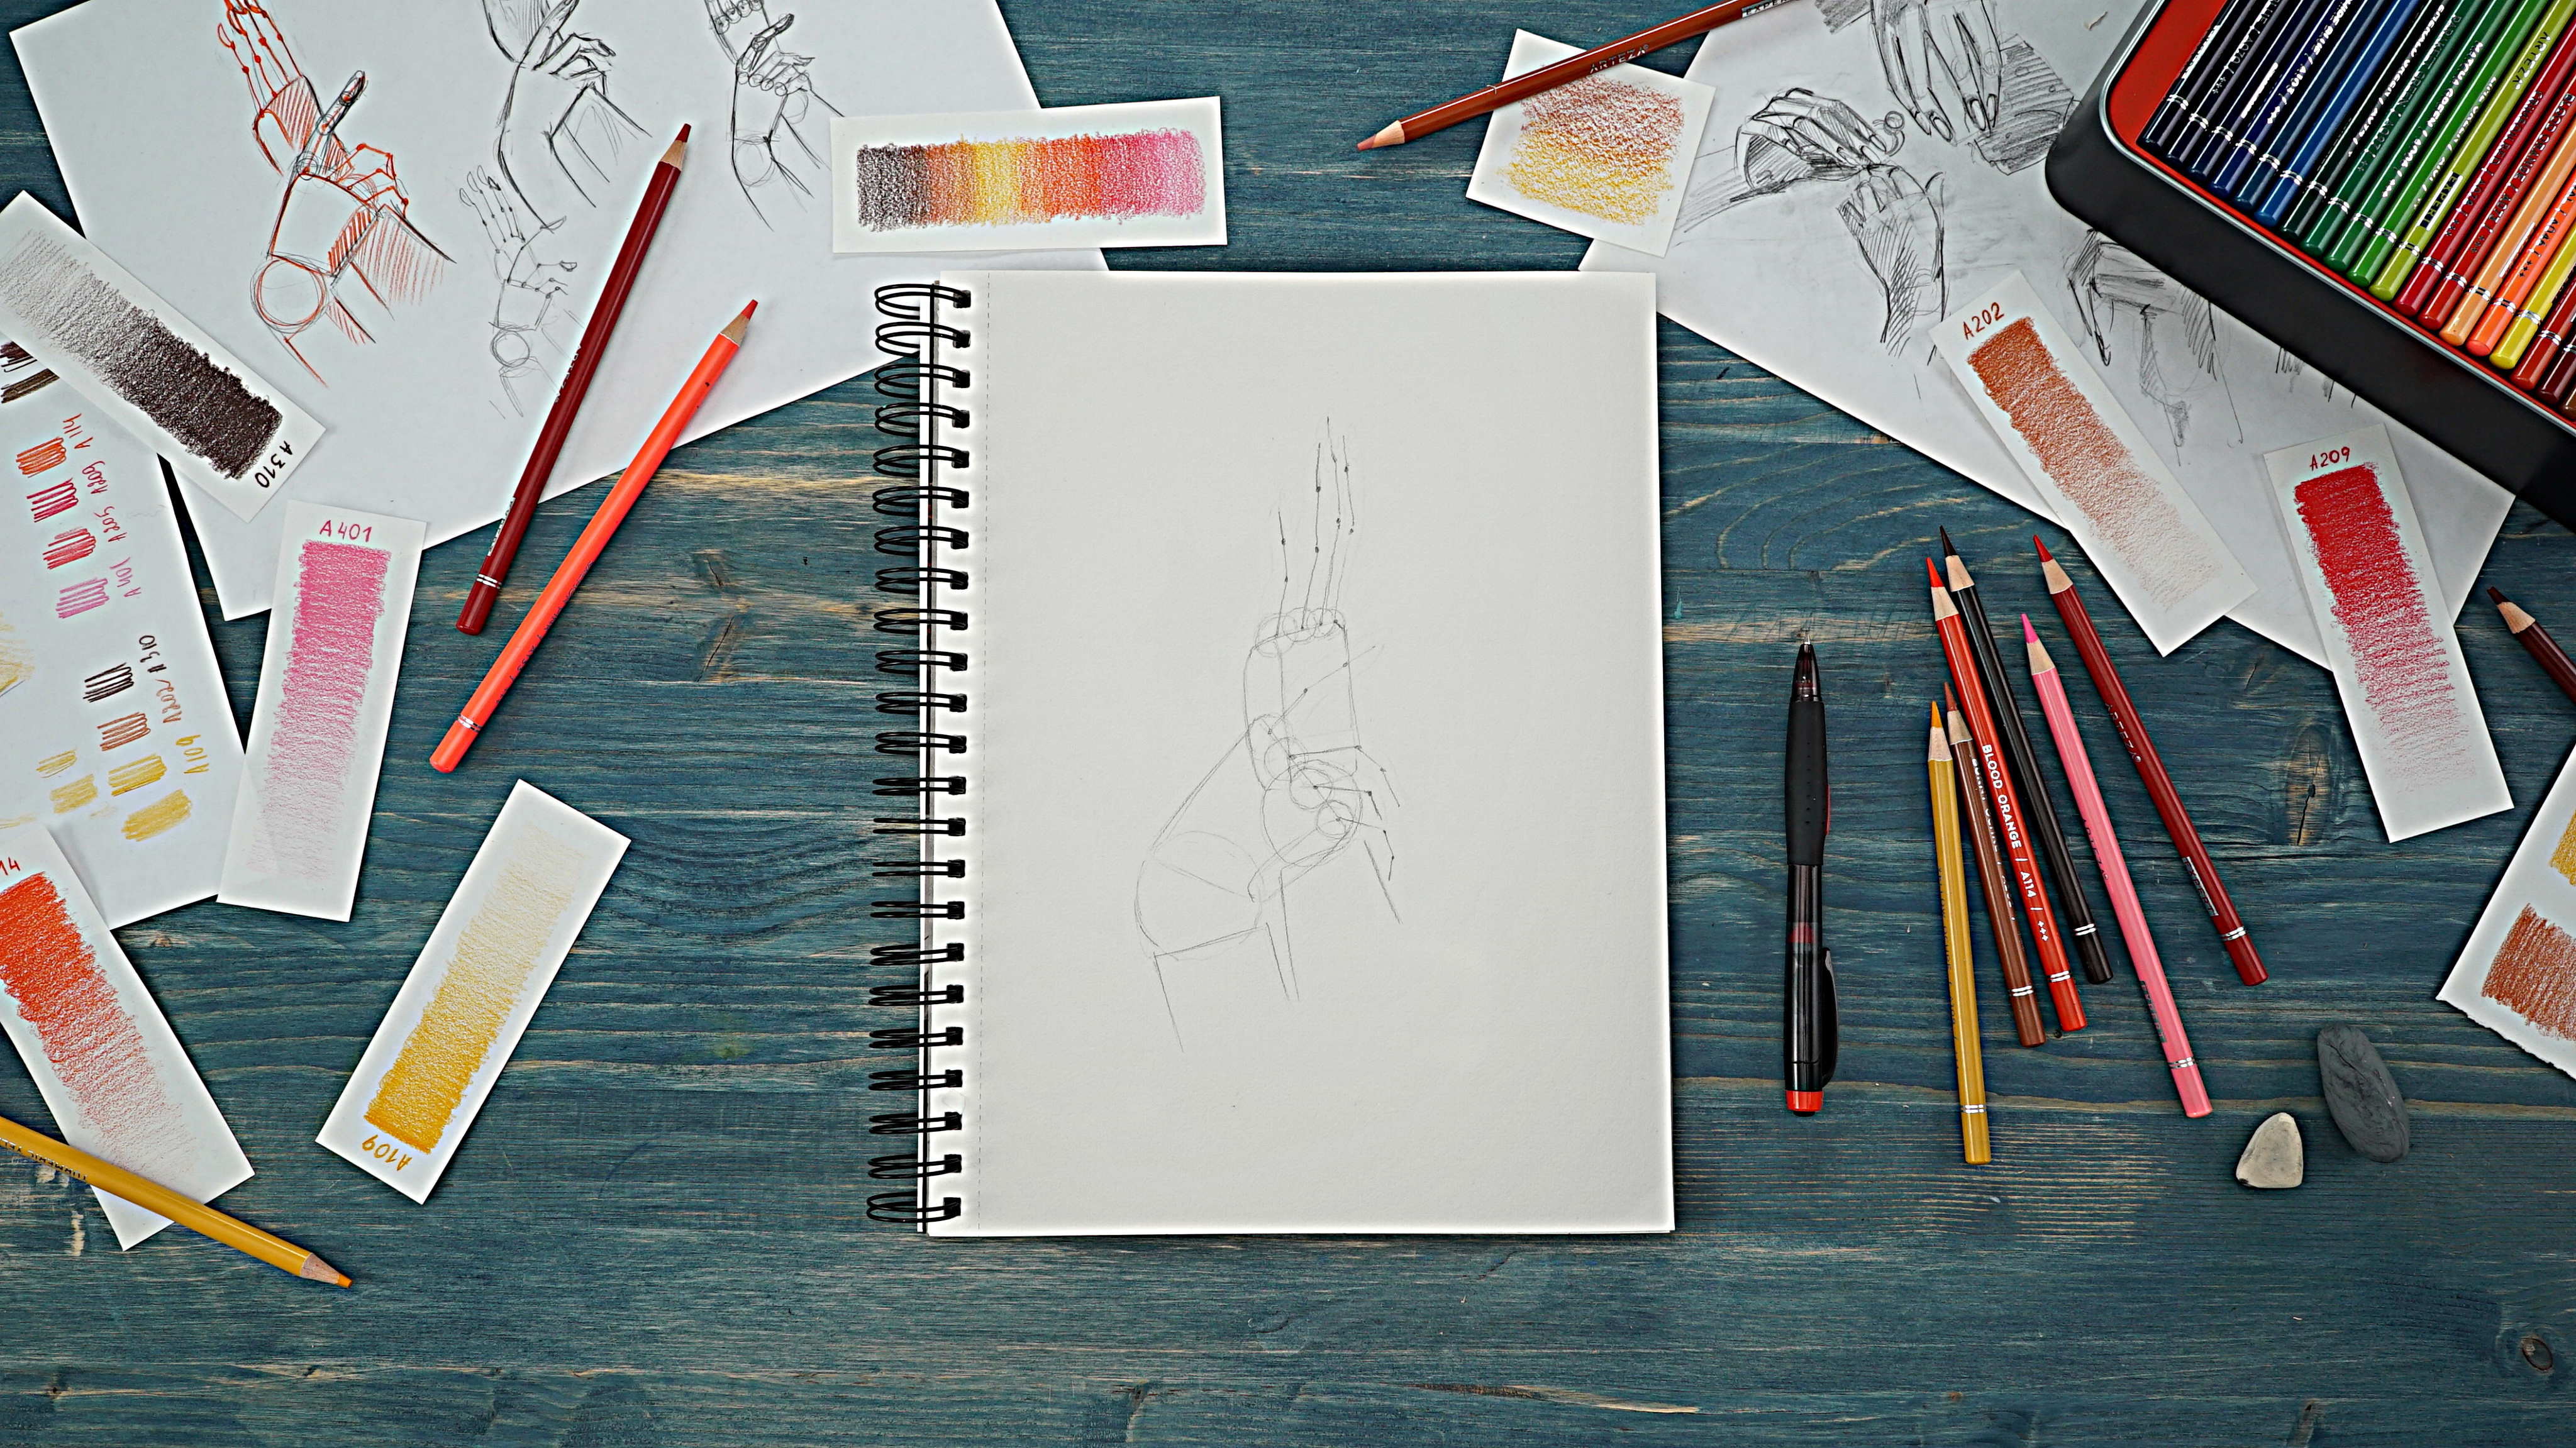
Step 2
Now, draw oval shapes around the lines beginning and ending on each mark. This adds “flesh” to the fingers, and the hands are now taking shape.
Go over the outer edge of all the fingers, the hands, and the wrists to smooth and contour the hands. Erase all the interior, preliminary lines.
Step 3
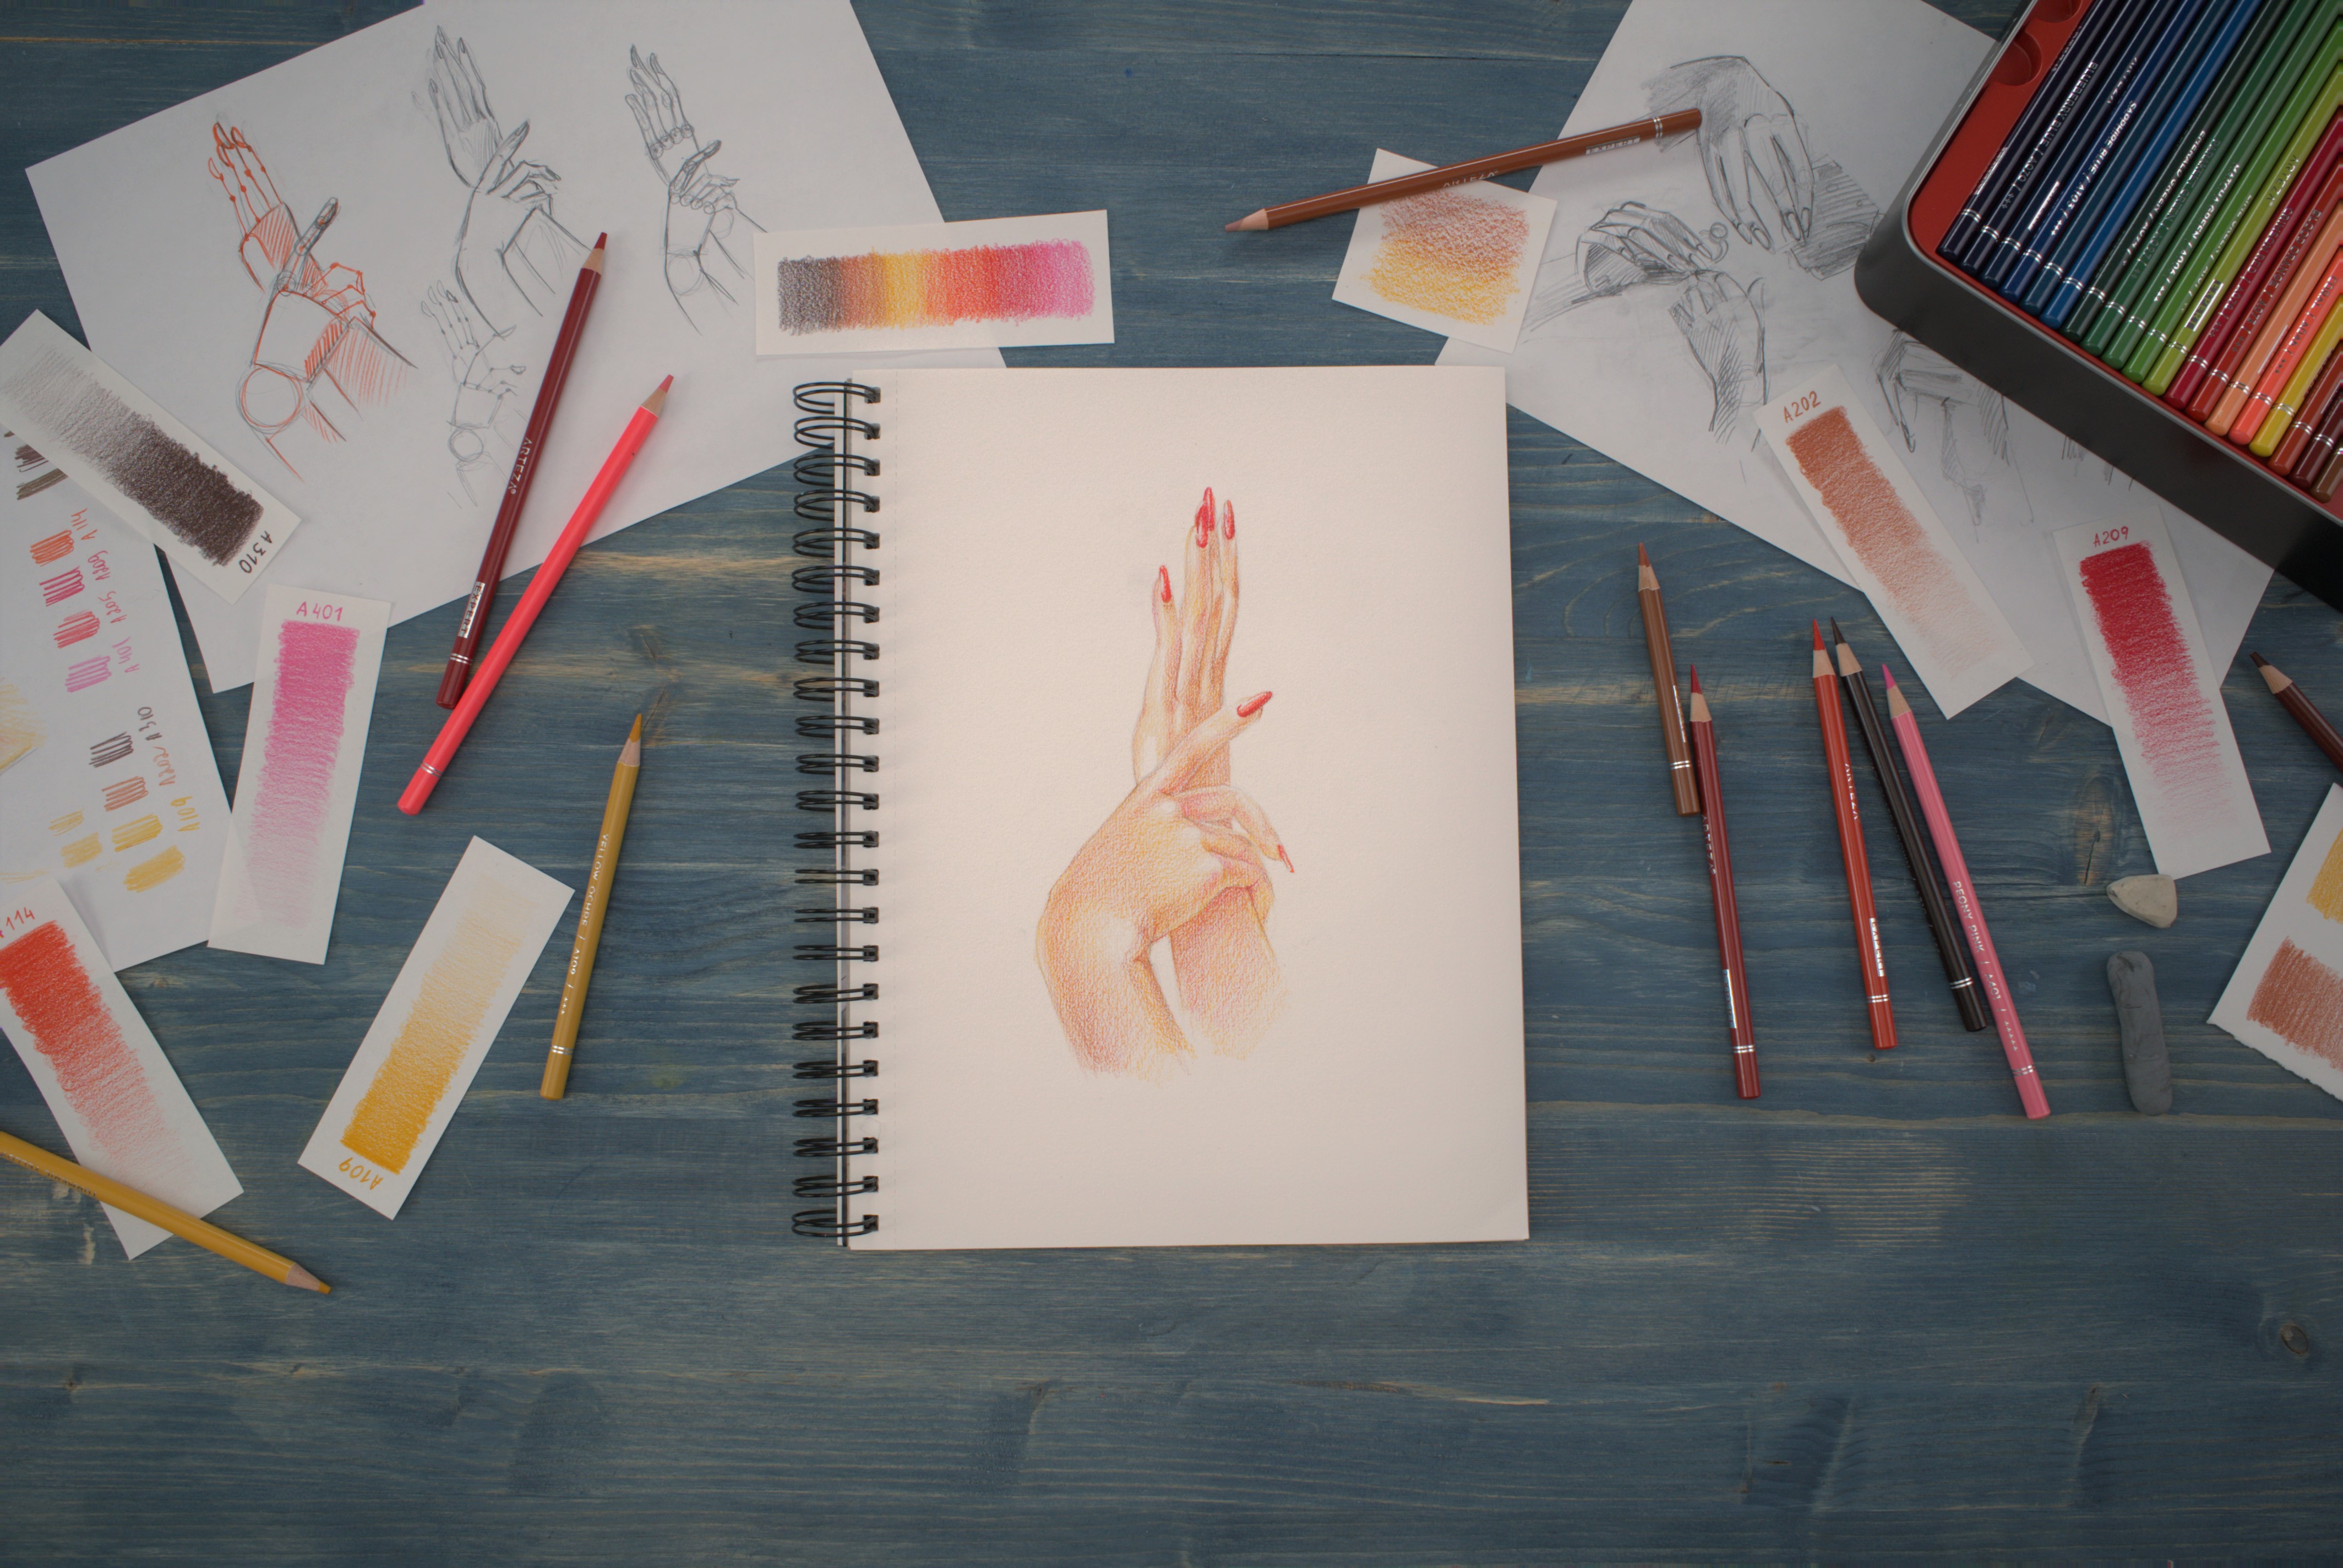
Start adding color by using a flesh tone and covering the entire surface of the hands except for the parts that have highlights—the edges of the fingers, the knuckles, the wrist bone, and the edge of the outside wrist and upper arm. These highlights are where the light is shining brightest and so would be your brightest areas.
Next, add subsequent layers of the flesh color to begin darkening the areas that would receive the least amount of light—the opposite side of the fingers, the part of the hand under the fingers of the opposite hand, the part of the arm under the opposite hand, the edges of the outer hand. There should be a distinct contrast between the highlighted areas and the shadowed areas.
Add color to the nails, bringing them to a point.
HINT: Adding different values of color will make your hands look more realistic. Values are the light and dark shades of a single color. To create a handy scale to see how a color goes from light to dark, take a scrap piece of paper and start by coloring one end of it very dark and then gradually lifting the pencil as you go across the paper, getting lighter and lighter. This value scale will then help you place the correct colors for realistic shading and shadowing.
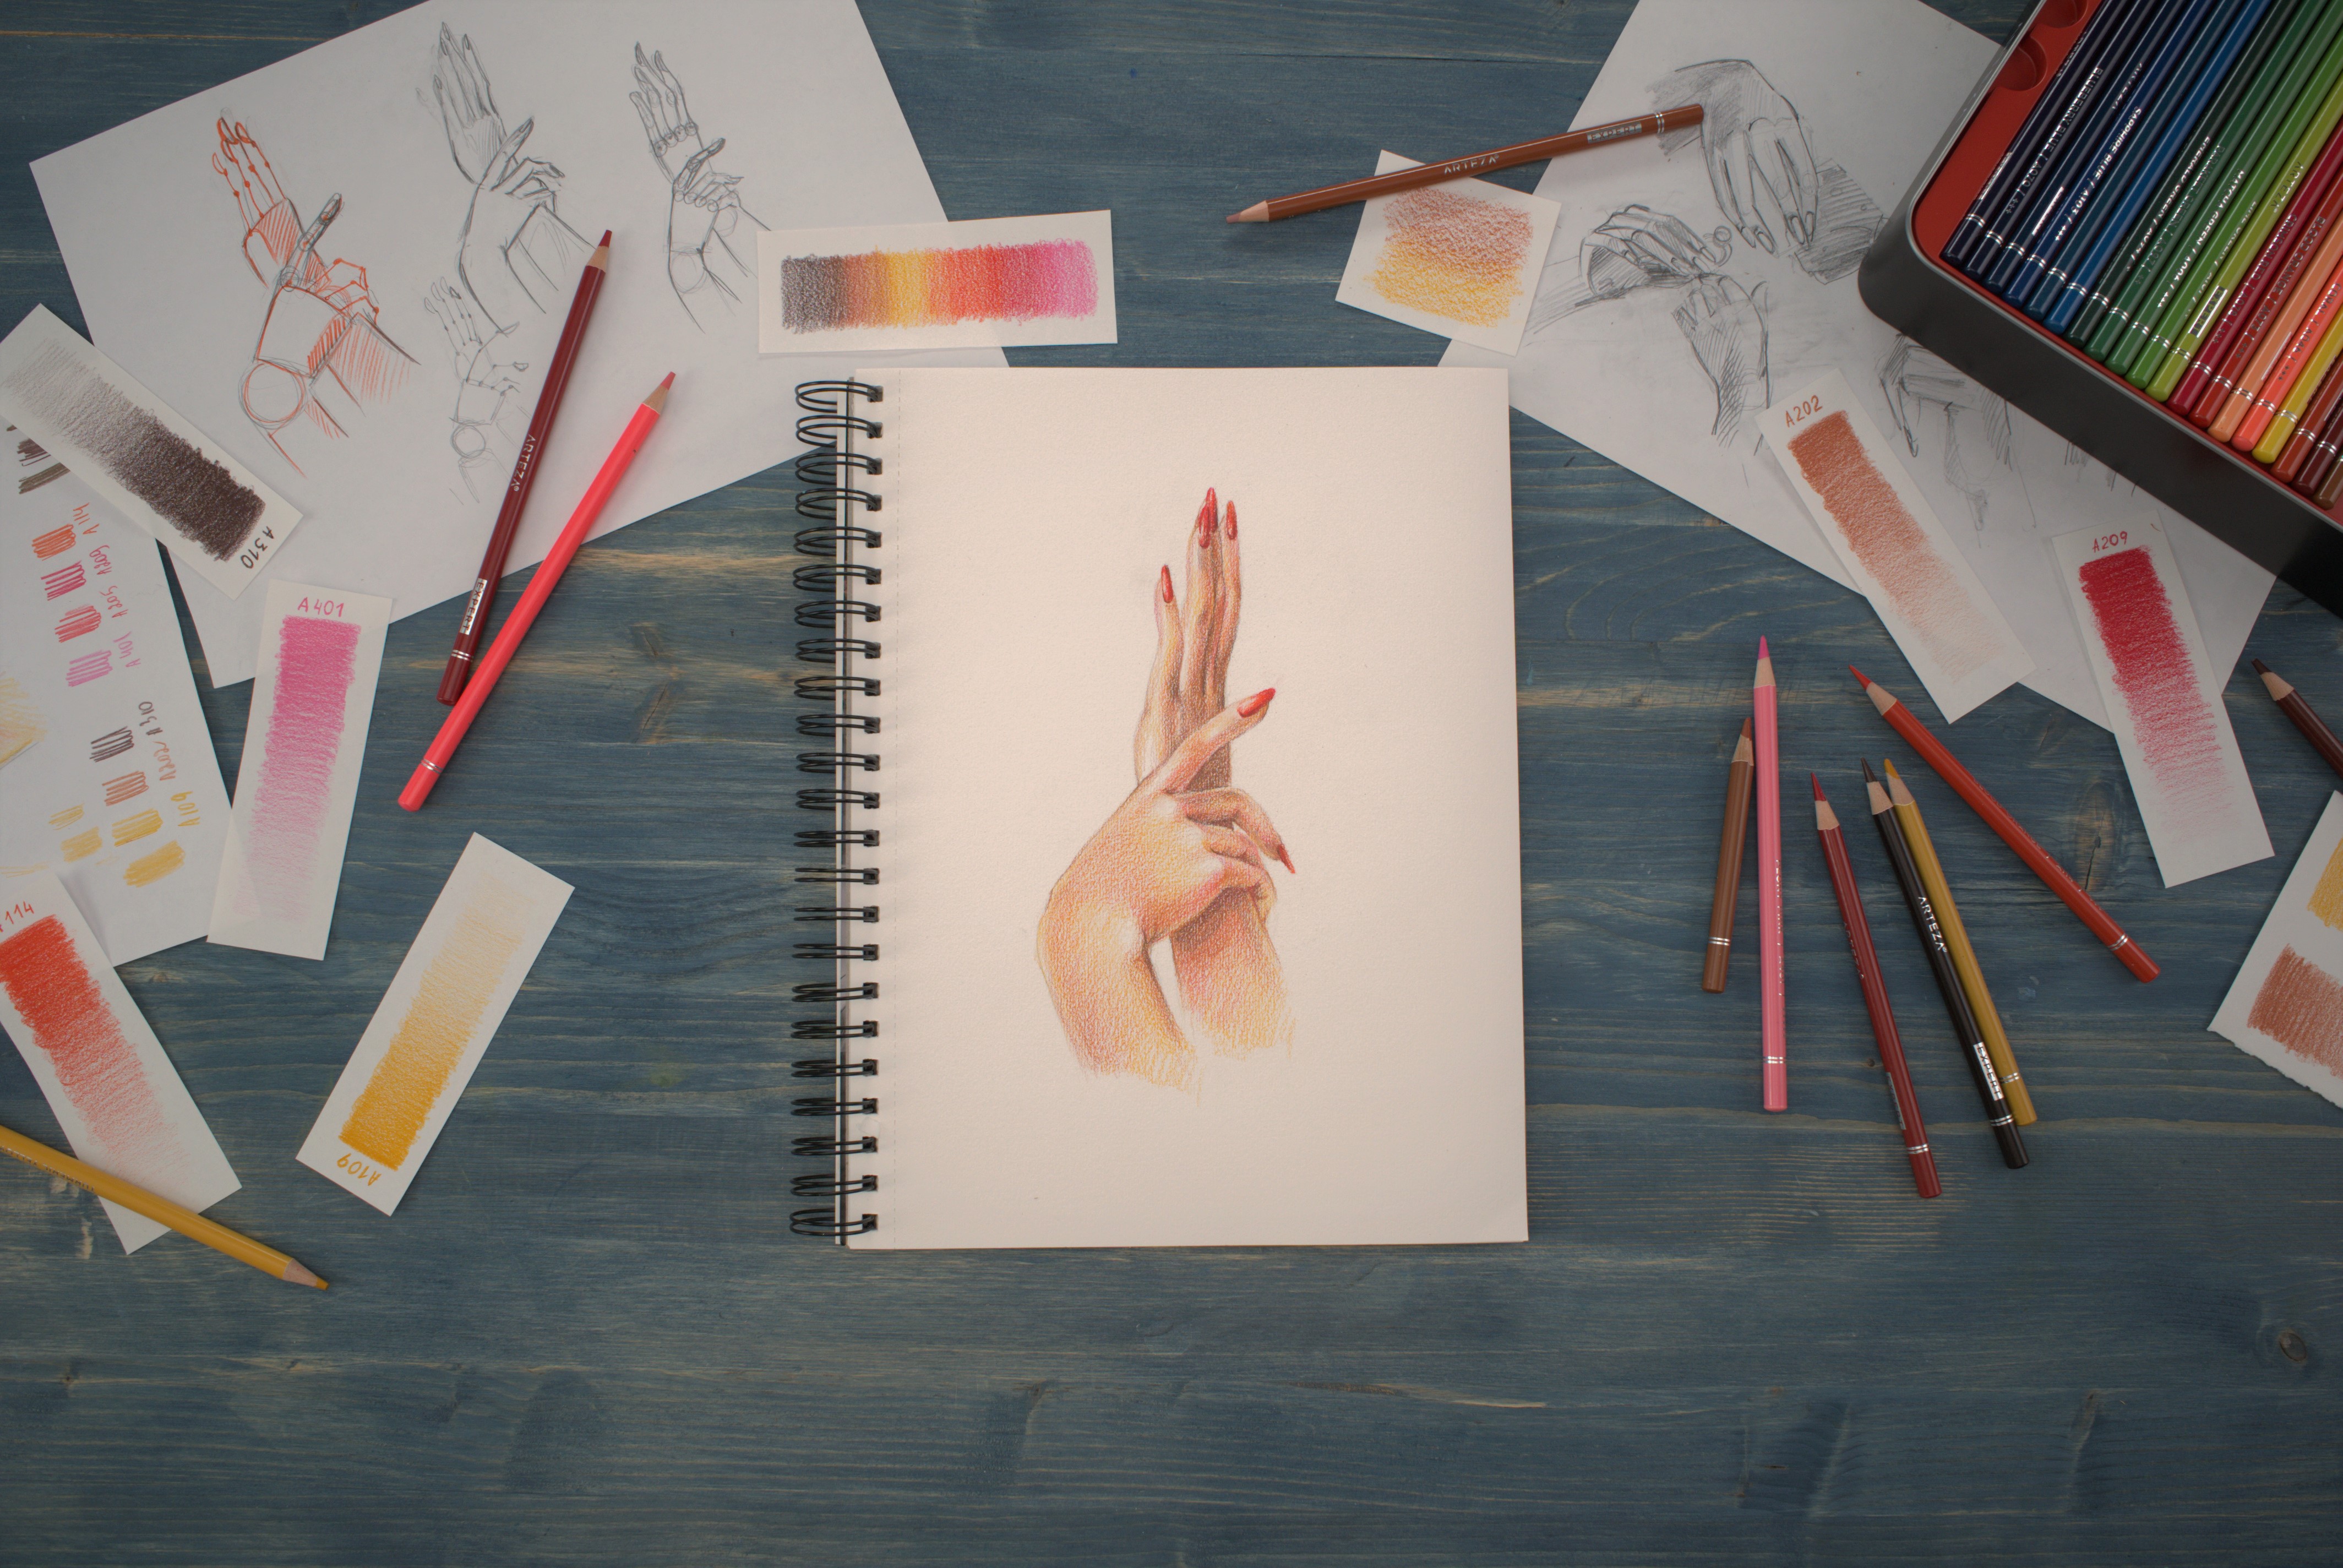
Step 4
Continue to darken the areas of shadow until the fingers and hands take on a three-dimensional look.
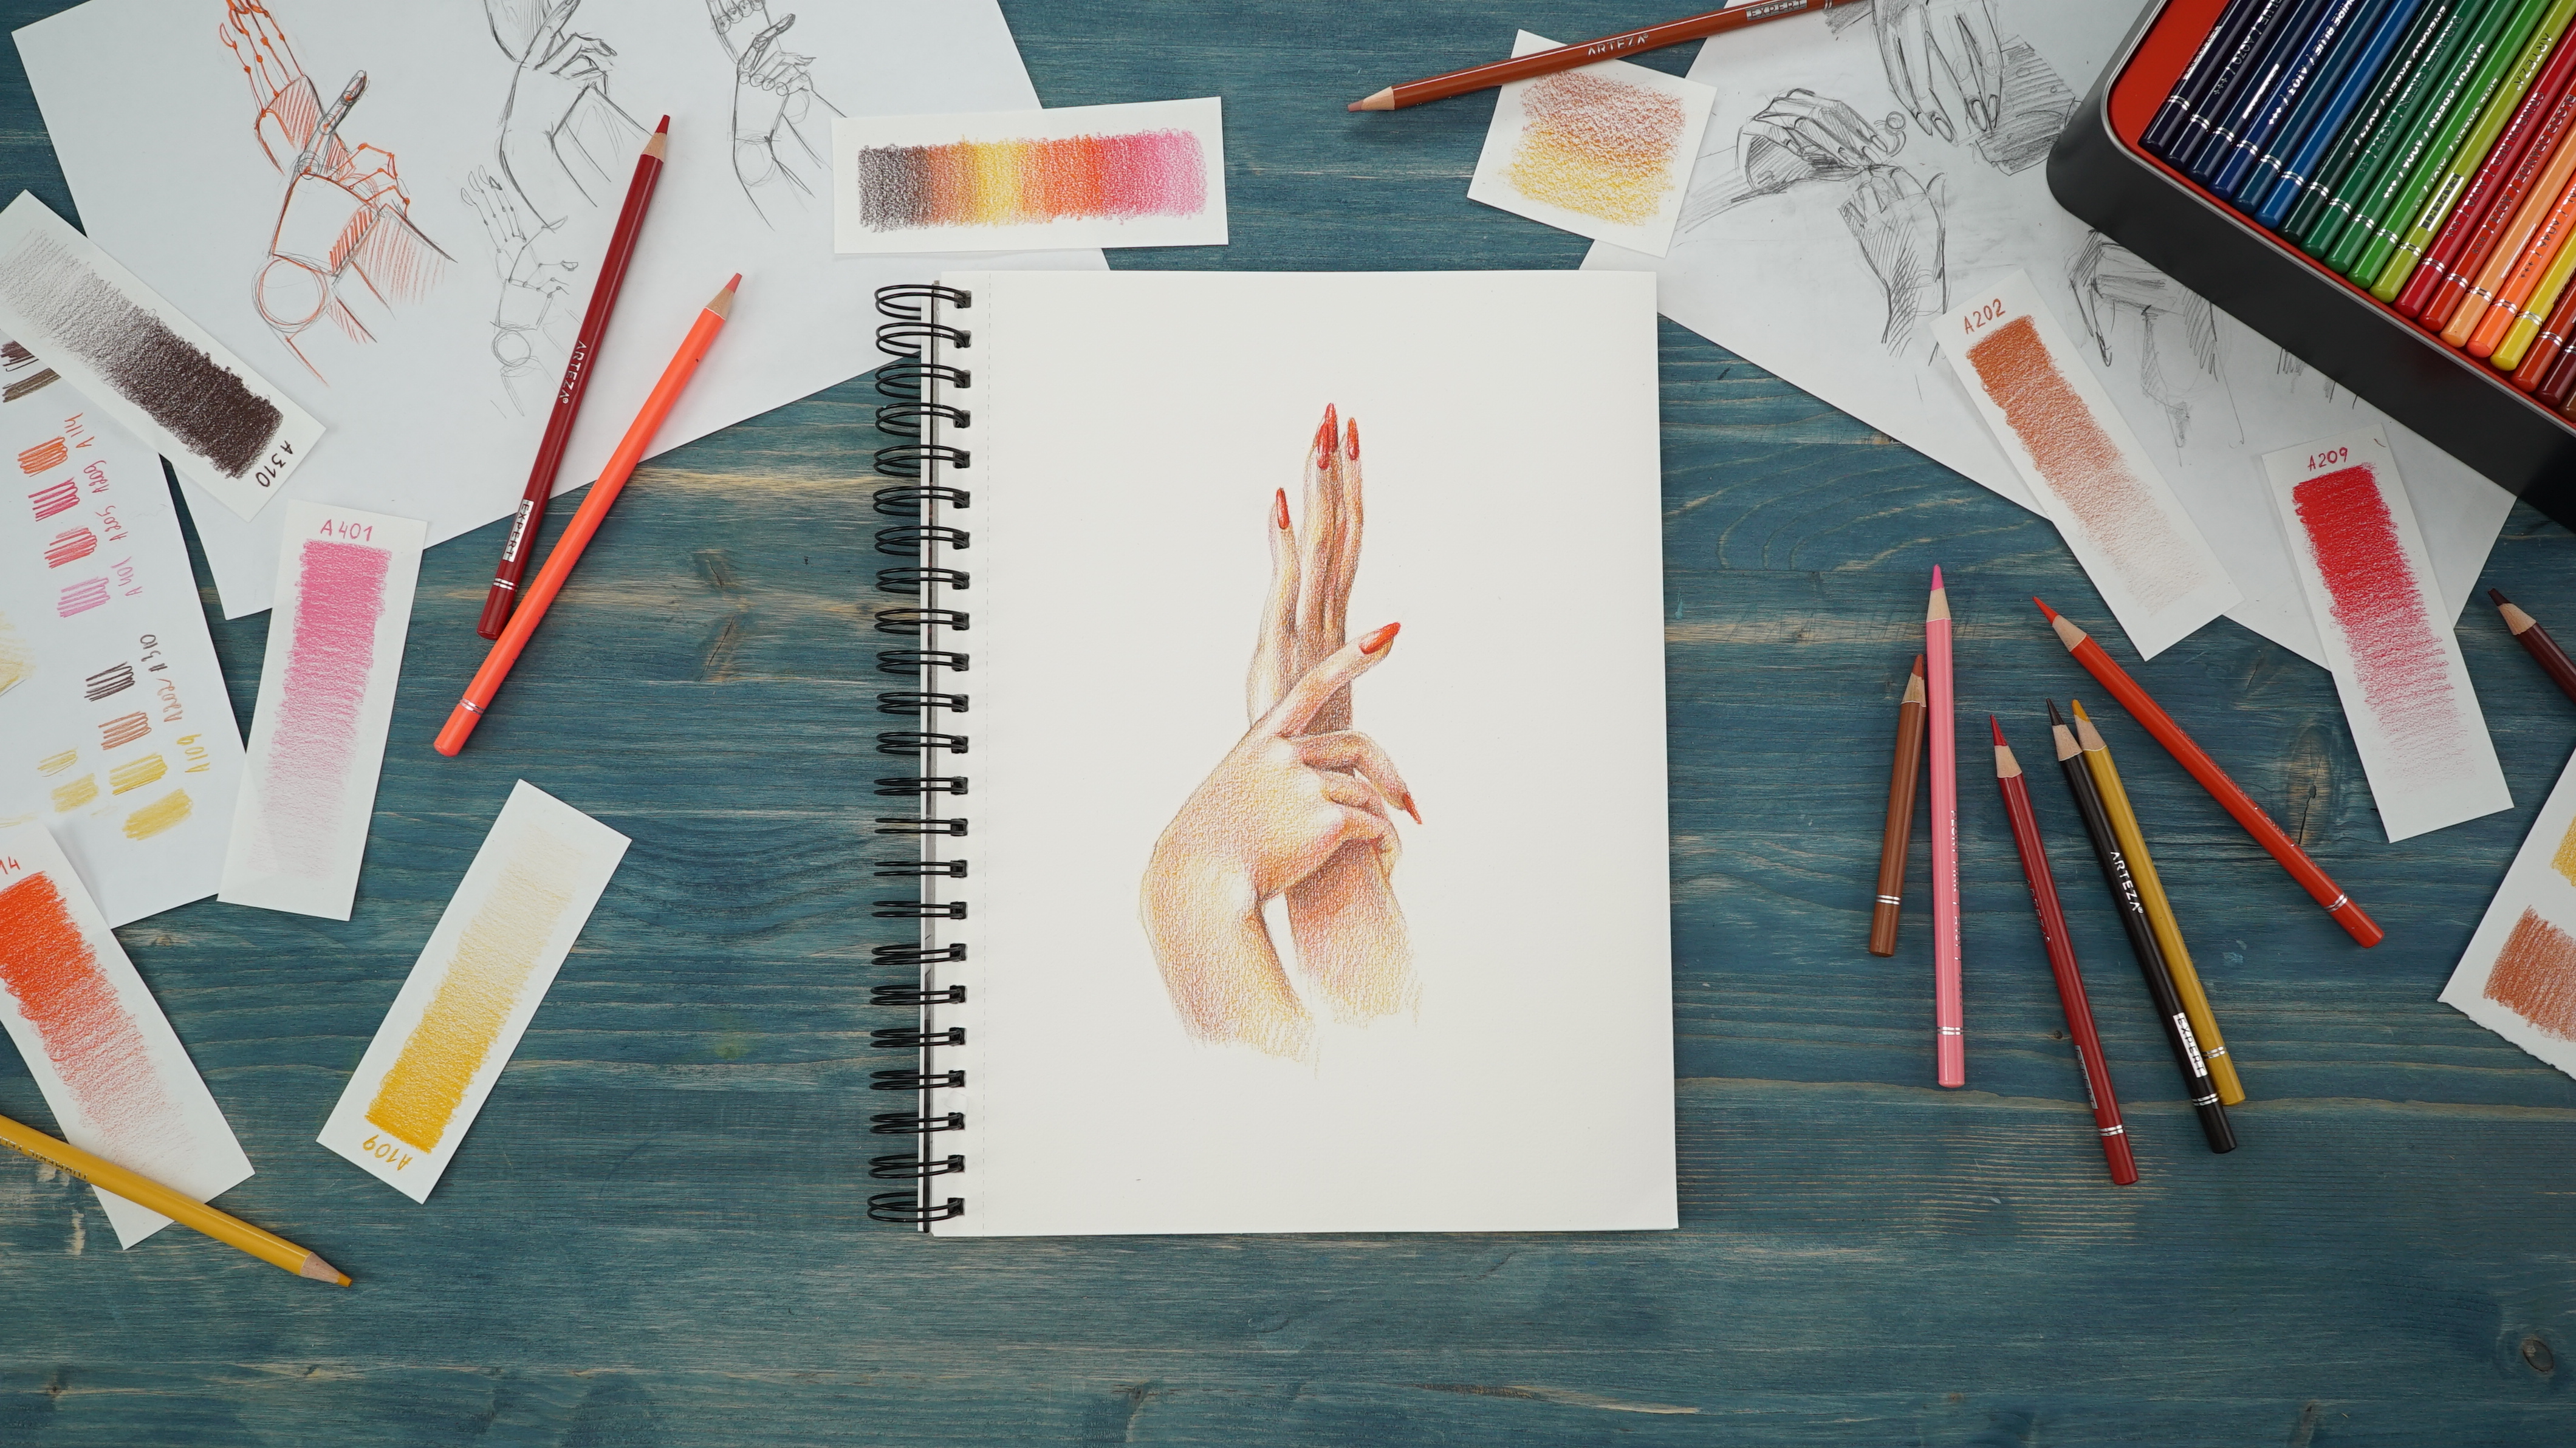
There you have it! You’ve just drawn a pair of elegant hands. We’d love to hear from you, so please leave a comment in the section below.
Are you feeling inspired and want to create more art? Shop suggested set below for your creation.


