
Want more great inspiration? Check out our other art camp tutorials!
- Art Camp Day 1 - How to Draw a Toucan in 7 Steps
- Art Camp Day 2 - Create a House Drawing & Paint with Gouache
- Art Camp Day 3 - Dive Into Acrylic Art with an Adorable Pool Painting
- Art Camp Day 4 - Seashell Drawing Using Arteza Drawing Pencil Set
- Art Camp Day 6 - Learn to Make Polymer Clay Jewelry
- Art Camp Day 7 - The Key to Making Art with Alcohol Based Markers
- Art Camp Bonus Day - 7 Easy to Draw Pictures Kids Will Love!
Table of Contents:
- Use Colored Pencils for Cute Easy Drawings
- List of Supplies
- Time for Some Ice Cream Art
- Recommendations
Use Colored Pencils for Cute Easy Drawings
In Day 5 of art camp, we’re going to really celebrate summer with the season’s favorite treat—the ice cream cone! In this tutorial, I’ll show you how to draw ice cream working with colored pencils. You’ll see that these pencils are great at giving you both light and dark variations of color and can be layered for subtle transitions. I’ll be using colors from my set of Arteza colored pencils. I especially like these pencils because they come in more colors than you can dream of and since they’re really saturated with pigment, the colors are so rich and vibrant. I strongly suggest you give them a try!
To get the best results, you should read this guide all the way through and watch the video to the end before you get started.
List of Supplies
- Arteza Professional Colored Pencils, Set of 120: A024 White Quartz, A028 Sapphire Yellow, A004 Lemon Yellow, A003 Orange, A080 Fruit Punch, A081 Plum Purple, A062 Lilac, A088 Amethyst Purple, A045 Violet, A056 Sky Blue, A133 Salmon Pink, A083 Pink Macaron, A122 Gold, A140 Wine Red, A405 Copper, A061 Burgundy
- Arteza Gray Toned Sketch Pad
- Arteza Toned Paper Sketch Bundle
Time for Some Ice Cream Art
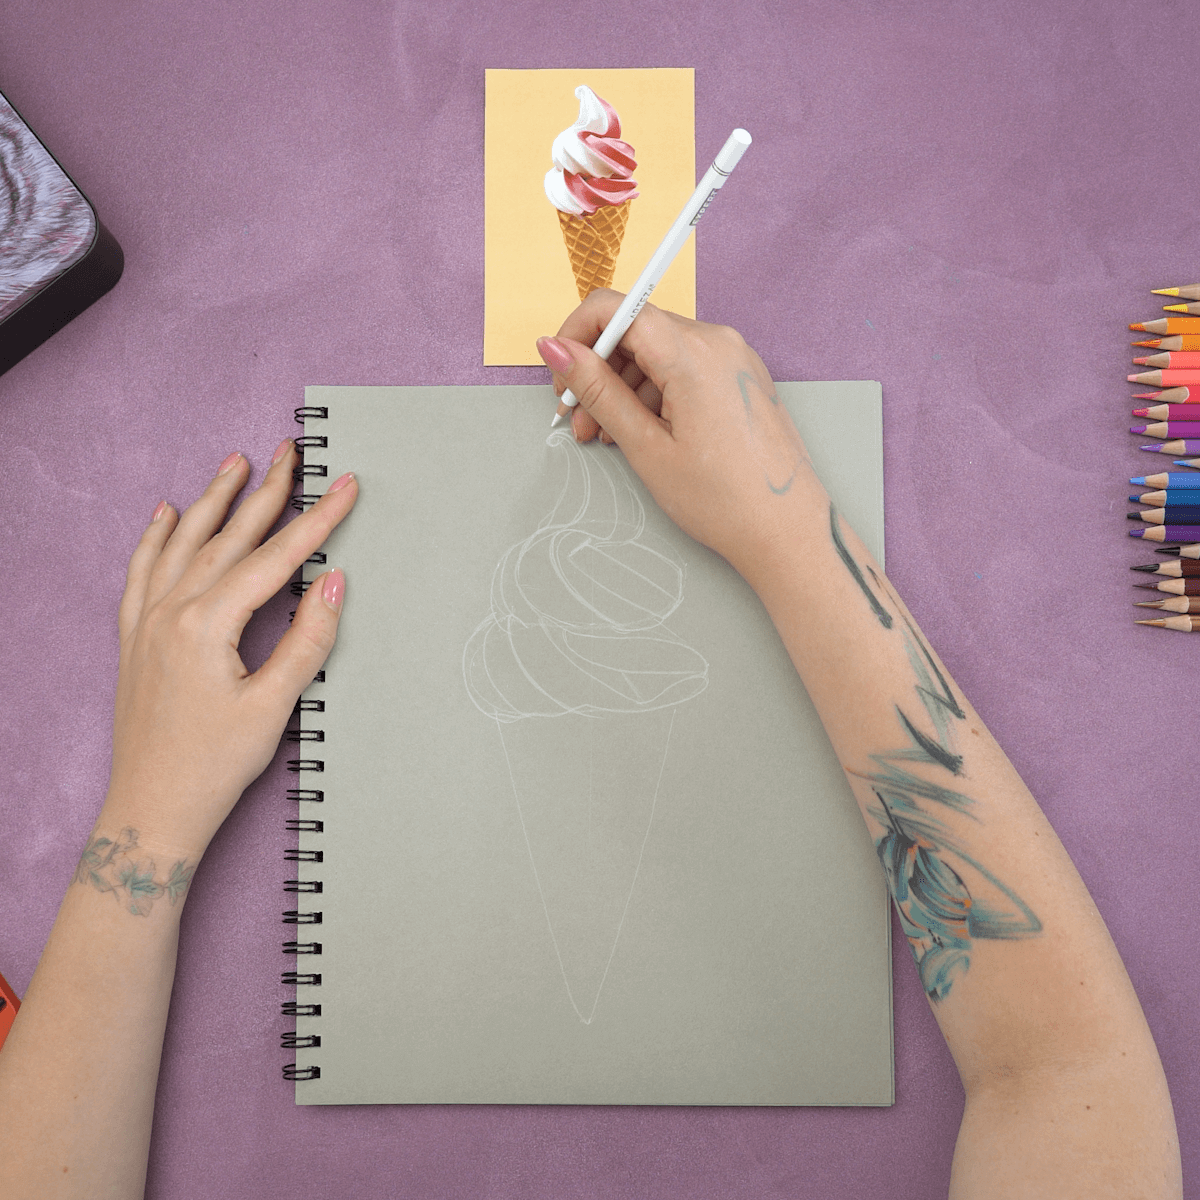
Step 1. Sketch the ice cream cone
Using a picture of an ice cream cone for reference, I begin by using the White Quartz colored pencil to draw a triangle for the cone and two ovals and a curved tip for the ice cream.
Step 2. Add details to the ice cream
Starting at the top of the tip I draw the curving creases of the ice cream’s swirls. I’m careful to follow the bent edges of the ovals. By pressing on the pencil, I get darker lines I can use to highlight those edges. Once I have the swirls the way I want them, I go back over everything, making adjustments so it looks like my reference photo.
TIP: Don't be afraid of making mistakes, the white pencil is easily erased.
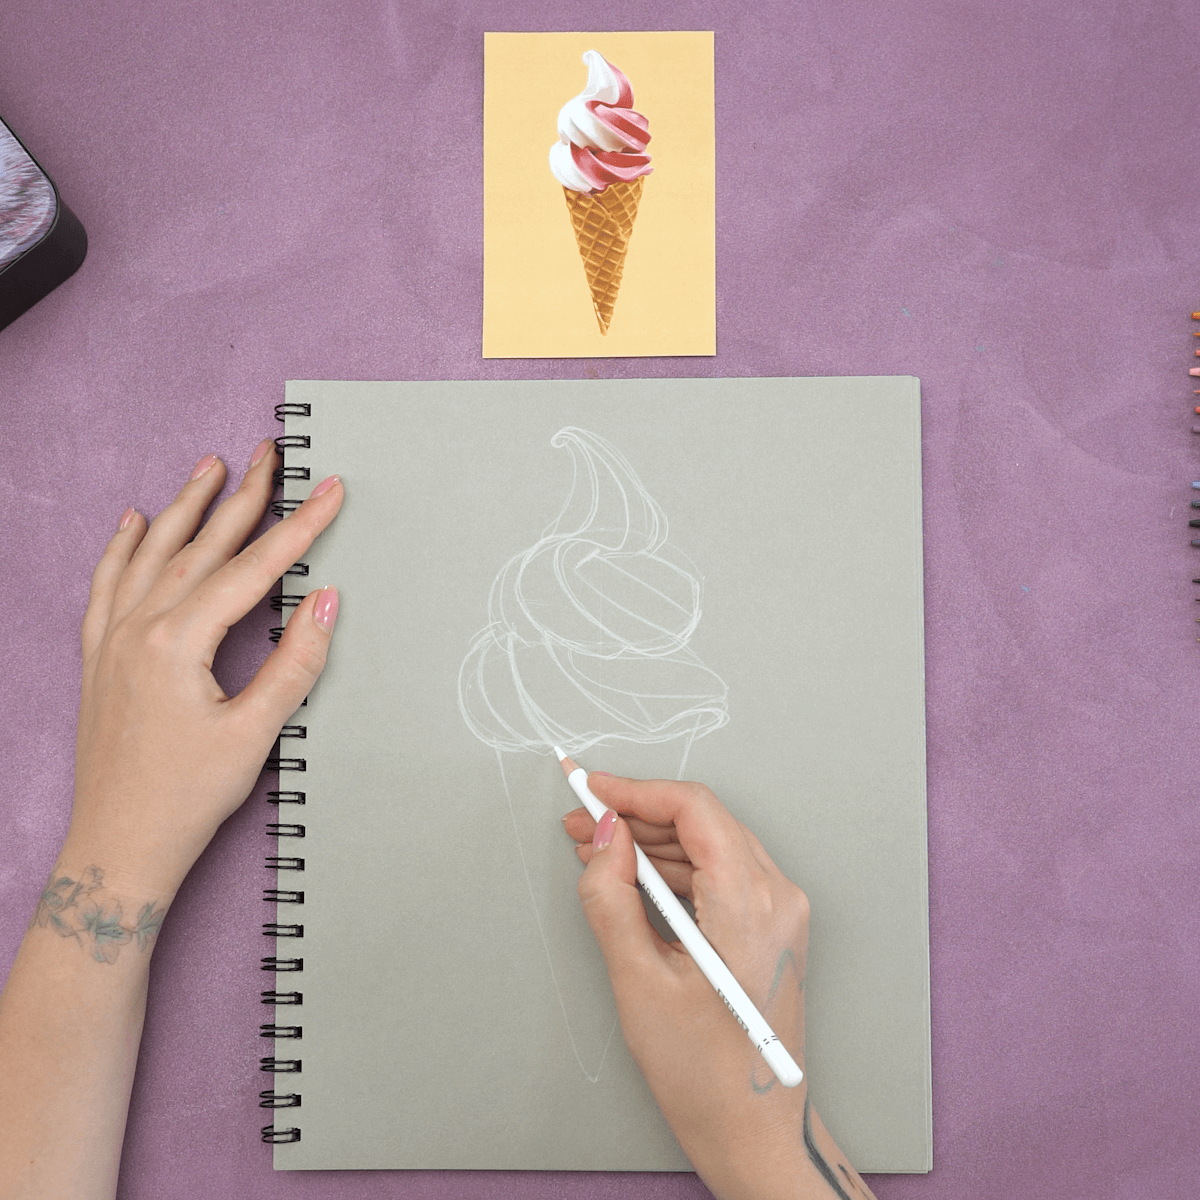
Step 3. Place the pattern on the cone
A waffle cone, like the one in my reference image, is made by wrapping a warm waffle into a cone shape. To get the look of this, I draw a diagonal line off-center on the cone. Now it’s divided into two sections. Starting in the largest of the two, I draw slightly curved diagonal lines from the dividing line to the outer edge. Next, I do the same on the smaller section, only this time I place the lines in between the first ones. To form the grid pattern, I go back and draw lines in the opposite direction in both sections.
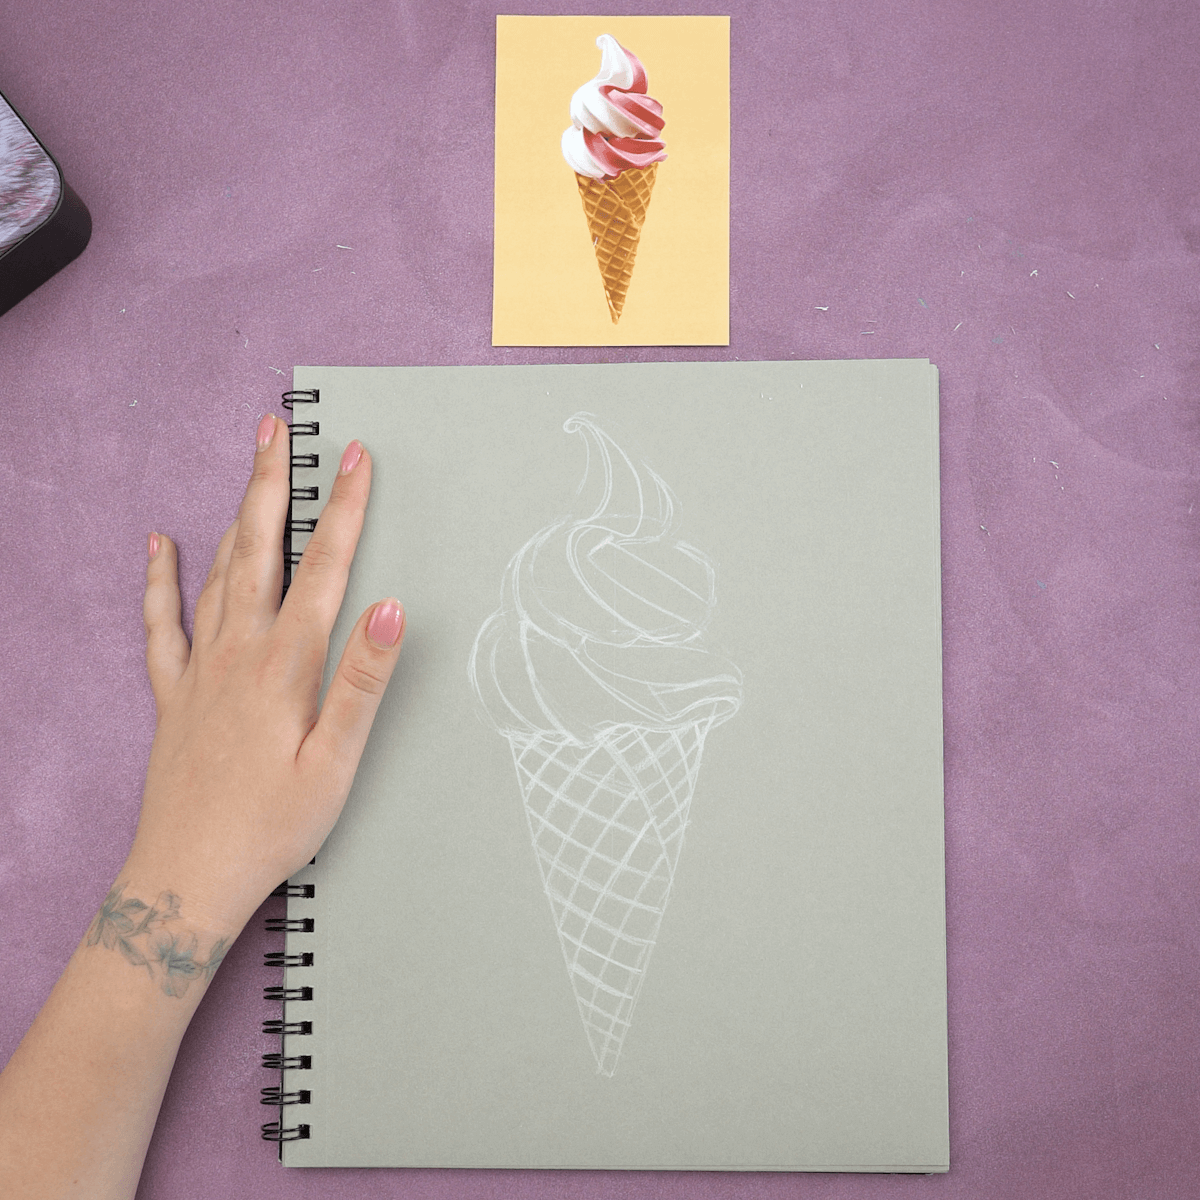
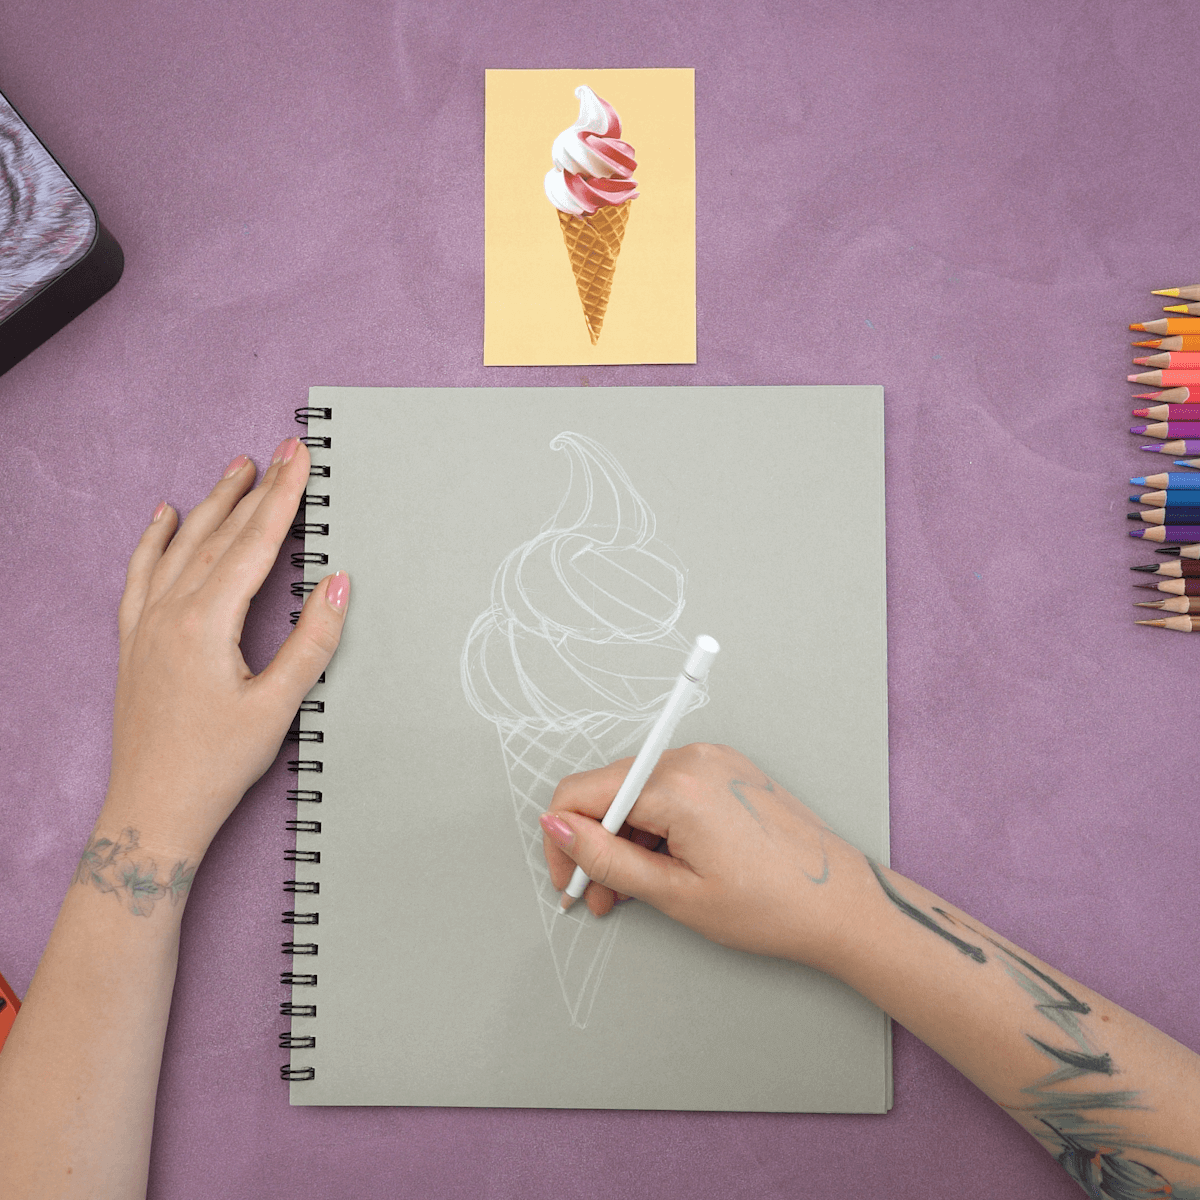
Step 4. Finish the drawing
Lastly, I go over the curves and folds in the ice cream to make them stand out more. Now, I erase any unnecessary lines to ensure that the colored pencils are as vibrant as possible against the gray paper.
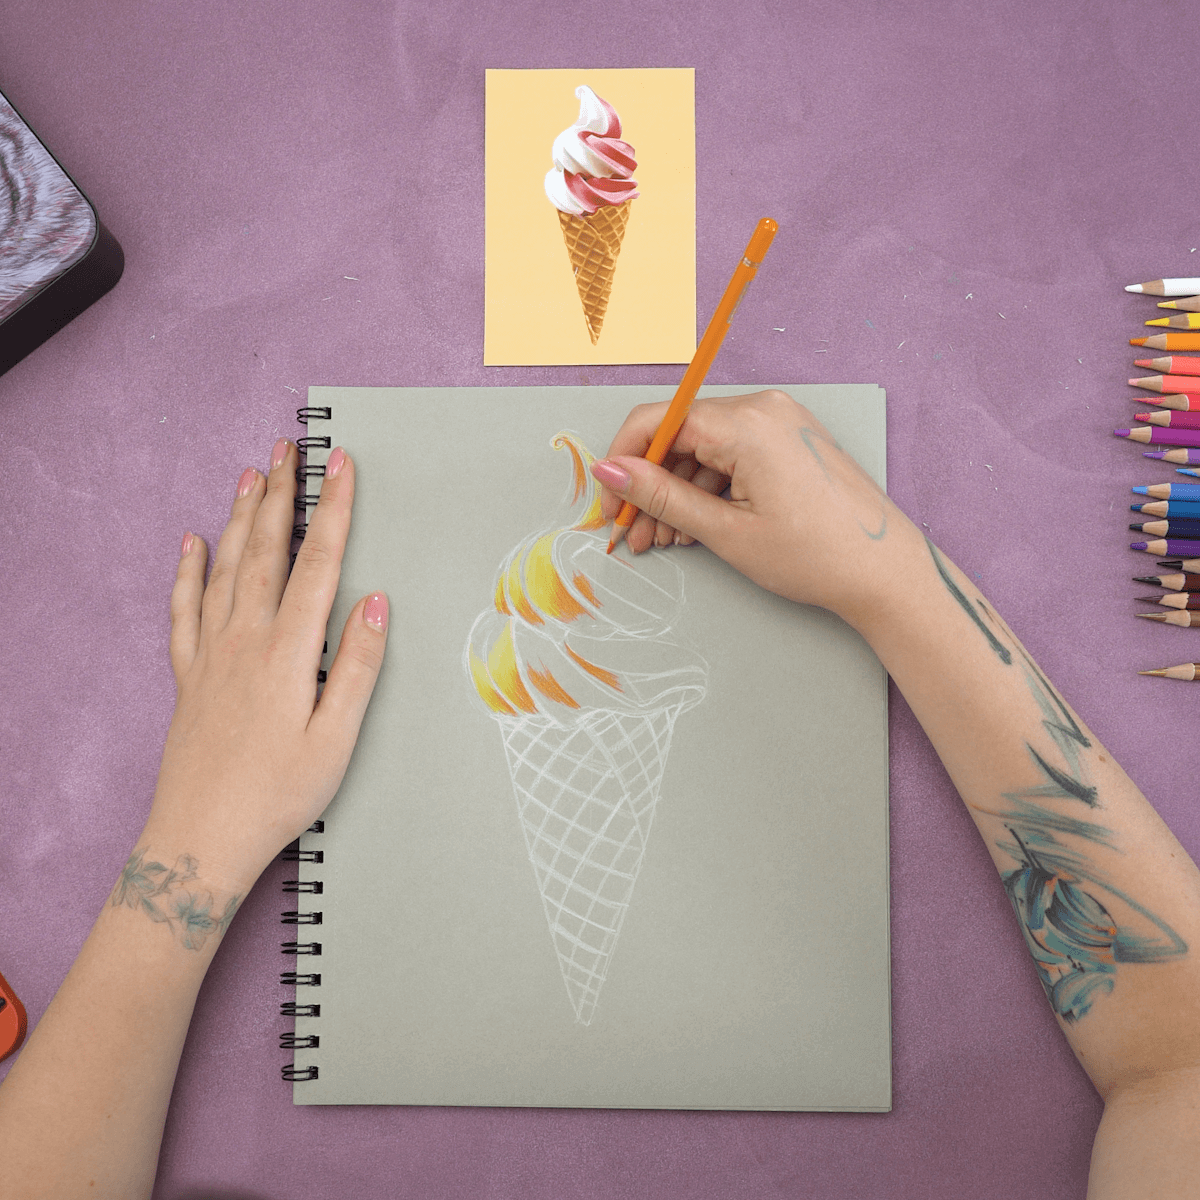
Step 5. Color the ice cream
To begin the coloring process, I start with what will be the lightest areas. Since the light source is coming from the left side, I begin on that side and use Sapphire Yellow to color these light areas. Next, I go to a mid-tone color, Lemon Yellow, and put it alongside the first layer of color. I use Orange by the Lemon Yellow to create a place in the curve where the light isn’t as bright. As the curve diminishes, it would be even darker, so I color in that space with Fruit Punch and Plum Purple.
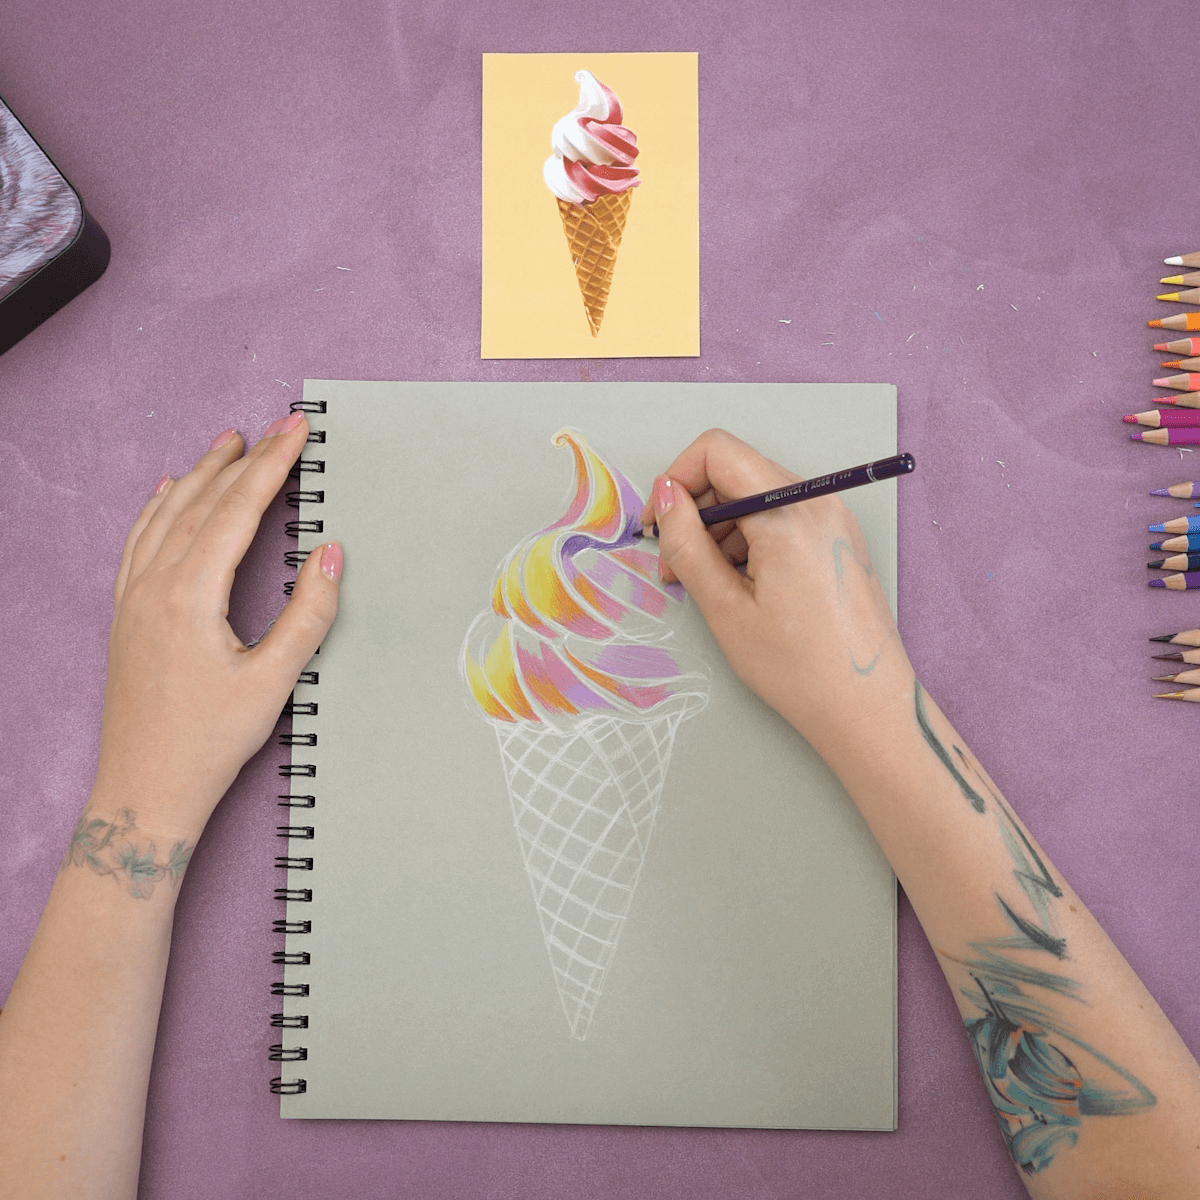
Step 6. Add shadows
By adding more shadowing, I can get a three-dimensional look to this drawing. I need to build them up using Lilac, placed strategically next to the pink areas on the right side. I keep increasing their darkness by layering over the darkest areas with Amethyst Purple. I also use this shade to create the shadows where the ice cream hangs over the cone.
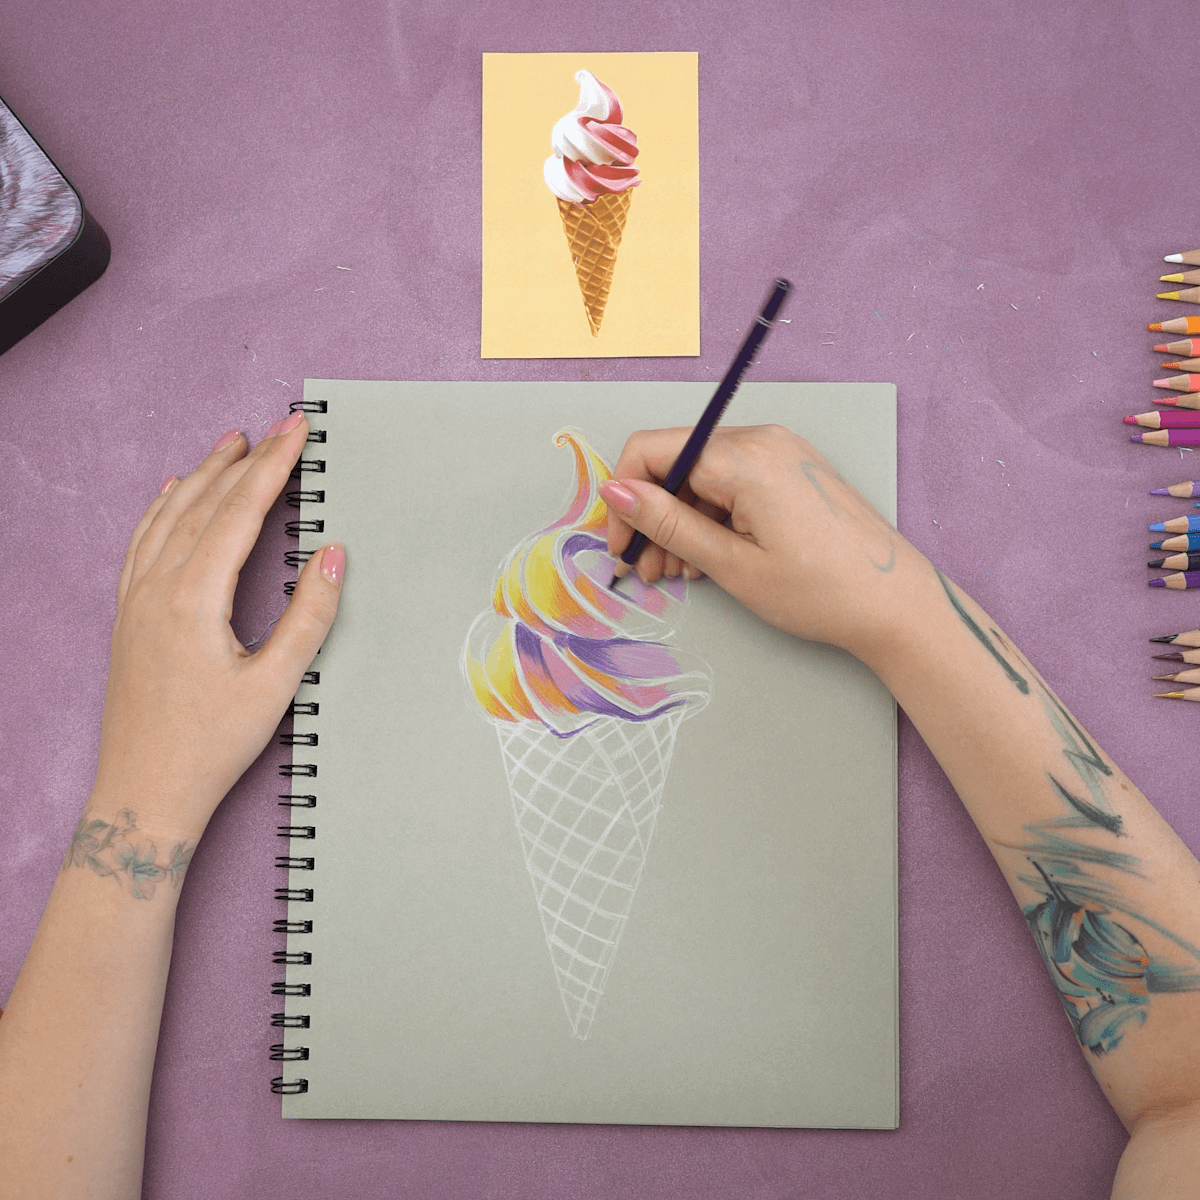
Step 7. Complete the ice cream
I create a beautiful gradient by adding some Violet next to a few of the dark areas along the right side. Touches of Sky Blue add highlights in the shadows and look like reflected light under the overhang of the ice cream. I even leave some areas without any color at all to give more lightness to the drawing.
Finally, I darken the edges and detail the cream with Salmon Pink and Pink Macaron, and continue to reinforce the edges and highlights with White Quartz. How colorful and delicious this looks!
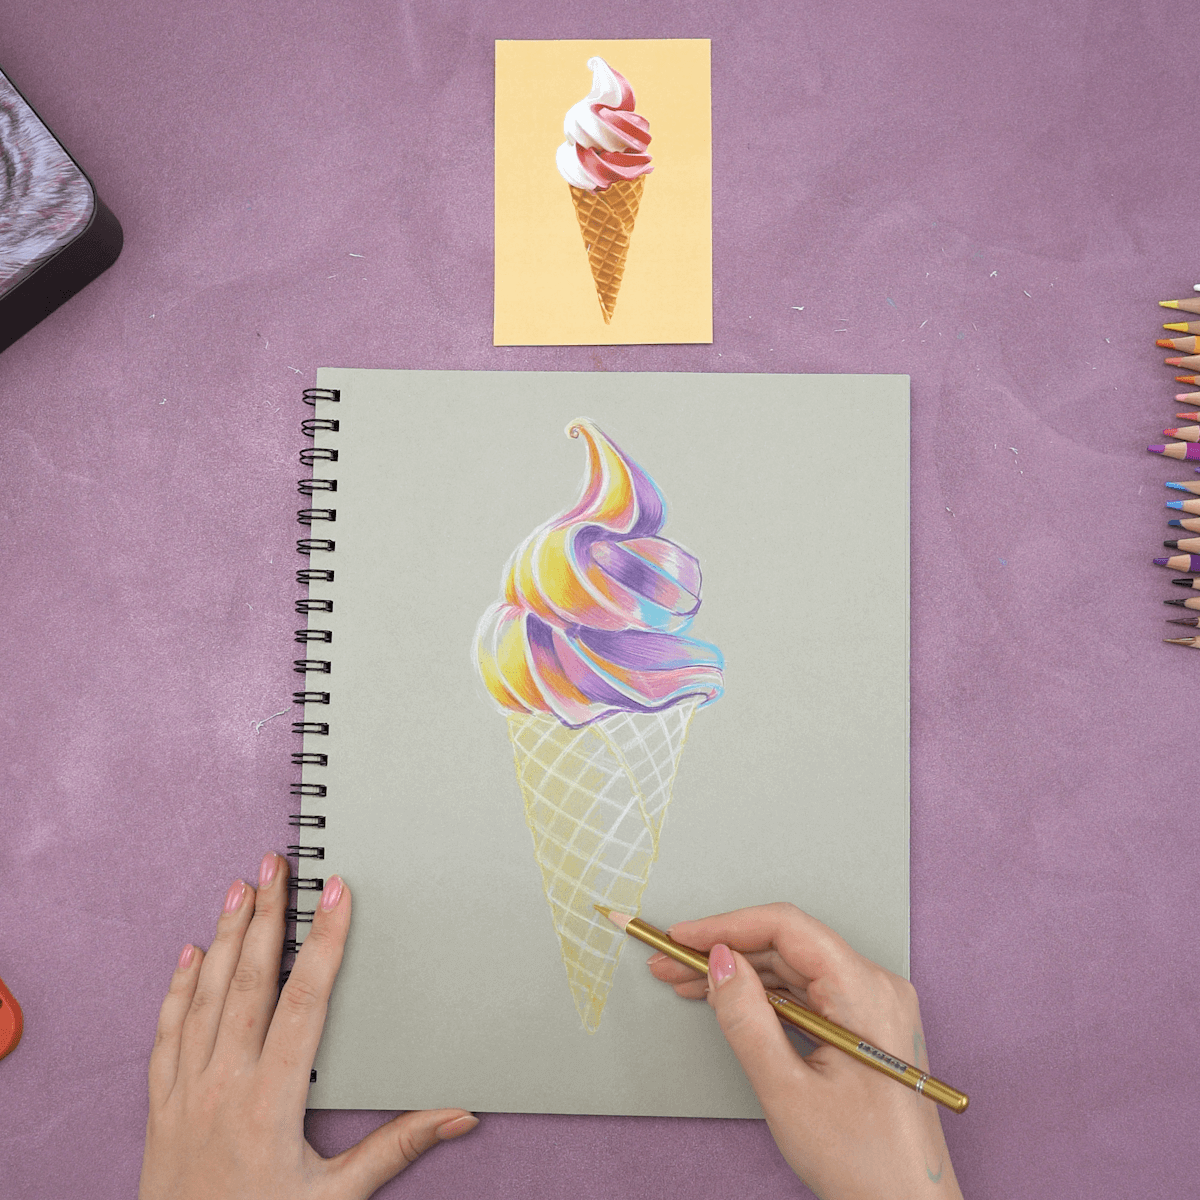
Step 8. Color the cone
For the cone, I go along the edges of it with Gold, making it uneven like a real waffle cone would be. Once this is done, I go over the entire cone with a light layer of the same color. To emphasize where the folded edge of the cone wraps around the front, I go over that line with an uneven one in Wine Red. Using soft hatching, I use it to place a shadow under the ice cream across both sides.
HINT: Hatching is the technique of drawing parallel lines in the same direction very close together.
Before coloring in each little square in the grid, I want to strengthen the white lines first. The contrast between the white and the darker color of the squares will make each little wafer cell appear deeper. Once that’s done I go into each cell with Copper.
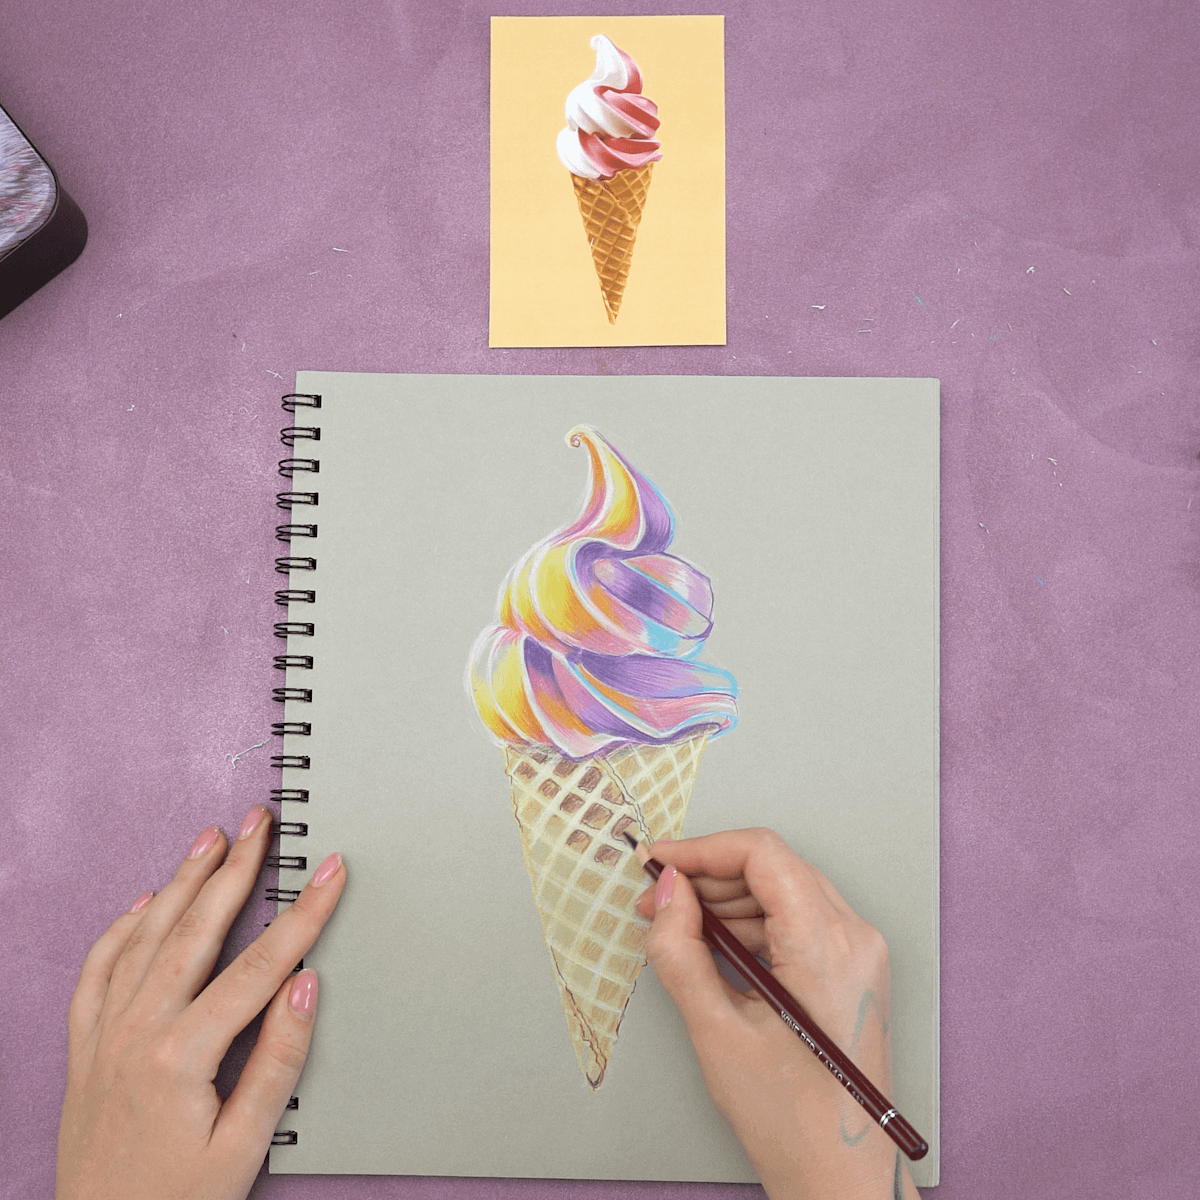
Step 9. Place shadows on the cone
I add shadows at the bottom of the cone and along the folded edge with Wine Red. I also use this to color the left corner of the cells I feel would be getting the least amount of light. I darken the right side of the cone as well, and closer to the bottom, I paint those cells with Burgundy. You can see how this adds so much volume and dimension!
Shadows are so important, that’s why I keep going back and darkening the right side of the cone with more Copper, slightly working toward the center to highlight the light on the left. More Burgundy details are added to the ones at the bottom as I work on the right side.

Step 10. Finishing touches
Now for the last little details. I add a final highlight on my lightest areas with White Quartz. I underline the edge of the cone with Copper and slightly detail the cells with Burgundy. To emphasize the light on the cream, I use White Quartz and then darken the shadow with Amethyst Purple.
It’s done! Doesn’t this cone look delicious?
Recommendations
- To get smooth gradients, place your hatching in one direction.
- You can regulate the lightness or darkness of your shades by the amount of pressure you apply to the pencil. It’s best to start with light pressure and work towards pressing harder instead of beginning with a lot of pressure.
- I encourage you to try colored pencils in metallic shades, as they can add a beautiful shimmer to your artwork.
As you can see from this lesson, colored pencils can give you some amazing results. You can create hyper-realistic drawings, imaginative cartoon illustrations or anything in between with them. Don’t be afraid to use all the colors in the set, you never know what combinations you’re going to come up with! Whatever you do, I hope you’ll keep experimenting with them and having fun.
Watch the video and see this cone in the making!


