
Table of Contents:
- Make Realistic-Looking Pineapple with TwiMarkers
- List of Supplies
- Step-By-Step Pineapple Drawing
- Recommendations
Make a Realistic-Looking Pineapple Drawing
Fruit has been a subject for artists for ages. I, personally, like drawing fruit for three reasons: it’s always available, it doesn’t move, and it’s fun! I find some interesting fruit at farmer’s markets and even in my grocery store. I can draw a single piece, cut them into multiple pieces, or arrange several varieties together for a more complex still life. By moving my light source, I can get some dramatic effects. Drawing fruit allows me to practice with colors, techniques, and positioning for future works.
One of my favorite ways to draw fruit is with the Arteza TwiMarkers, so I’ve created this pineapple drawing guide using them. This is like having two pens in one, in an amazing range of colors. On one end is a fine tip, great for sketching or putting down the initial drawing, outlining, and adding the fine details. The other end has a flexible brush tip that’s perfect for filling in large areas with color, making wider lines, or for blending. I also use them for calligraphy and doodling in my journal.
List of Supplies
- TwiMarkers: A120 Marmalade Orange, A133 Chartreuse Green, A112 Lemon Yellow, A192 Sage Green, A263 Fern Green, A238 Hibiscus Red
- Paper
Step-By-Step Pineapple Drawing
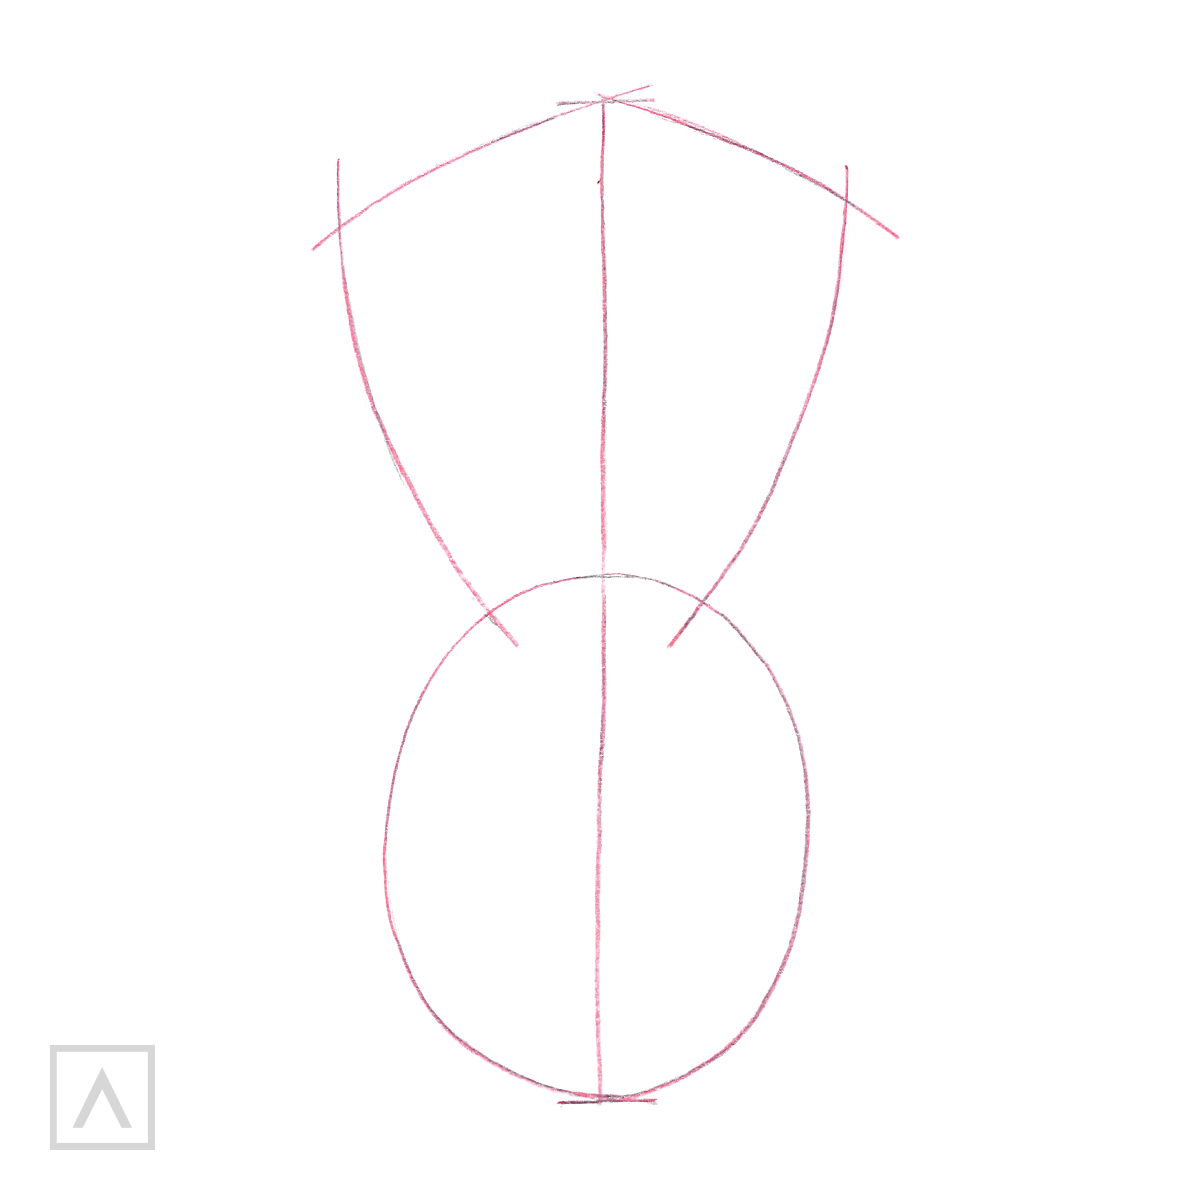
Step 1
I start by looking at the overall form of the pineapple in terms of its basic shapes. I sketch the crown first, then add an oval for the body. Next, I place a center vertical axis so the left and right sides are the same.
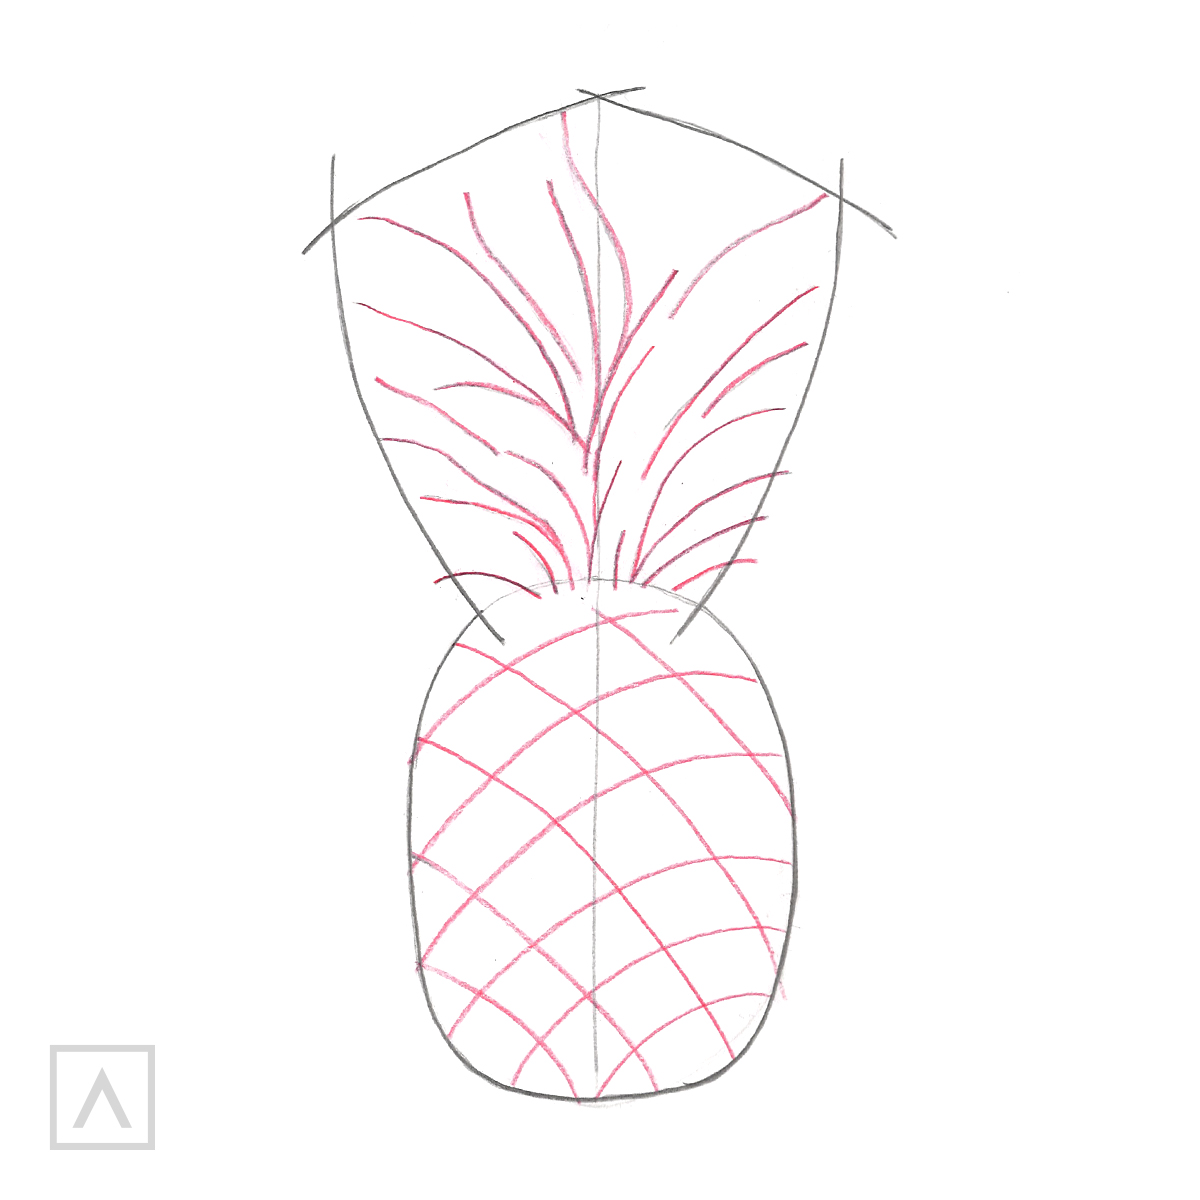
Step 2
The leaves and body are in segments. I divide these by drawing the lines at an angle based on the pineapple's shape. As I add the leaves to the crown, I’m careful to place them in the direction in which they grow, putting short leaves at the base, closer to the fruit, and the longer ones at the very top.
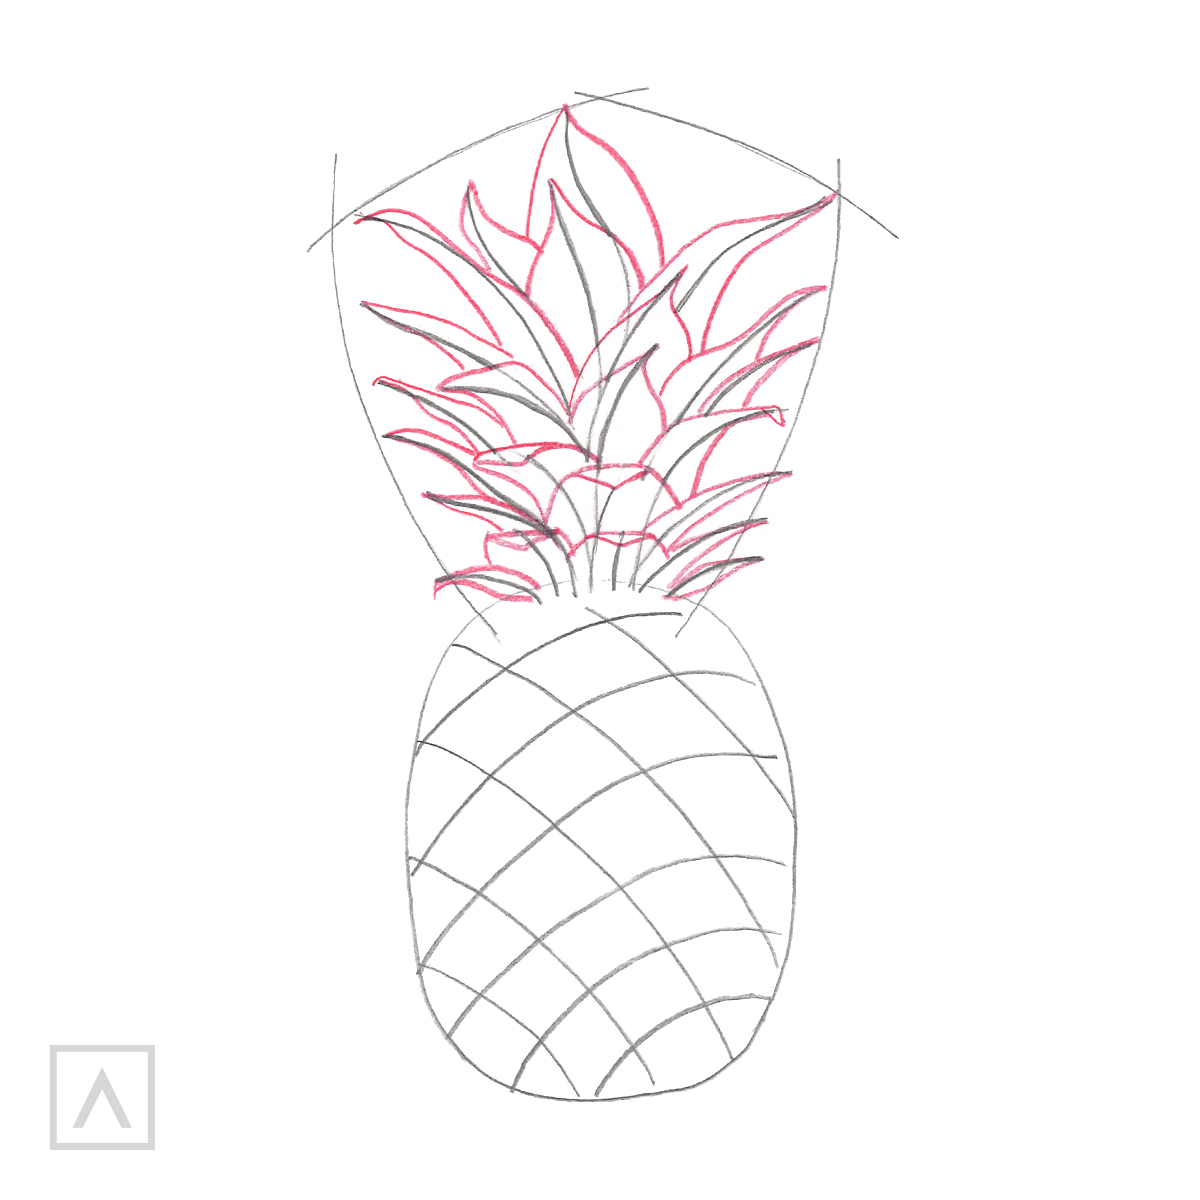
Step 3
The leaves of a pineapple are pretty thick, so I show this by drawing them in different thicknesses, giving them pointed ends. If I look closely, I can see that some leaves twist, so I add some curved lines to make them look more realistic and interesting. I think this pineapple drawing looks like it’s ready for some color!
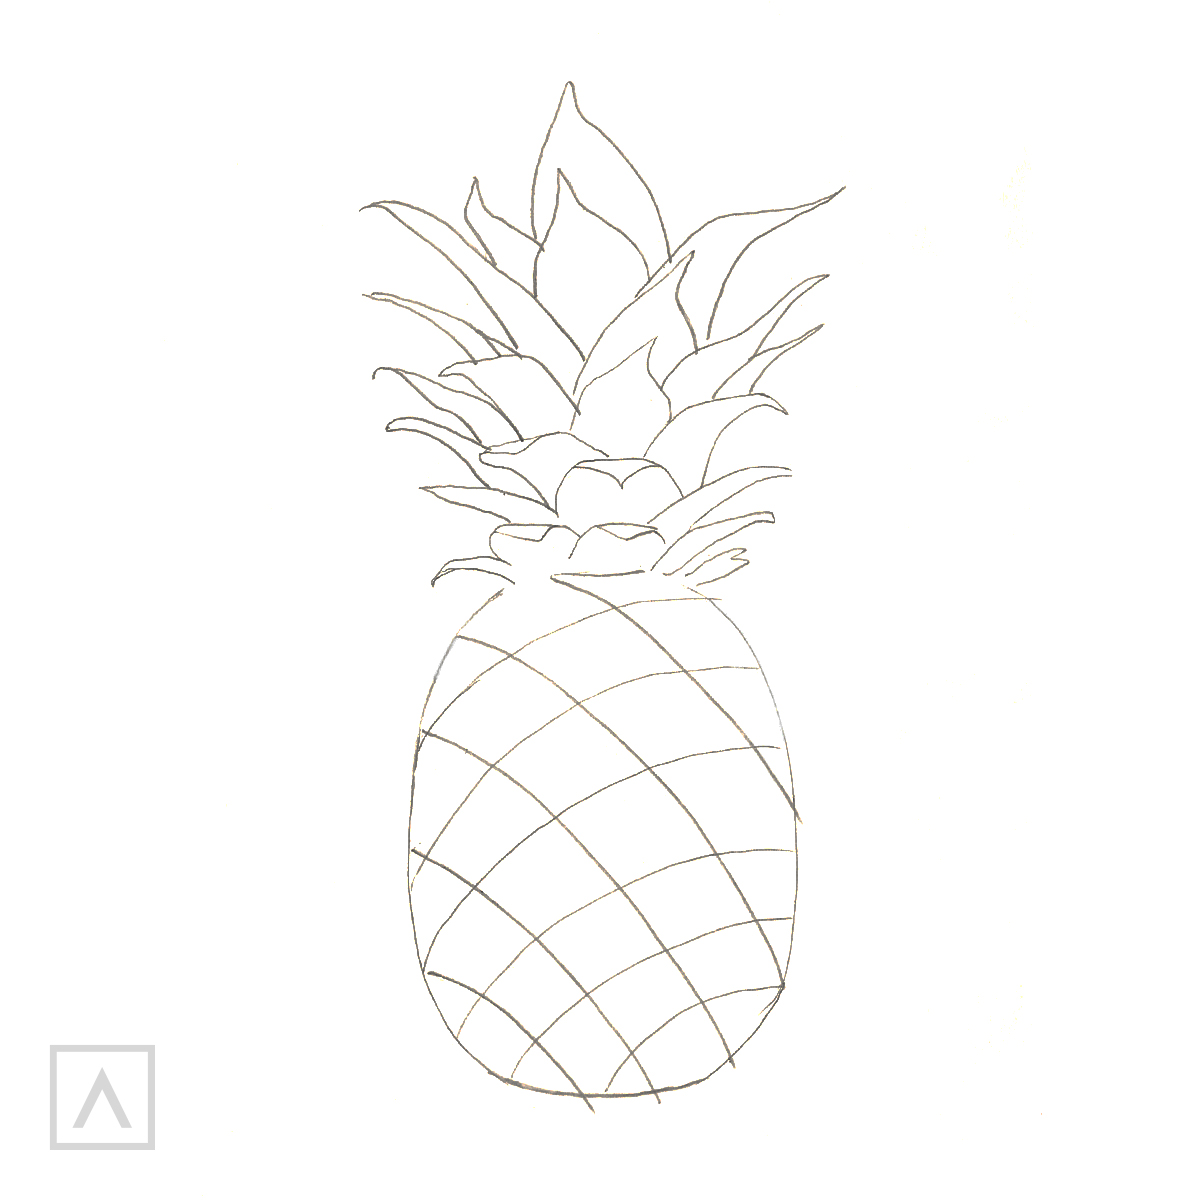
Step 4
I clean up the pineapple by removing the excess construction details—don’t want those showing through the ink!
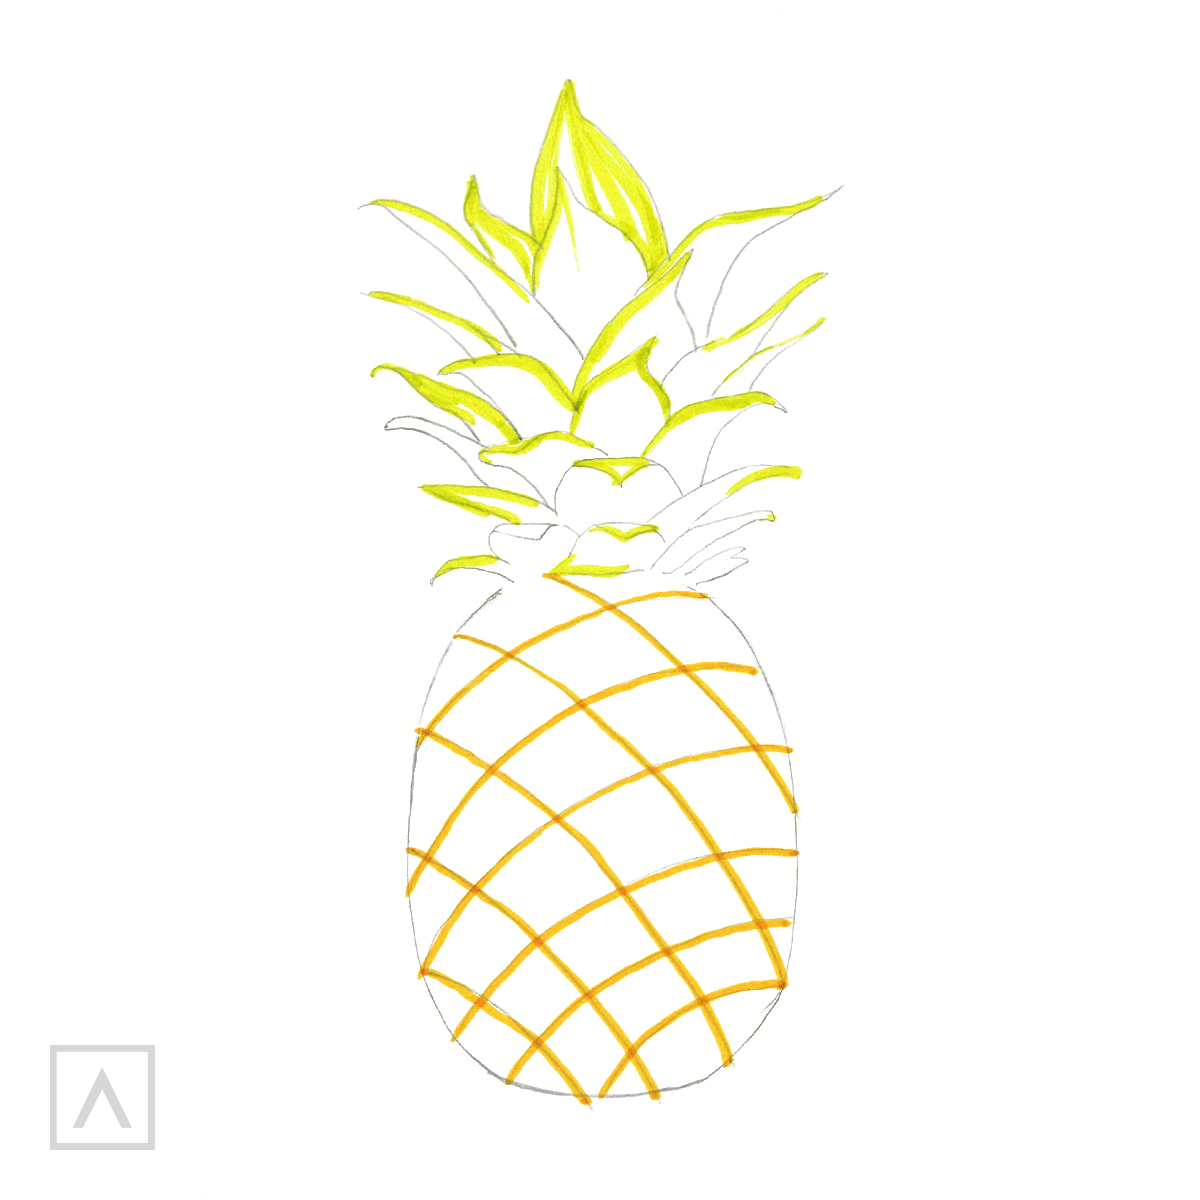
Step 5
Using my Marmalade Orange (A120) TwiMarker, I outline where the spikes on the pineapple will go. I color the leaves’ edges with Chartreuse Green (A133).
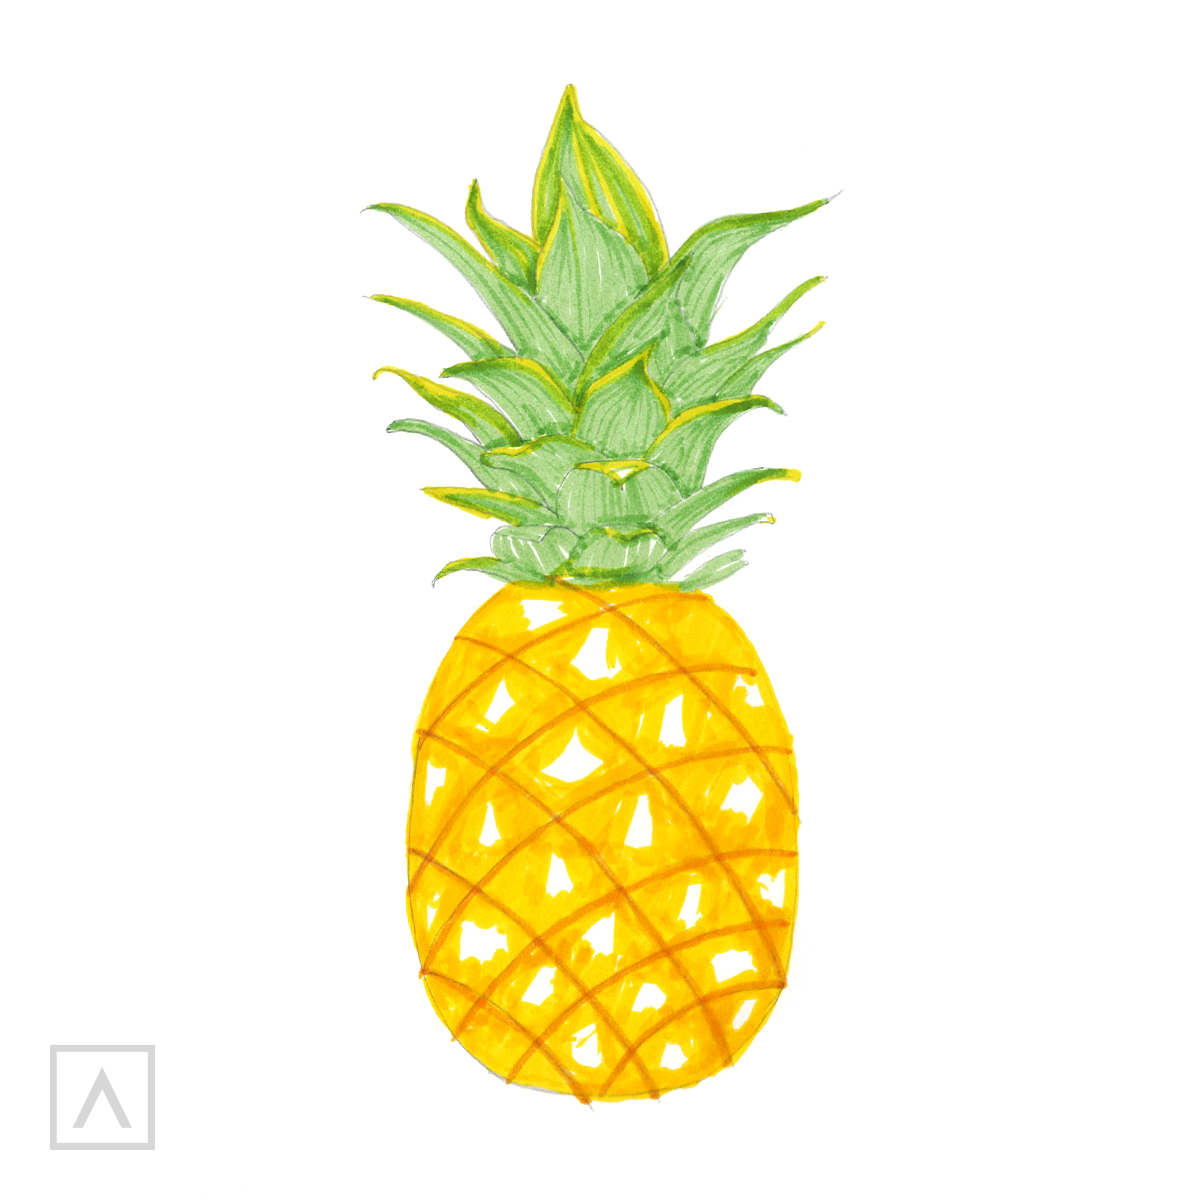
Step 6
I use Lemon Yellow (A112) to fill in the pineapple, but keep the area in the center of each spike section colorless. I fill in its leaves with Sage Green (A192) placing my lines based on each shape to give the leaves texture.
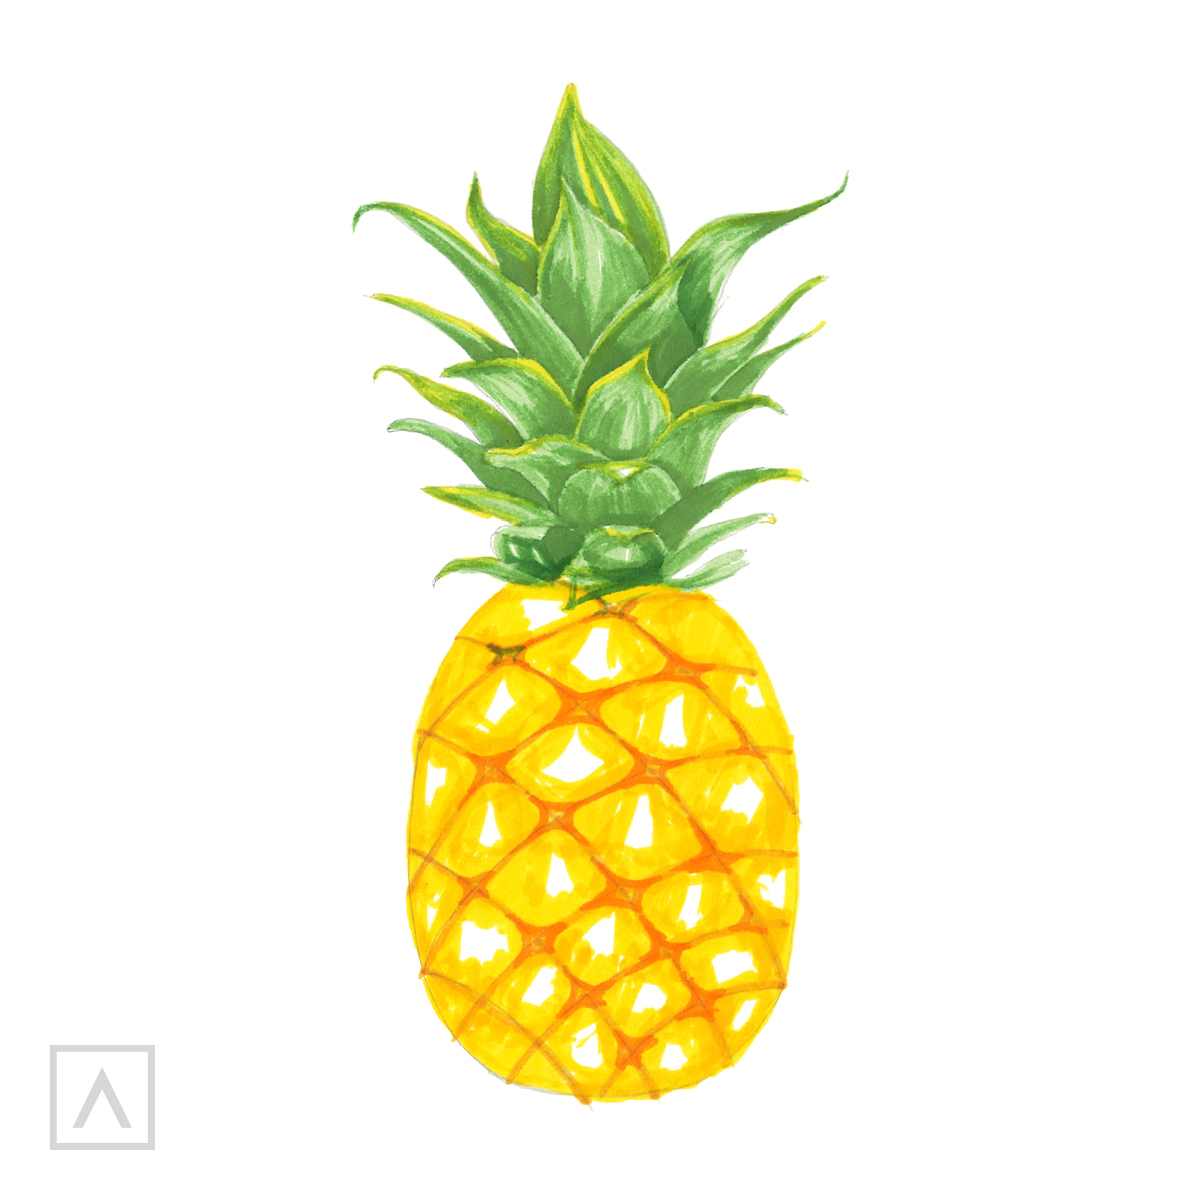
Step 7
To add volume, I add more layers of Sage Green (A192) at the base and underneath each leaf for its shadow. On a real pineapple, the spike sections are more of a rhombus shape, with each segment having four equal sides. I create this look with Marmalade Orange (A120) by thickening the lines that separate them and adding more color-filled areas where they intersect.
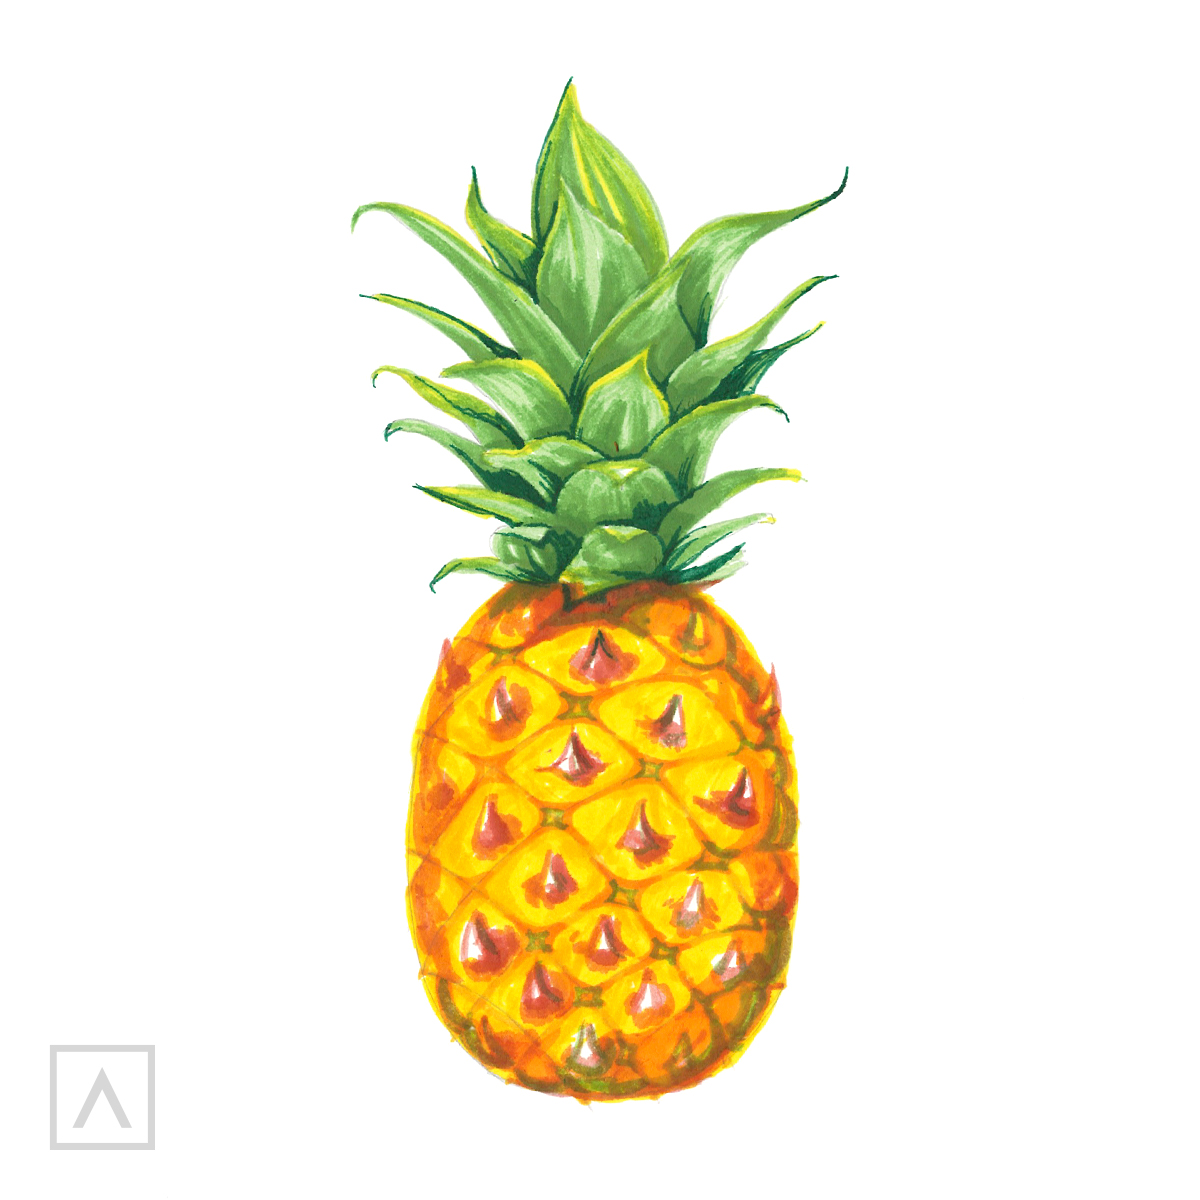
Step 8
To complete this pineapple drawing, it’s time for me to increase the contrast and add the details. With the Fern Green (A263) marker, I go over the shadows on the leaves of the pineapple to make them more saturated. Along both sides and along the bottom I place Marmalade Orange (A120) for another shadow that will give the fruit volume. I’ve left the little spikes for last. Now, I use Hibiscus Red (A238), going over the area twice to darken them, leaving one side open. On that side, I add a highlight on each spike using Sage Green (A192).
Hooray! The pineapple drawing is complete and I know yours turned out great, too!
Recommendations
- A good rule of thumb is to go from general to specific. This means you should start with rough sketches of the basic shapes and gradually improve the drawing, leaving the tiny details as the final step. I have done that here, which is why it’s important not to skip any of the steps.
- When working with TwiMarkers, I recommend proceeding from light to dark. First, use the lightest shades and work your way to the darkest ones. Here’s a hint: you can always make shades darker, but with markers, you can’t make them lighter.
- Take advantage of the diverse colors in the TwiMarker set and the dual tips. Remember, by making layers of one color, you will achieve darker variations of that color.
I just know you’re going to love drawing a pineapple and other fruit as much as I do and find them interesting things to draw! This guide is the perfect way to start experimenting and playing with markers if you’ve never used them before. I encourage you to step out of your comfort zone and draw lots of different fruits with them. You can make doodles, illustrations, or hyper-real drawings that will be sweet enough to eat! Let me hear from you and how you’re creating fruity masterpieces!


3 comments
Hey,
Such an amazing article. You would love see my Drawing of algae site as well.
Thanks once again.
If you use the shading colors to create the starting sketch lines, you can still follow along and then apply water at your own discretion!
I do have only the water colored pencil… I’m just gonna explore it to that medium to get look like that you drew.