
Table of Contents:
Yes, You Can Draw a Realistic Nose
How to draw a nose? While watching my favorite detective show, I understood all too well the frustration of the police artist trying to draw the suspect’s face from the witness’s description. He made several attempts to get the nose right until suddenly he adjusted a line which allowed the witness to shout definitively it was the man she saw. Although this was a fictional account, I often find if the nose isn’t right, the person is unrecognizable. Therefore, it’s one of the most important elements in portraiture to master.
To help you with noses, I’ve developed these five steps. See what I did and learn how easy it is!
Step-By-Step Lesson in Drawing Noses
You may not realize it, but your nose is a combination of various shapes that join up to form one feature. The easiest way to get a correct rendering is to begin with simple geometric forms. With this basic framework, I can construct it into what everyone will recognize as a nose. Once that’s done, adding shadows with the pencil gives it depth and helps it appear three dimensional.
Step 1
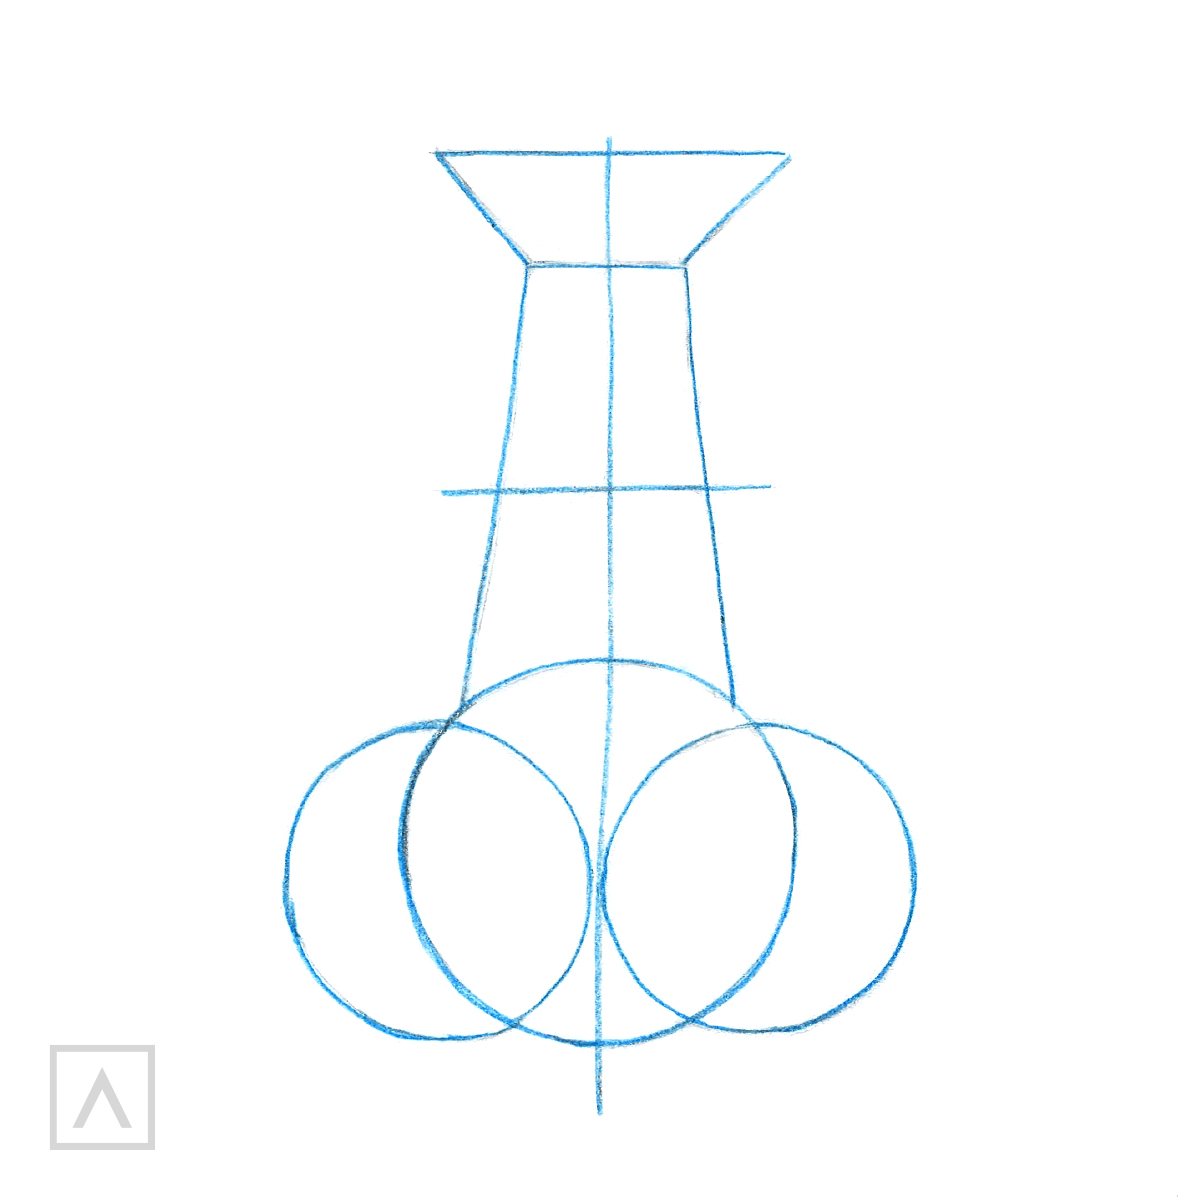
Our noses are symmetrical, with the same thing on either side. To keep that symmetry, I started with a vertical line. At the end of it, I put a circle. Next, I overlapped it with one on each side. Later on, these will become the end or ball of the nose and the wings that flare out and encompass the nostrils.
On top of the nose, I drew a trapezoid representing the bridge. For the ridge, I added an adjacent one, only upside down. Since the nose is widest between the bridge and the tip, a line went there.
Step 2
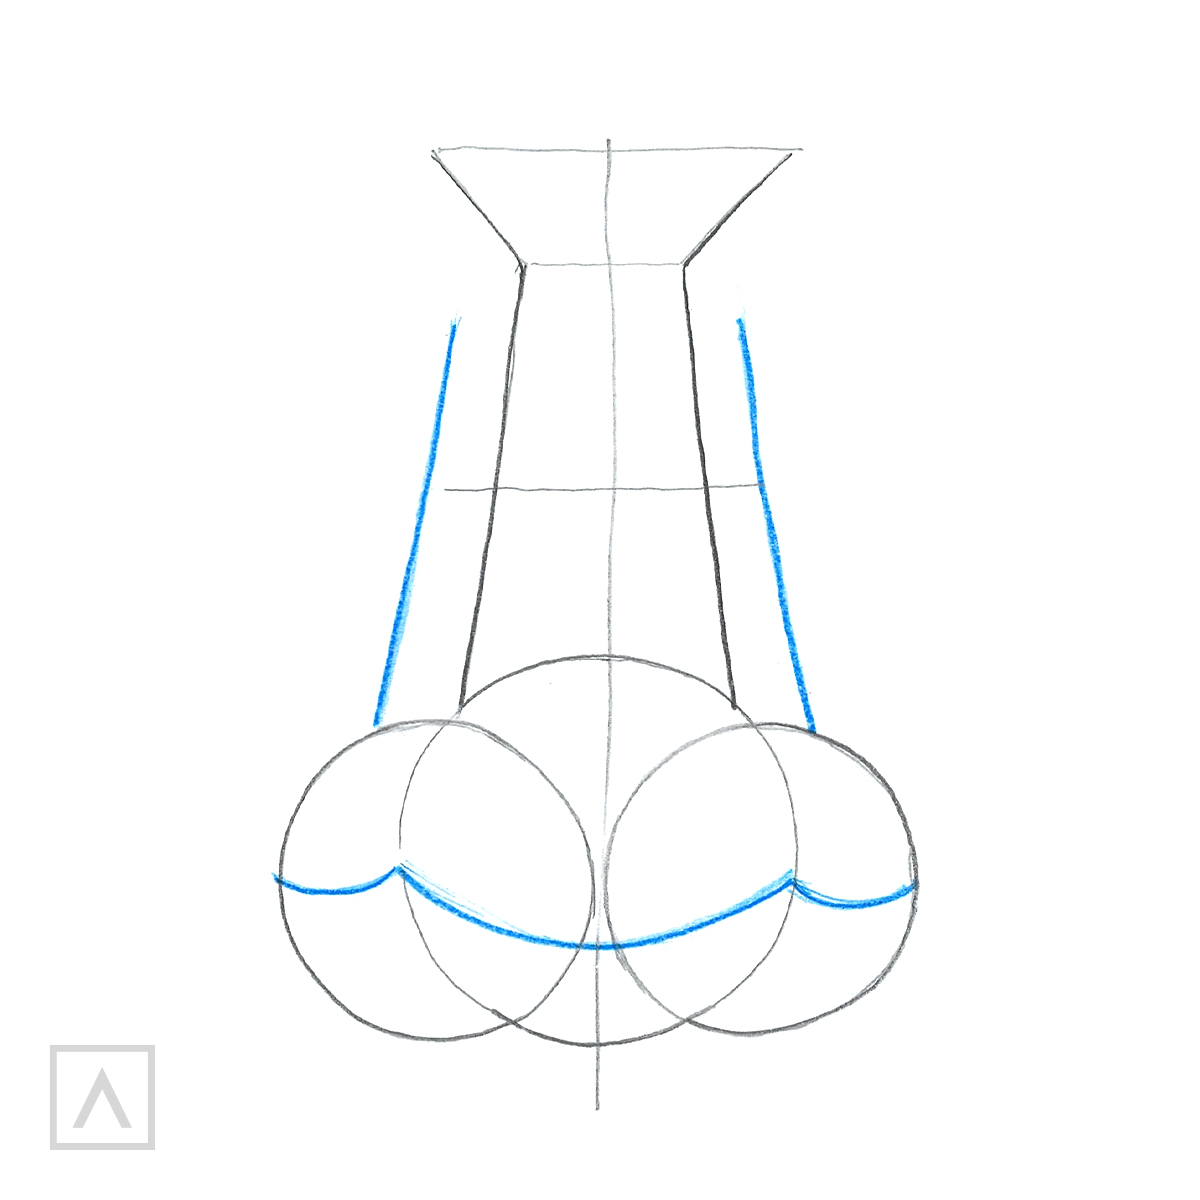
The bridge splays outward where it connects to the cheeks. It’s good to add lines on the sides to remind you, otherwise your nose could end up looking like a beak and we don’t want that! These lines also came in handy when I started adding hatching.
HINT: Hatching is placing lines very close together to darken in an area.
Try to consider the end of the nose a sphere so it’s easier to envision how the light washes over it. In this instance, the light is coming from above, so the top receives the most light, and the underneath less. A way to know where to make it darker when you begin shading is to separate the nose with contoured lines that divide the top and the bottom.
Step 3
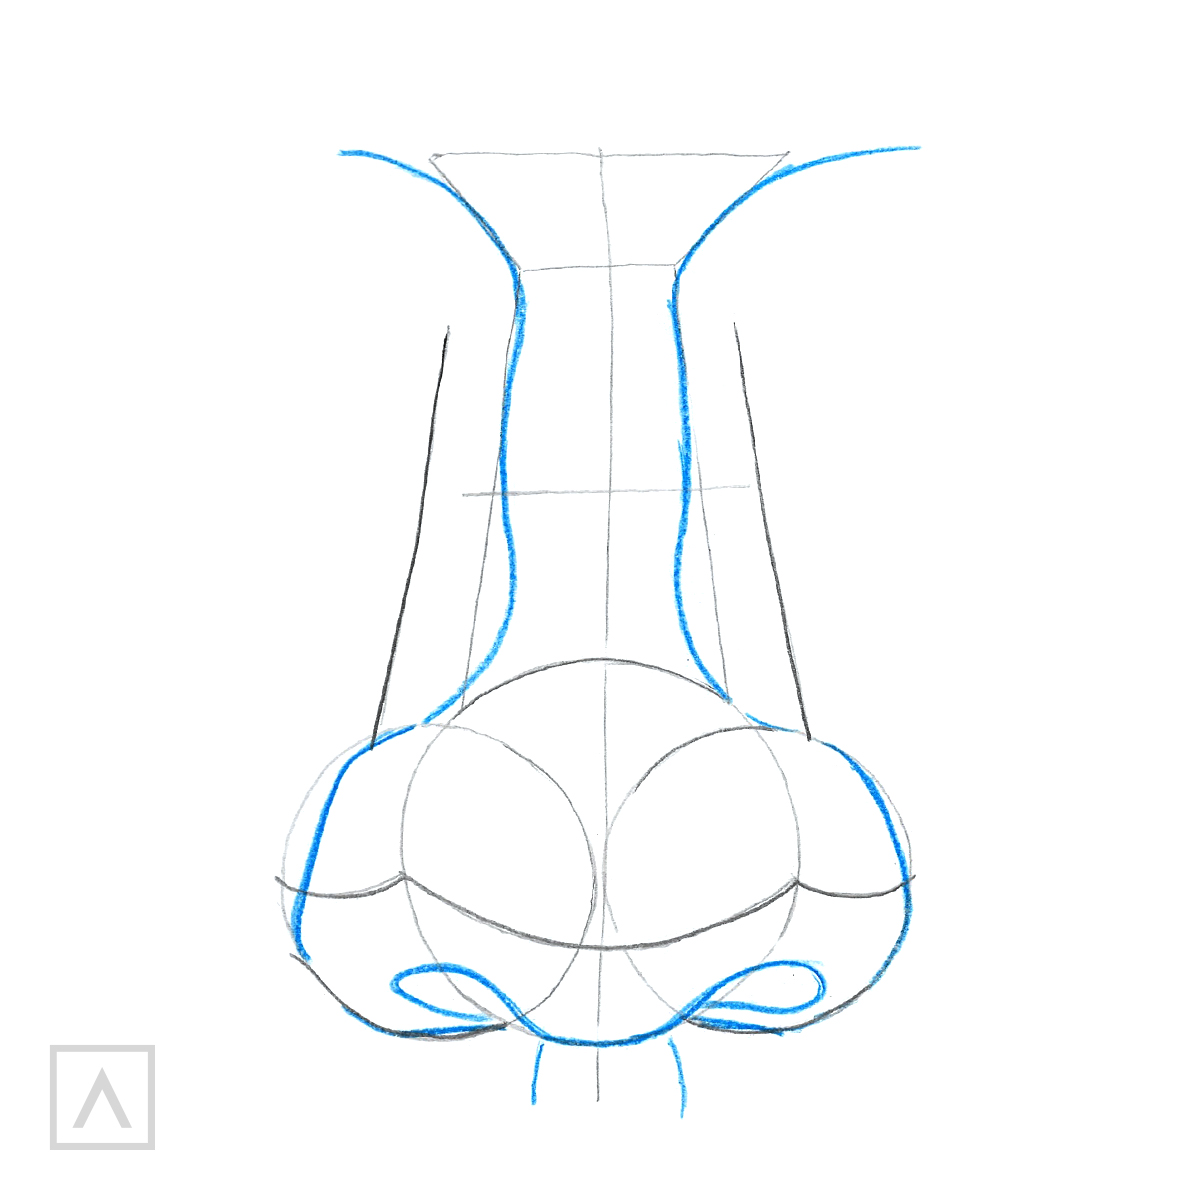
Using the bridge as a guide, I connected all the lines together, then reinforced them and added the nostrils. This is when you can really get the true shape of your subject’s nose. I recommend taking your time with this step until you are completely satisfied it looks just right. In this case, I could see the nose taking shape the way it was supposed to.
Step 4
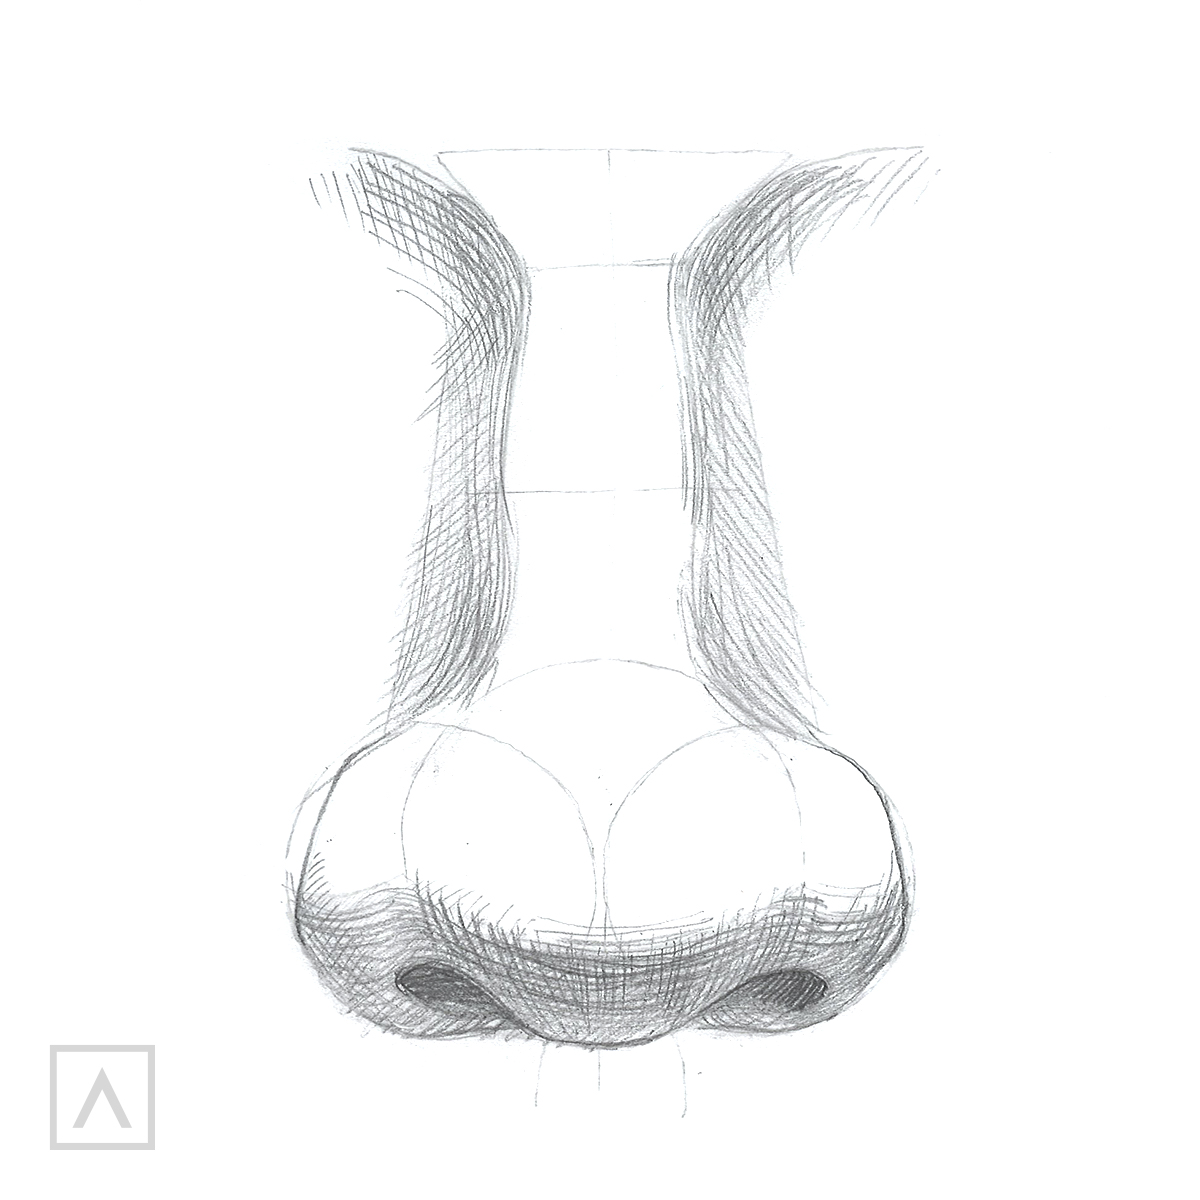
Shadows are what turns a flat drawing into one with depth. I began this process where the least amount of light would be—the nostrils, under the tip, and along the sides. Can you see how hatching in these areas is starting to make it look as though the nose is sticking off the paper?
Before going further with my shadowing, I erased all the initial construction lines.
Step 5
Realistic drawings take advantage of the value scale as a way to insert dark, medium, and light values to give the appearance of shadows, which in turn gives the drawing dimension. You do this by gradually building the shades from dark to light. Now that I placed the darkest areas, I continued with halftones, working around the ridgeline, the tip, and nostrils.
TIP: To get these tones easier, it helps to use drawing pencils in differing lead hardnesses. The hardness is denoted with a letter—H or B—with H pencils providing hard leads for light marks and B offering softer leads for darker ones. I recommend using the Arteza Professional Drawing set for the best results.
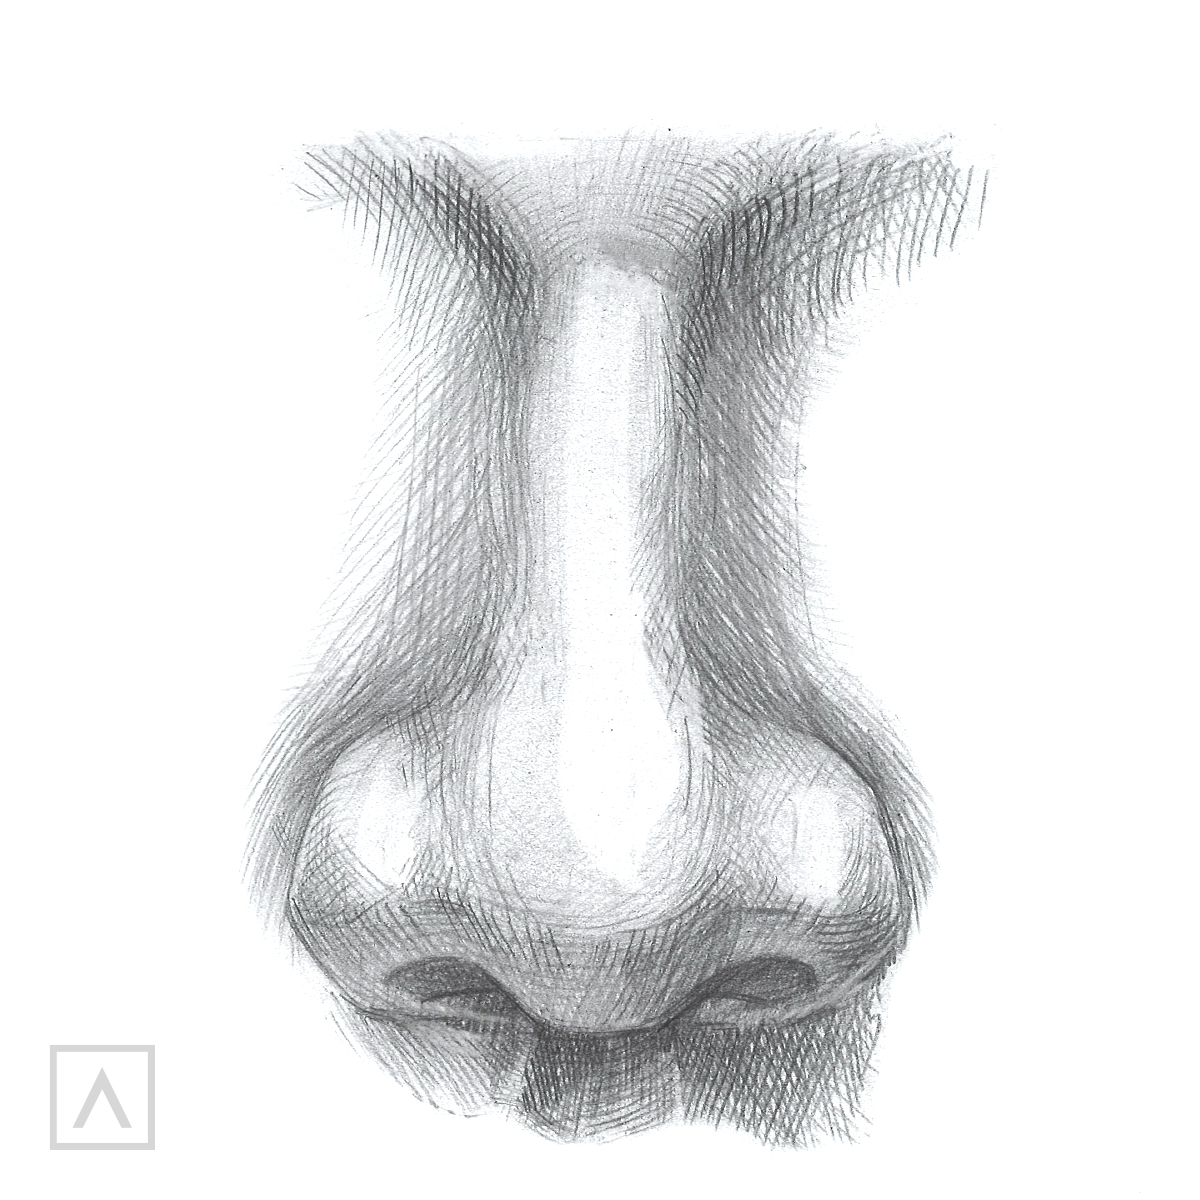
For the lightest areas, I used an eraser and removed the graphite on the ridge, the ball of the nose, and the wings until a bit of white paper was revealed.
And that’s all there is! You now know the secret to draw a nose that looks real. I bet it wasn’t as hard as you thought it would be. Simply remember to begin with a foundation of shapes, add location lines, connect the lines, start with darkest areas, and end with adding mid- and light tones.
You can have lots of fun filling your sketchbook with noses. The internet is a treasure trove of noses to use for practicing including big ones, button noses, crooked ones, and more! The more of these images you draw, the easier it will be when the time comes to draw a real live human. As you practice, you’ll get better, I guarantee it! I want to hear about how your nose drawing is going, so leave me a comment in the section below.


1 comment
Good dear having nice information because to see a good plan in life maybe it possible
http://familiesportrait.de/