Table of Contents:
- Spice Up Your Halloween With a Pumpkin Drawing
- What You’ll Need to Get Started
- How to Draw a Pumpkin Step-by-Step
- Enjoy Your Realistic Pumpkin Drawing
Spice up Your Halloween With a Pumpkin Drawing
Halloween is creeping up on us, which means it’s pumpkin season! Whether you enjoy drinking pumpkin spice lattes (otherwise known as PSLs) or carving them into amazing Halloween creations, we created a fun pumpkin drawing tutorial to help you get into the spirit. After you learn to draw this pumpkin, you can experiment by trying to change its shape or by adding different shapes to its expression. We’ll make this Halloween drawing feel easy by breaking down how we drew this spooky friend into easy steps you can follow.
What You’ll Need to Get Started:
Expert Colored Pencils
- Sunflower Yellow A016
- Camel Brown A110
- Orange A003
- Raw Umber A132
- Noir A012
How to Draw a Pumpkin Step-by-Step:
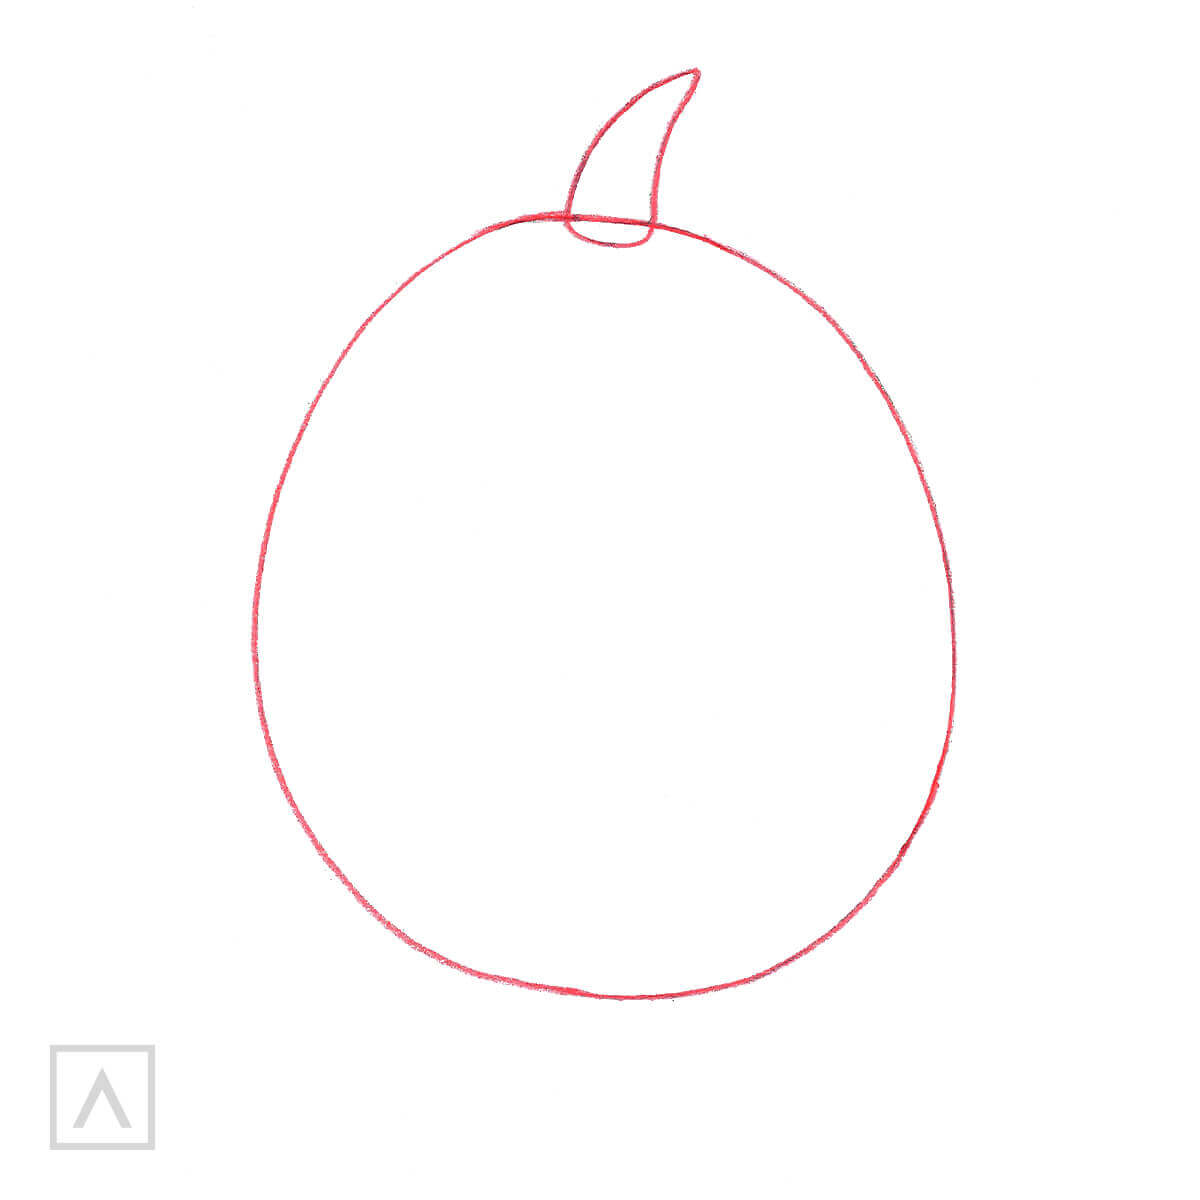
Step 1
Draw an oval with a tapered tail on top. This will be the base of the pumpkin and its stem.
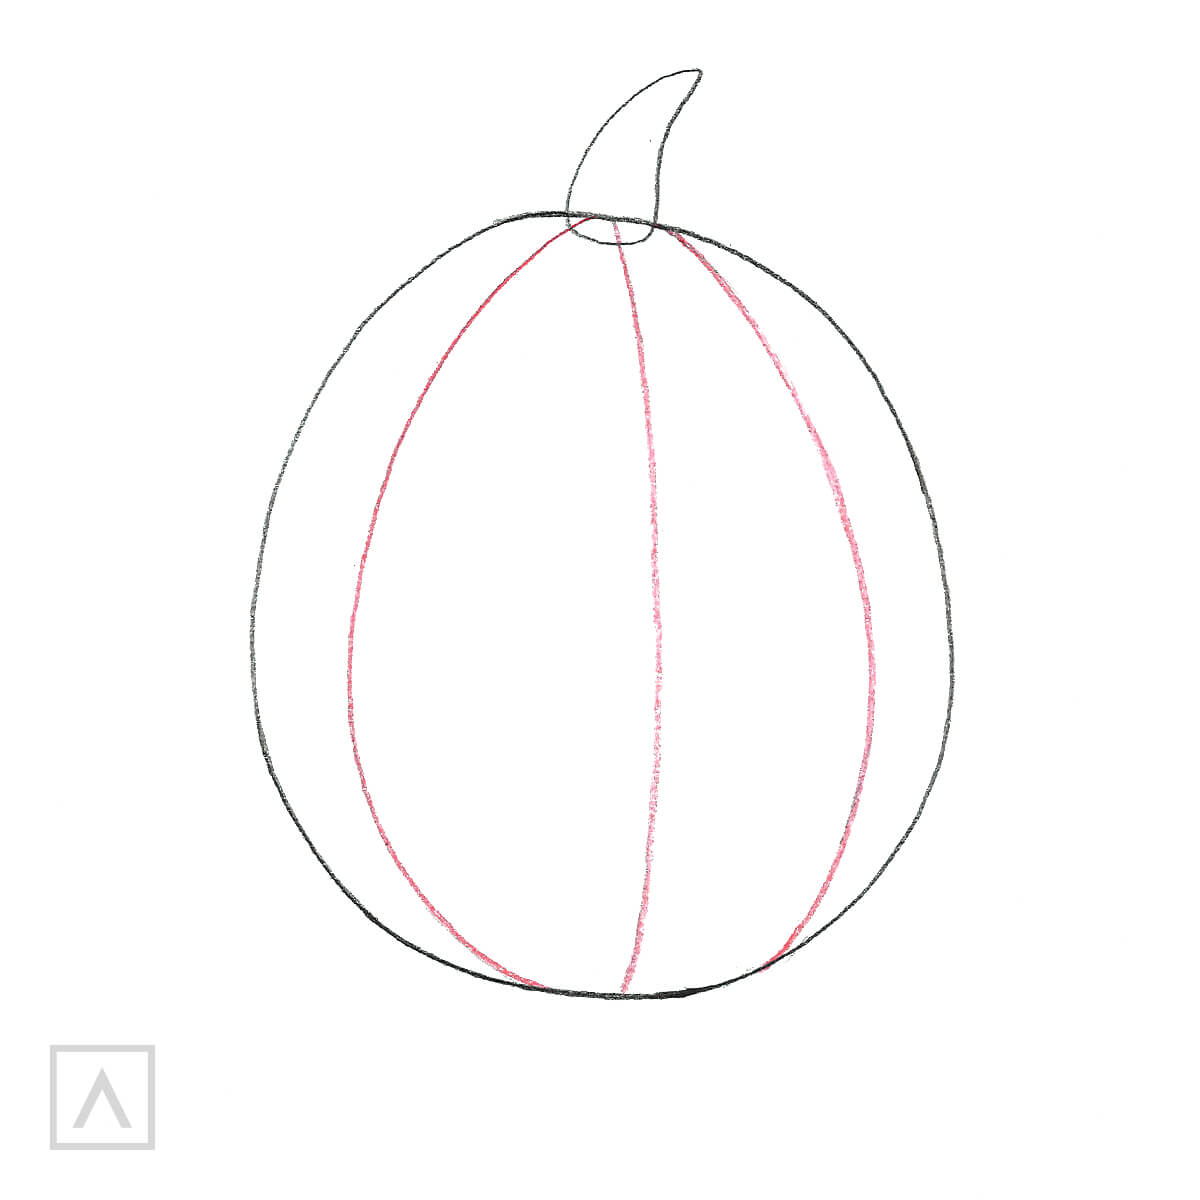
Step 2
On the oval shape of the pumpkin, draw three vertical lines dividing the pumpkin into wedges.
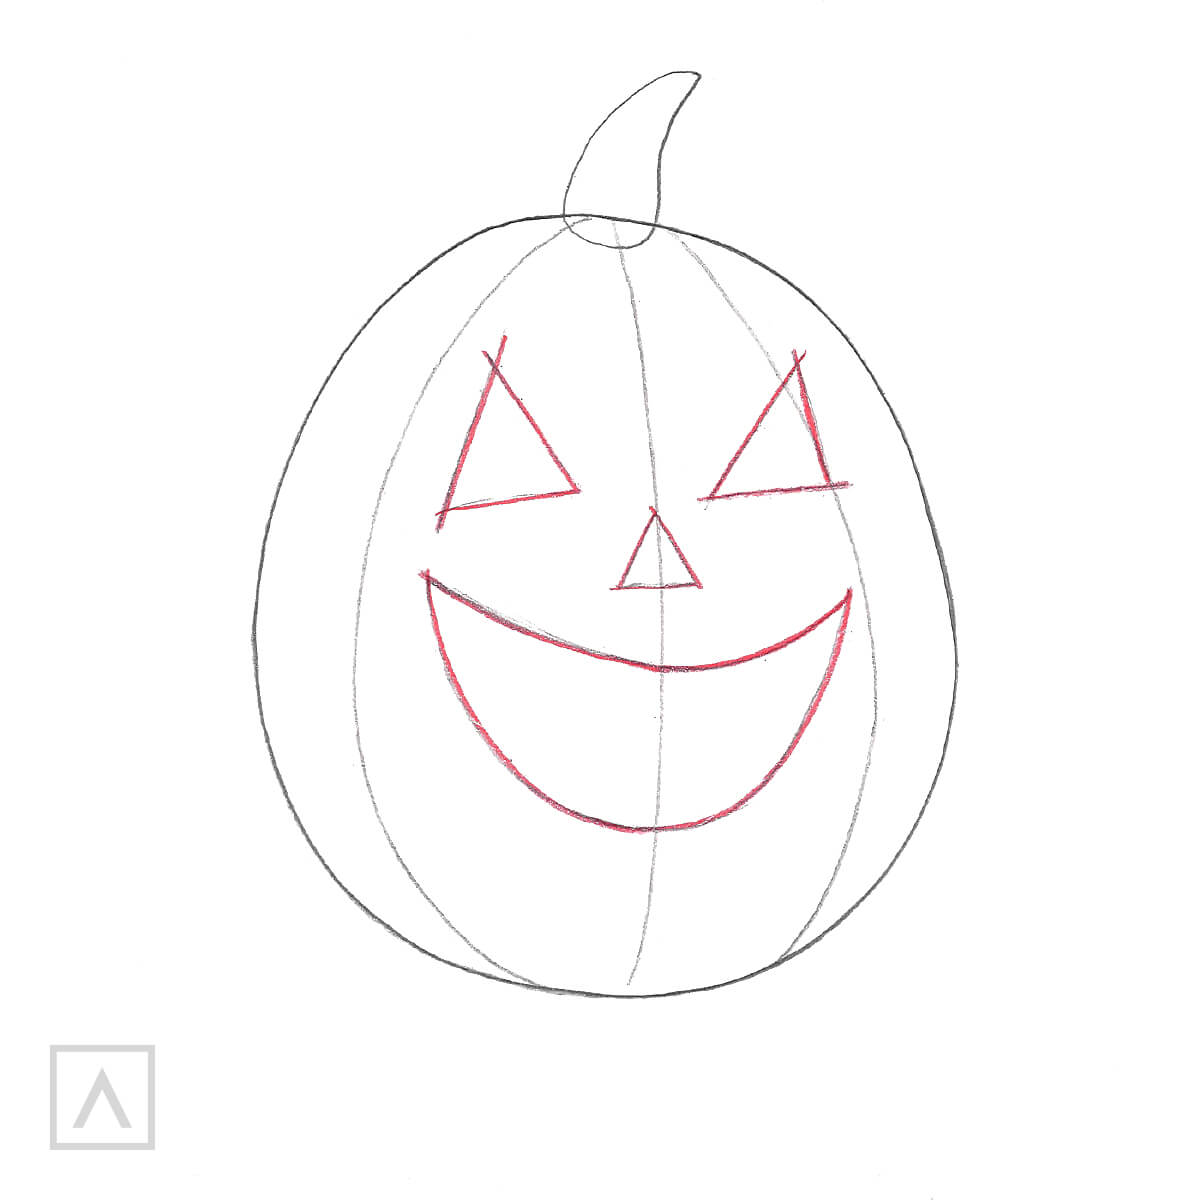
Step 3
Sketch a face in the middle of the oval. Draw the eyes in the upper part of the oval with triangles and add the nose between them using a small triangle. Below the nose, draw a wide, crescent-shaped smile.
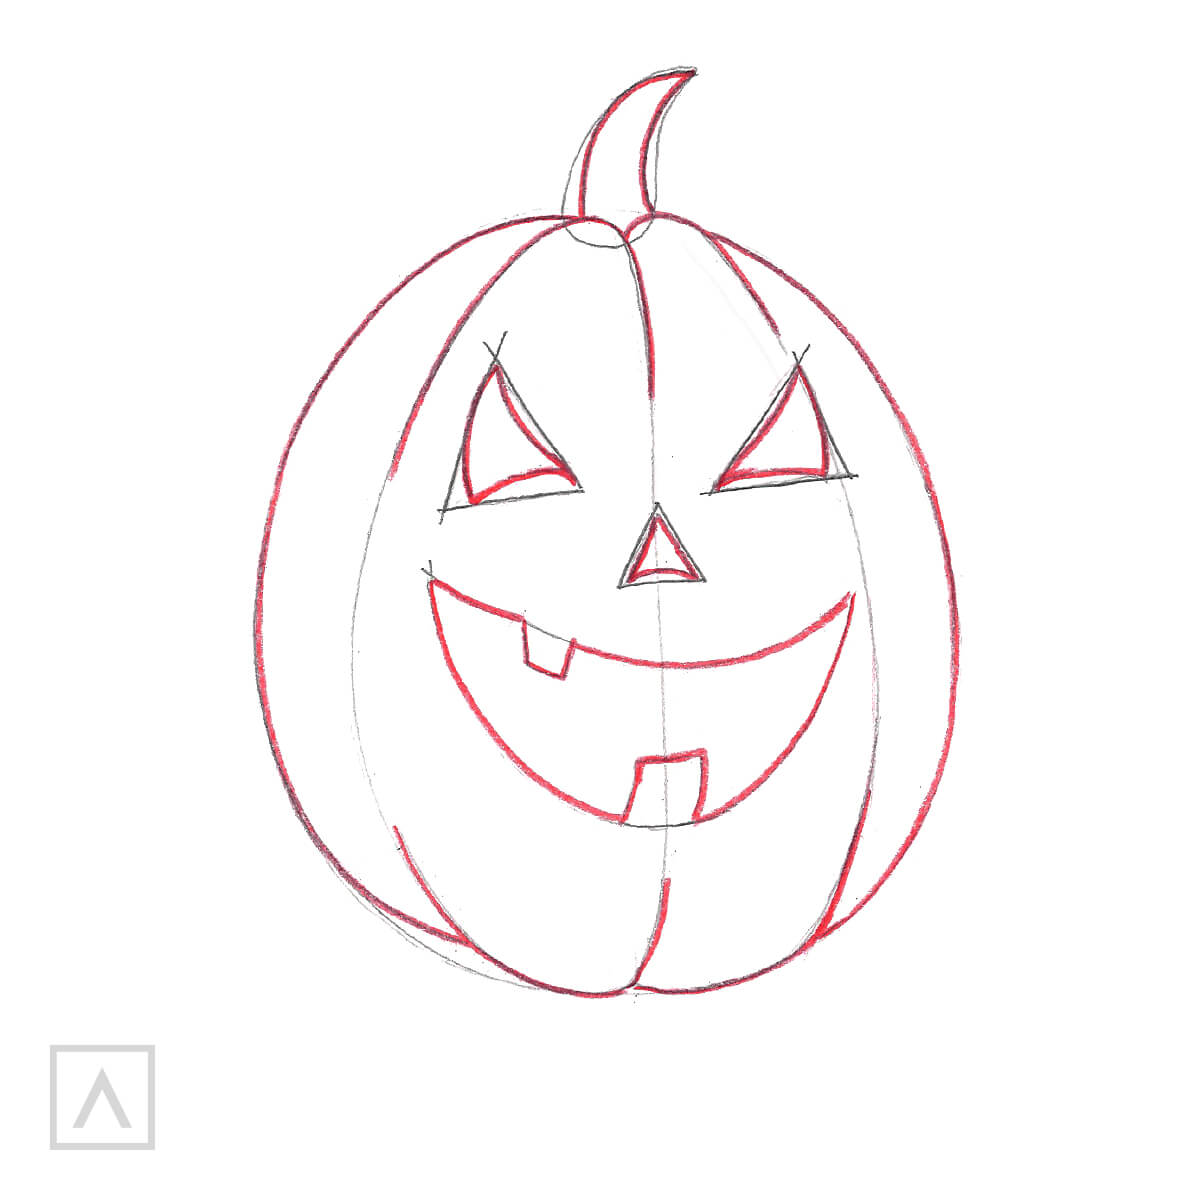
Step 4
Let's create the smooth outline of our pumpkin and work on the details in the face and stem. First, create a smooth contour line around the pumpkin. Sketch stripes on the pumpkin to create sections and make them more curved and intermittent in the middle of the pumpkin. Make sure to avoid the face as you’re drawing these lines. We’ll be making the face look more detailed when we start to work with colored pencils.
To give the pumpkin a sly expression, make the eyes slightly curved. Use similar lines to add a curved look to the nose.
Add two teeth to the smile, one at the top and one at the bottom. We also made the stem look more curved. Remove any construction pencil lines with an eraser.
Step 5
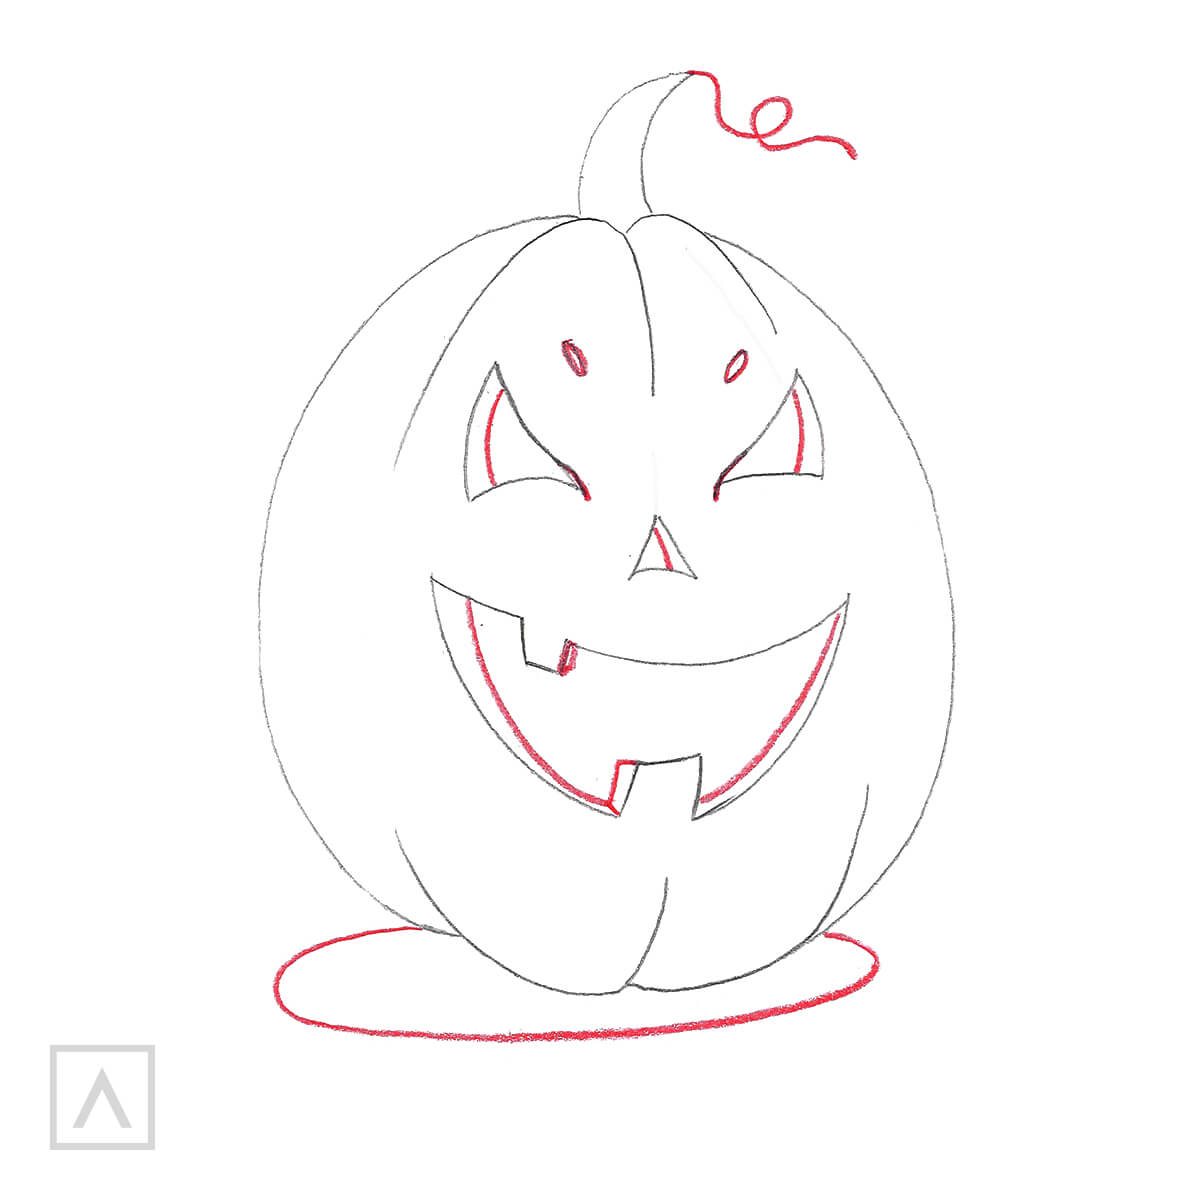
In this step, we’ll be finishing the pumpkin’s mischievous expression. Let's add some realism by adding thickness to the eyes, nose and mouth. Add a semi-circular shadow under the pumpkin and a curl on the top of the stem.
Step 6
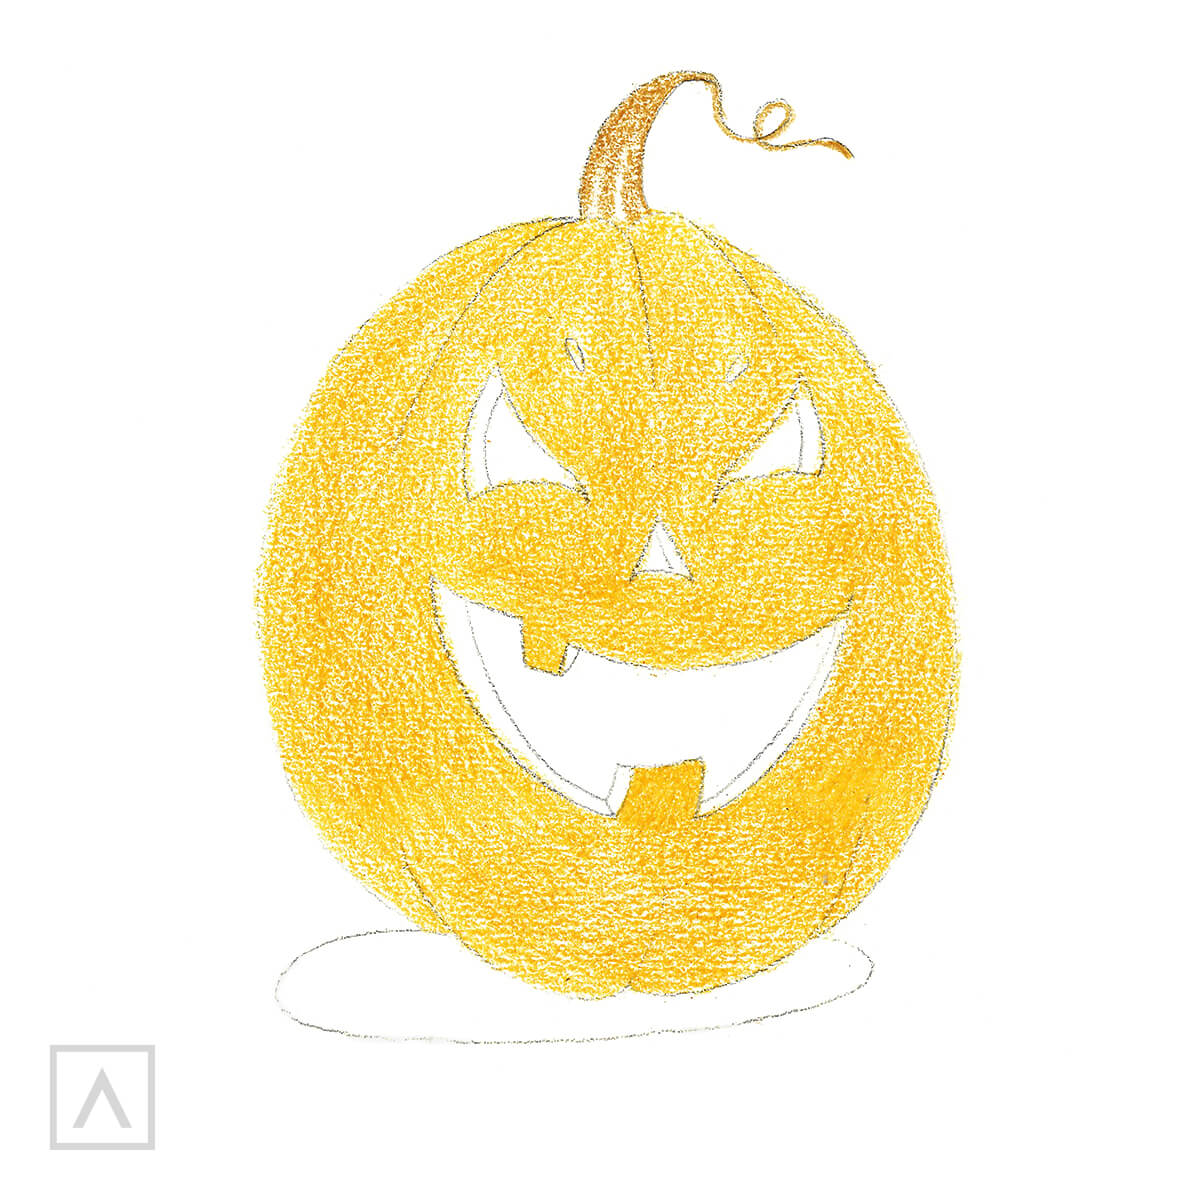
Color the base tone for the pumpkin. Use Sunflower Yellow A016 to color the entire pumpkin except for the eyes, nose and mouth. Use Camel brown A110 to color the stem and leave some small areas blank so we can use them later to make the stem look dried.
TIP: Don’t press too hard on the pencil. You’ll want to color with light, even movements. This will make it easier to create soft gradients and perfectly blended transitions in the later steps.
Step 7
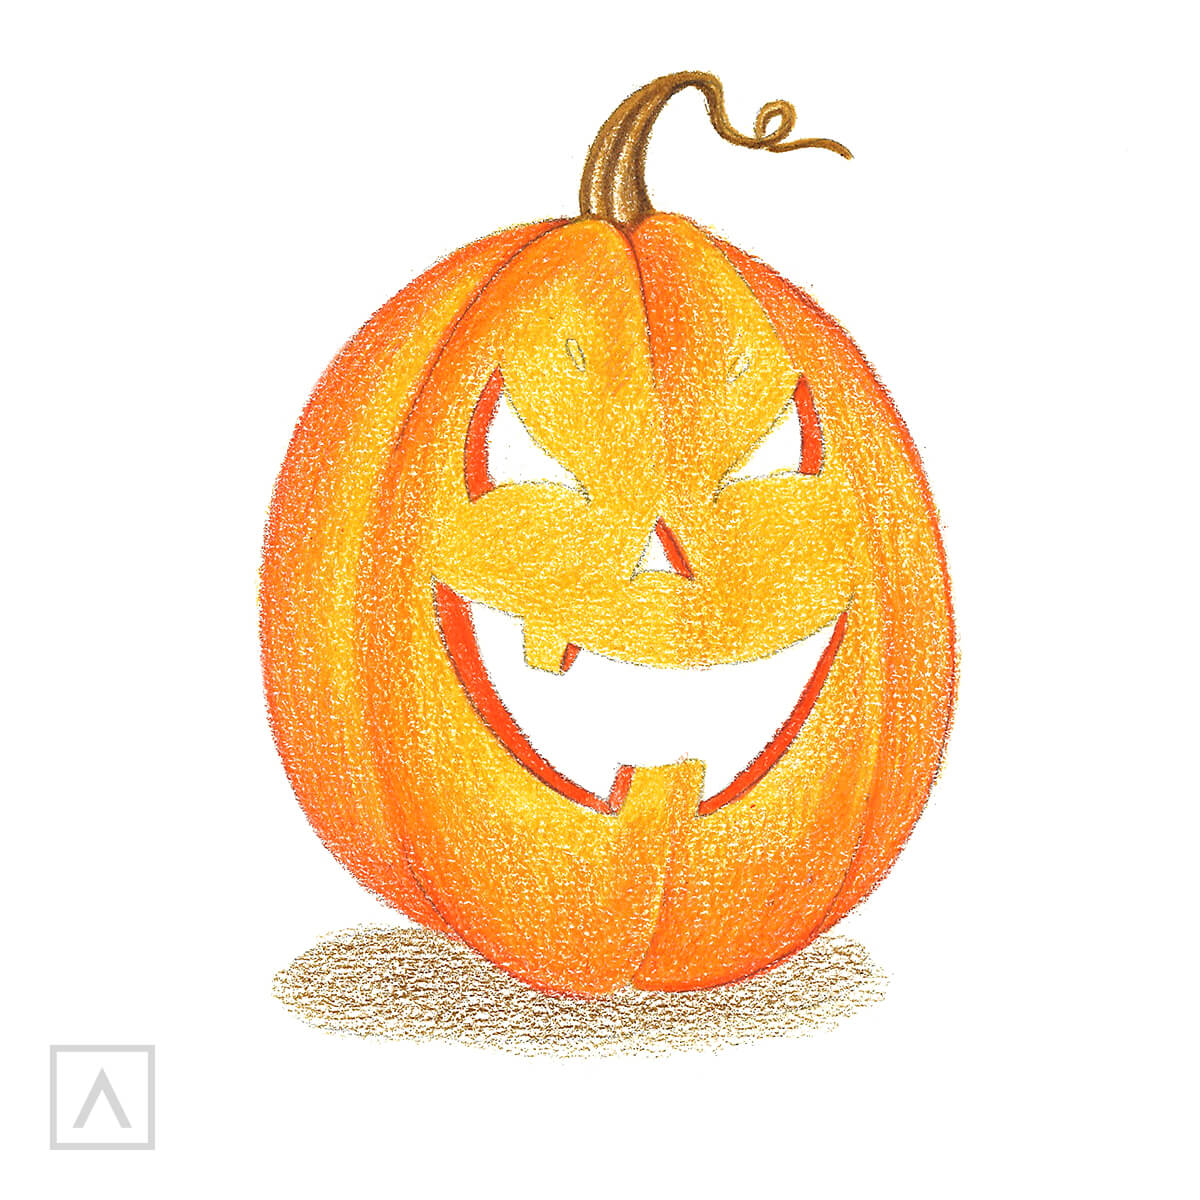
Use Raw umber A132 to represent the shadowed areas on the pumpkin stem and add the shadow created by the pumpkin.
Using Orange A003, color over the inner areas of the eye, nose and mouth. Go over the contour and lines of the pumpkin sections with this color. Start coloring from the edge of the sketch and fill in each new section with this color. The middle of the pumpkin, where the face will be, should be the lightest area.
TIP: To make the pumpkin look more voluminous, you need to create smooth transitions from light to dark. This is much easier to do if you don’t press down hard on your pencil as you color. Using the light, even strokes we mentioned before will allow you to create perfect gradients and easily mix colors.
Step 8
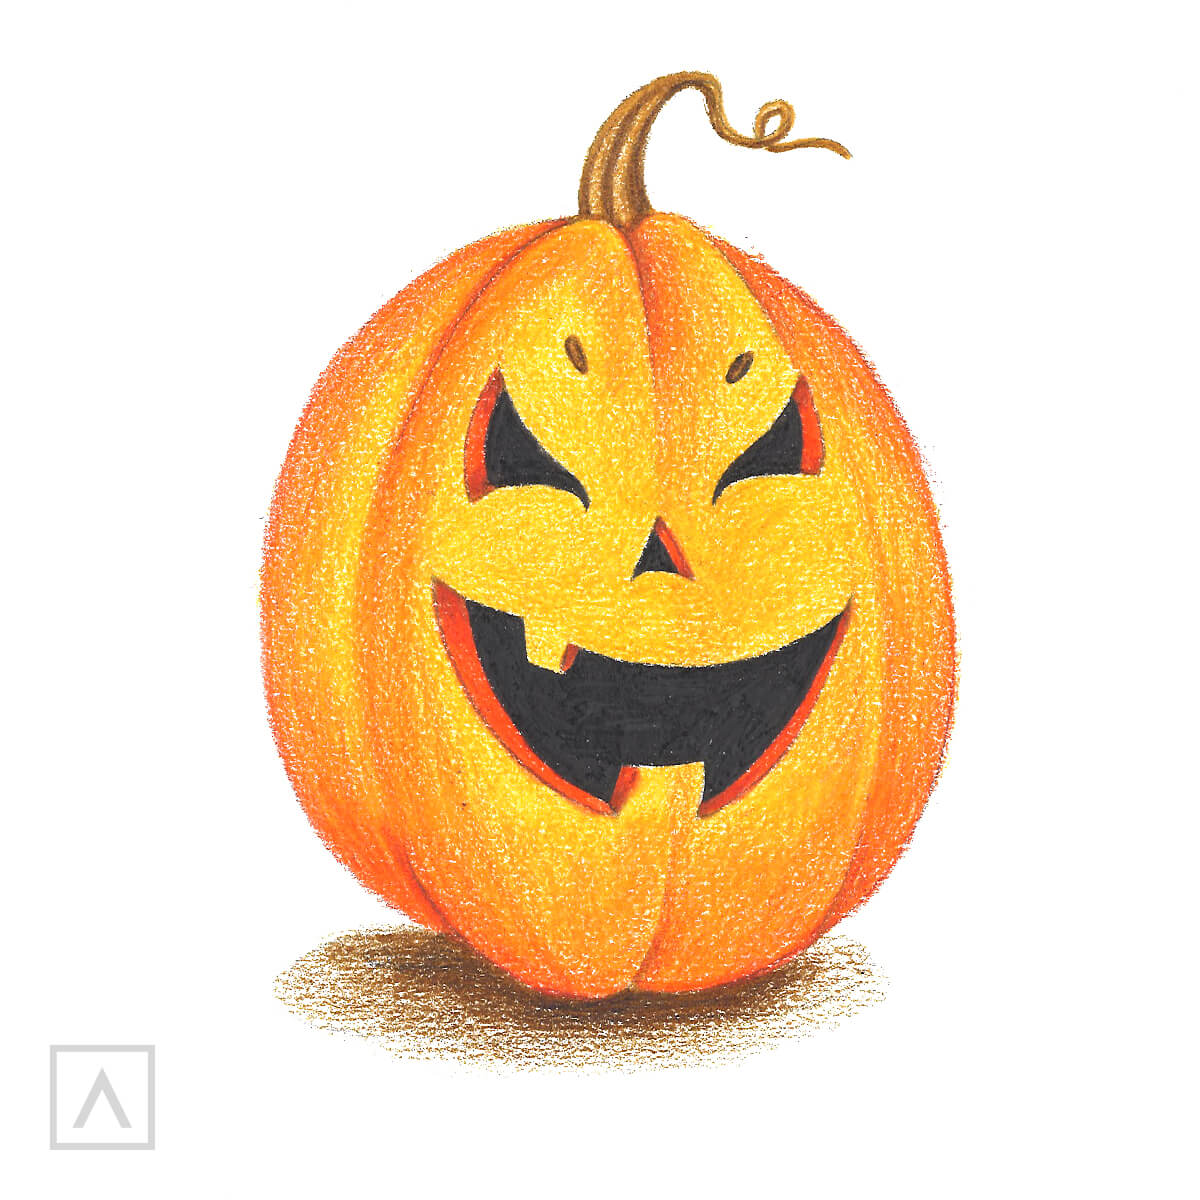
Now let’s add the finishing details to our pumpkin and refine his expression. Using Noir A012, color the pumpkin’s eyes, nose, and mouth. Draw in some eyebrows using Raw Umber A132. Use the same color to enhance the shadow under the pumpkin. Loosen the pressure you apply on the pencil as you reach the edges of the shadow. This will make it appear as if the shadow is diffusing around the edges. You can add a touch of this color to the thickness of the eye sockets, nose and mouth to tone down the orange color at the edges and add realism to the pumpkin.
Enjoy Your Realistic Pumpkin Drawing
Now your Jack-o-lantern friend is ready to be displayed for everyone to see. The best part is, this pumpkin won’t change all month long, so it’ll look great no matter when you drew it. Arteza’s soft, blendable colored pencils are perfect for this project because you can easily layer your colors and fill in areas. These highly pigmented pencils come pre-sharpened so you can start creating immediately. We hope this tutorial helped inspire you to create other simple Halloween drawings and to fill your sketchbooks to the brim with tricks and treats!


