
Table of Contents:
Learn How to Draw Fire
How to draw flames? Right now it’s pretty cold outside and I’m sitting next to a warm fire. But, whether it’s cold where you are or not, it’s always a good time to add fire to your paintings and drawings by learning how to draw flames. Drawing fire can be a challenge because it has no definite structure. The trick is to try to show the flames in motion while working within a static shape. To do this, you want your lines to vary, using color to define the flames and add nuance to your fire.
I love drawing fire because it can be used to give emotion to my work. It can make a scene feel cozy or it can create terror! When I learned how to draw fire, I started with art markers. EverBlend Markers allow you to make many smooth color transitions and achieve a vast variety of light and shadow areas, which is important in realistic painting. For this demonstration, I used the Arteza Everblend Markers - Set of 60. Not only does this art markers set have so many great colors, these dual-ended markers make it easy to blend the colors, as well as put in all the details that make authentic-looking flames.
I recommend trying out the markers first on a scrap piece of paper to get the feel of how they flow and the types of lines you can create. It’s important to use thick paper since you’ll be doing quite a bit of layering, and heavyweight paper avoids any ink from bleeding through.
Step-by-Step Fire Drawing
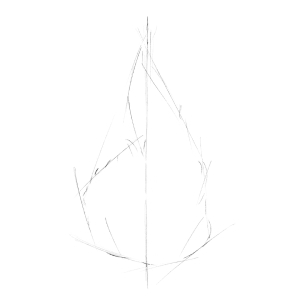
Step 1
Use a 2HB pencil to draw a faint vertical line down the center of a sheet of thick paper. This line helps keep the drawing symmetrical and keeps me from losing the vertical direction as I draw the fire’s outline.
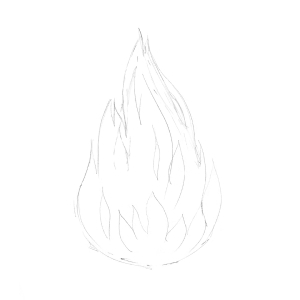
Step 2
Before adding the details to my work, I need to draw all the tongues of the flames. I make some of them short, some long, and some in between. It’s nice to do this part sitting in front of a real fire and can be quite mesmerizing. But, don’t stare at the fire too long or you’ll lose track of time and we’re just getting started!
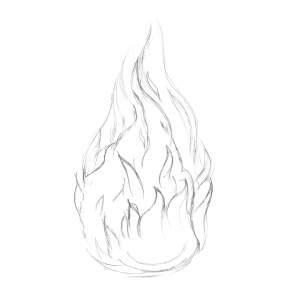
Step 3
At this stage, I work on inserting as much detail as I can to the individual flames. This helps me know where to place the different colors, and answer questions like which markers should be used in which areas, and where should the transitions between light and dark (and between two colors) be placed? This step should result in a finished pencil drawing.
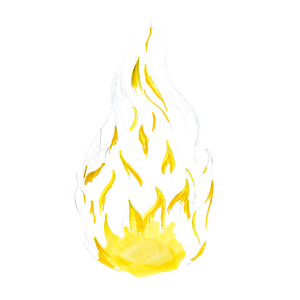
Step 4
I start the coloring process following the “light to dark” rule. I add my yellow shades first. I use 945 (light yellow), 935 (medium-light yellow) and 0 (white) to fill in the lightest areas.
Step 5
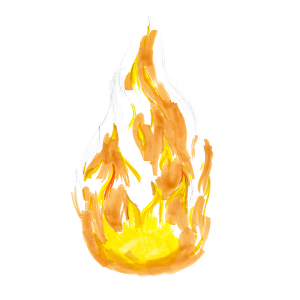
Next, I add 2497 (light orange) to paint the mid-tone areas. I love to watch as the flames flicker and dance around. I try to keep all my strokes going up in different directions to give the feeling they are jumping up the chimney or into the sky if it’s a campfire.
Step 6
Using 9423 (saturated orange) I work on the transition from the light orange to the darker orange by blending along the edges of the flames.
Step 7
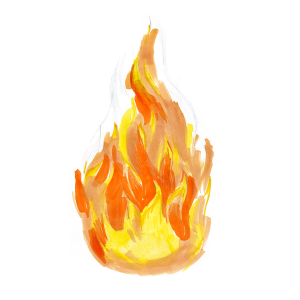
Now it’s time to add the darkest flames. I paint dark parts of the flames using 9432 (yellow ochre) and 422 (red-orange), and also those parts of the background that are seen through the flame, using 401 (burgundy). By using a dark background in a cooler shade, the fire is brighter and has more volume.
Step 8
A fire just doesn’t look and feel hot until you’ve added some red. I add red to the middle of the flame using 422 and 302 (rose). I think this fire is starting to sizzle! What do you think?
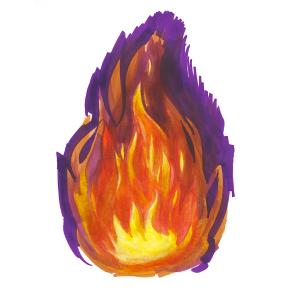
Step 9
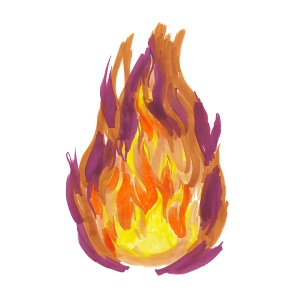
It’s time to start painting the background and add details to the flames’ edges. For this, I use 422, 881 (purple), and 4103. I am adding a dark purple since purple and yellow are complementary colors, which I think will make the yellow really stand out.
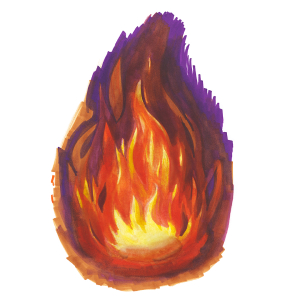
Step 10
By layering 4103 with 881 and 401 in the background, I can give the scene a richer feel. It’s really starting to look like it’s a fire in the woods. I can just hear the crickets and the fire crackling!
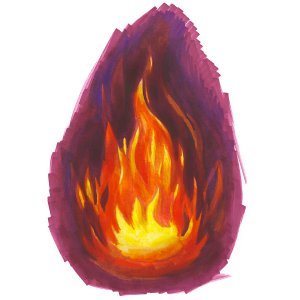
Step 11
Now that the background is in shades of violet, I overlay it with lilac 410 and add some 422 to keep it looking hot.
Step 12
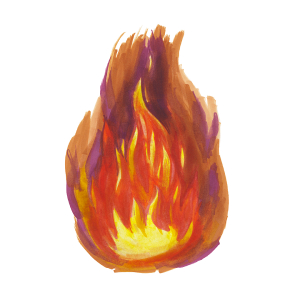
At this stage, I think the background isn’t quite dark enough to really make the flames leap from the page. So, I color the background violet once again using 401 and 0, 881, and another layer of 401.
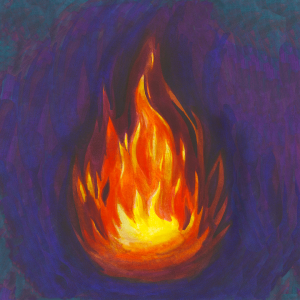
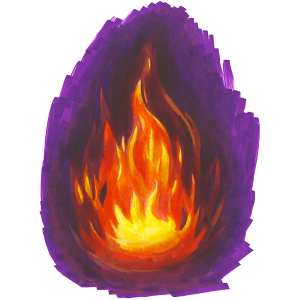
Step 13
To give it the feeling of being a campfire drawing, I layer blue and blue-green colors to the background to mimic the trees and grass. Next, I darken the red parts of the flame and work on refining some details with 401 and 0, 881, and more 401
During this final stage, I step back and see what areas I can make brighter and which areas need to be darker, especially in the background and shadows of the flames. The blending marker is great for making your bright areas really “pop.” I use 410, 401, 8273 (royal blue), and 301 (yellow) to add more depth to the details.
Recommendations
- Before you get started, experiment with color combinations on a scrap piece of paper to get the color palette you want to use. Also, practice using the blending marker to see what kind of effects you can get.
- If you can’t look at a real fire to use as a reference for your drawing, study pictures of flames in books, magazines, and on the internet.
- Don’t be afraid to use fire in your drawings and paintings; it’s amazing how much emotion you can evoke from just a few flames.
What I love about using fire in my art is that it can be drawn in so many ways. Fire never stops moving, so its shape and colors are always changing. It’s a fun challenge for both beginners and experienced artists. I hope you’ve enjoyed learning how to draw fire and I hope I’ve inspired you with this mini-tutorial to heat up your future artwork! I’d love to hear how you use fire in your art!


