Table of Contents:
Make Holiday Memories with a Family Tree
The holidays are special times for families, with lots of gift-giving and togetherness. To make this year’s seasonal get-together something to remember, we’ve created a step-by-step guide for making a family tree . Whether you’re thinking of giving DIY gifts for Christmas, Hanukkah, or Kwanzaa, nothing is more personal than recording the generations of your family and giving that to a loved one in the form of family tree art.
Before beginning, we recommend you gather the list of names of those who will be included. This way you won’t need to stop and find these in the middle of the project. We also suggest you read the steps and watch the video before starting so you’ll be fully prepared.
List of Supplies
- Arteza Expert Watercolor Pad, 32 Sheets, 9”x12”
- Arteza Gouache Premium Artist Paint, 12ml Tubes in the Following Colors: A253, A251, A171, A137, A287
- Detail Paint Brush
- Stencil Sponge
- Arteza School Glue
- Arteza Sketch Pad, 30 Black Sheets, 9”x12”
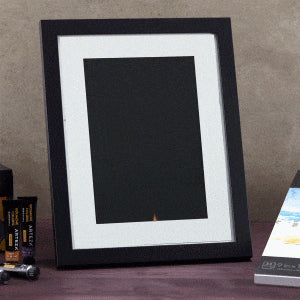
- Arteza Premium Document Frame, 11”x14"
5 Steps for a Fun Family Tree
Gather all the supplies together to ensure you have everything you need handy. If you don’t wish to draw the elements for this project freehand or use the ones from our video as a guide, you can find references for them as well as special fonts for hand lettering on the internet.
Step 1. Make the tree, hearts, banner, birds, and flowers


Remove two sheets from the watercolor pad. On one, draw a tree. Use the other to draw a heart for each person’s name as well as a ribbon banner where the title will go, the birds, and flowers. Cut them out.


Step 2. Paint the tree


Squeeze a small amount of the recommended gouache paints onto a palette. Using a small brush, put some of the bronze A253 paint onto a round stencil sponge. Using a sponge helps make the painting process easier. Dab the sponge onto the cut-out of the tree, covering it completely in paint. After the paint has dried, add dabs of gold A251 on all the leaves.


Step 3. Add the names


Trace the title onto the banner and use black A171 and a fineliner brush to outline the letters and add shadows.
Paint the center of the hearts for the females in A137 and when dry, write their names using A251. For the male members, use A287 and then put their names in A171.
TIP: The artist doesn’t paint the birds and flowers, but leaves them the white of the paper. She places a dot of A253 for the centers of the flowers.


Step 4. Assembly


Place the tree on a black piece of paper. Arrange the names on the branches along with the birds and the flowers. Place the banner at the bottom. Once you have everything the way you want it, glue the tree to the paper and all the other elements to the tree.


Step 5. Framing


Use the mat that comes with the document frame and glue it to your picture. Place the matted picture into the frame and it’s ready to give to your loved one!


Recommendations
- If your tree is too complex, it may be difficult to cut out. To make cutting easier, you can use a less complicated design or you can cut out the trunk and leaves separately, and then glue them together.
- By using a very small brush for painting the leaves, you’ll avoid smearing the gold paint onto the trunk or limbs of your tree.
- You can print your names on paper first and then transfer them by using a pencil to color the back of the paper with graphite and then tracing them onto the hearts; or you can cut out the printed names into the shape of a heart.
- Using a fineliner brush requires a steady hand. Practice painting the names on a scrap sheet of paper to get the feel of working with the brush before writing on the hearts and banner you’ll be using.
Nothing helps create a happy holiday like DIY gifts. Your loved ones will know you’ve taken time and put thoughtful consideration into this gift of genealogical art. We hope your holidays are merry and you’re inspired by this video.


