Table of Contents:
- Make Beautiful Art with Liquid Chalk Markers
- What Are Chalk Markers?
- Create Stunning Glass Art with Chalk Markers
- Recommendations for Beginners
Make Beautiful Art with Liquid Chalk Markers
Today’s liquid chalk markers are helping artists take their work in new directions. For crafters, chalk markers are opening a whole new world of DIY and decorating opportunities. When you look at how versatile and colorful they are you’ll understand why liquid chalk markers are one of the hottest art tools on the market.
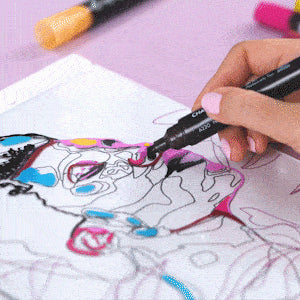
To help you get started, we’ve got some tips on using chalk markers along with a step-by-step guide to creating a stunning piece of glass art using Arteza Liquid Chalk Markers.
What Are Chalk Markers?
Unlike the old-school, dusty white sticks of chalk that come to mind when you think about chalk, today’s chalk markers are cleaner, more vibrant, and easier to use. In fact, a chalk marker isn’t solid chalk at all — it’s liquid chalk!
Liquid chalk is a highly opaque medium that contains bold pigments. This offers complete coverage to allow you to draw over an existing color in order to add highlights and details. Chalk markers can make more precise lines than regular chalk because they are as easy to hold and use as a pen or pencil. That’s one of the reasons they work so well for hand lettering. Best of all, these markers work on all nonporous surfaces including glass, metal, plastic, whiteboards, and chalkboards; so the creative possibilities are endless!
Tips to Get Started
- With the lid still on, shake the marker for 30 seconds before using to mix the liquid chalk and get it flowing through the tip. As you press the tip on a hard surface it becomes saturated with ink and ready to use.
- Liquid chalk markers work best when held at a 45-degree angle.
- Store your markers laying flat instead of standing upright.
- Markers do not dry instantly. Be careful not to smear your work by putting your hand on the painting or using a wet napkin to make corrections.
- Each pigment reacts differently to different surfaces. To ensure your color will work on the surface you have chosen, test it first.
- A good general rule is to work on larger areas first and smaller detailed areas last.
Before you get started, we recommend watching the video all the way through and reading the steps below to have the best understanding.
Create Stunning Glass Art with Chalk Markers
When used on glass, chalk markers can achieve a 3D effect. Watch as our artist creates a stunning free-standing glass artwork.
List of Supplies
-
Arteza Liquid Chalk Markers
A106 French RoseA117 Taffy PinkA241 Peaches & CreamA118 Ballerina PinkA101 Snow WhiteA220 NoirA192 EspressoA108 Wine BerryA170 Ultramarine BlueA138 MagentaA181 PurpleA207 Bright YellowA176 Dark BlueA153 TurquoiseA166 Pool BlueA404 LilacA029 BlueA107 WatermelonBackground: A267, A266, A1503, A151
- 7 Pieces of glass
- Glass Panel Display Stand
Create the drawing
The drawing the artist in the video is using was created using image-editing software. She separated the drawing into zones or sections by how light or dark the area on the face should be (you can also apply the Mosaic Filter for this).
For example, there is a zone where the dark color of the hair will be and a zone for where the dark shadow above the eye and under the nose will be filled in. There are also zones for where the light colors will be used, such as the ones on the forehead and cheeks. Create the zones on your drawing accordingly.
Print the drawing.
The artist uses the same drawing for each piece of glass. She works on the background first and then builds up subsequent layers by filling in the different zones of the drawing on each glass panel. To do this, decide which zone you are going to fill in on which pane of glass until you have divided the drawing into 7 layers.
Glass Layer #1 — Start with the background


Place a piece of glass over your drawing. Trace around the perimeter of the glass with a pencil to ensure the proper placement of all subsequent pieces of glass.
The first layer will be the pink background. The artist uses the French Rose marker, using straight horizontal strokes, adding Taffy Pink, Peaches & Cream and Ballerina Pink. Then, after dampening a napkin with water, she blends the colors to create a hazy effect.
With the Snow White marker and the wet napkin, she gently rubs over the white in spirals.
Glass Layer #2 — Fill in the face


Make sure to place the second piece of glass exactly on the pencil lines. On this layer, the artist begins by filling in the zone for the hair with Noir (black). She continues across the face using Espresso for the eyelid, side of the face, and neck. She uses Wine Berry for the ears, forehead, and nose. Next, the artist defines the cheekbone line with Brown and highlights it with a dark shadow in Noir as well as the head-neck line and the areas under the lower lip and on the chin. She draws the glare on the back of the head with Grape Purple and on the neck with Ultramarine Blue. For the areas where the light hits the face — forehead, nose, lips, chin, ear — she uses Magenta. To define the brightest highlights of the forehead, nose, and chin, she uses Ballerina Pink.
Glass Layer #3 — Add another layer of color


For the third layer of glass, the artist fills the same areas as on the second one, only changing the colors slightly and adding more highlights to the hair, face, and cheekbones. She uses Noir for the hair. She adds highlights to the hair and face with Purple and Ultramarine Blue. For the cheekbone, she uses Brown and Noir. Then, Wine Red, Noir, Purple, and Brown are used for the eye.
Notice how the artist outlines the hair with Wine Red, then moves to the nose and ear. She highlights the shadow on the neck with Noir, adding a glare with Ultramarine Blue and then fills it in with Brown and Wine Red. She adds more shades of Magenta and Ballerina on the neck, nose, and lips.
TIP: After creating the first two layers, hold each piece of glass up toward the light to see if there are any unpainted areas. Make sure all areas on both pieces are completely covered.
Glass Layer #4 — Add the foliage


After lining up the glass precisely on the pencil lines, outline and fill in each leaf with Snow White. Add Dark Blue, Turquoise, Pool Blue, Ballerina Pink, Lilac, and Blue randomly, blending with the other colors while wet. Overlap these colors with the same colors as the portrait and the T-shirt. The artist uses Snow White to draw the T-shirt.
Glass Layer #5 — Fill in the highlights


For this layer, the artist works on only the light areas — the profile, nose, eye, lips. She also adds highlights to the face with Dark Blue in the same areas as on the third layer. She draws the ear with Noir and Magenta, contours the hair with Noir. She defines the profile of the face with Wine Red and outlines the nose and eyes with a line using Noir. Next, she fills in the lips, forehead, eyes, nose, cheekbone, and neck with French Rose and defines the shadow with Brown. She draws the light with Watermelon. She then draws flowers in some of the same areas as she did with the fourth layer, but without filling all of them in.
Glass Layer #6 — Add more details

For the sixth layer, the artist defines the profile one more time, but this time with Ballerina Pink. Working thoroughly on the eye and forehead with this pink, she then adds highlights with Pool Blue and draws the ear with Watermelon. She emphasizes the shadow with Noir by outlining the hair, lips, and eyes, then adds Bright Yellow for highlights that pop. She makes squiggly lines with Noir to represent the model’s curly hair.
Glass Layer #7 — Add the finishing touches


Once the final seventh layer is placed over the drawing, the artist uses Bright Yellow to draw the profile of the face and the flowers without filling them in. She makes all the highlights with Snow White using a variety of techniques such as points, lines, and spots. She outlines the eye and the ear with French Rose, then draws in curly hair closer to the temple, the eye, and the nose with Noir. She adds a highlight to the ear with Pool Blue, and contours the shape of the face with French Rose. The artist then outlines the flowers in Snow White and also uses it to add small highlights.
Display Your Art!
Once all the glass panels have dried, carefully place them on the display stand in the correct order, leaving a 0.5 - 1cm space between the panels. Placing them apart like this is what will create the look of three-dimensional artwork.
Recommendations for Beginners
- Start with simple sketches and geometric shapes.
- Before creating glass art with the markers, practice on chalkboards to get a good feel for how they work.
- When you begin using chalk markers to do the project shown here, place the layers on the wooden stand as each panel dries so you can see the way one layer relates to the next.
- Keep a wet cloth on hand to make corrections.
We hope this guide and video have inspired you to see chalk markers in a whole new way and that you’re as excited to start creating with them as we are!


6 comments
We’re love hearing when artist try even the unconventional mediums like these! ♥
Yes that is really fun when making a painting with liquid chalk markers.
Hey, Kimberley! Rest assured that the chalk won’t get smudged easily once dry unless they’re wiped off intentionally. We’d love to see this technique done with acrylic markers, too!
This is really cool! I’m curious if anyone’s done this with acrylic paint markers. I would be concerned that the chalk on the glass plates would easily get smudged or run if they got wet. I LOVE how this turned out, though!
Hi. it was pretty interesting read about <a href=https:https://cedar group.net/collections/liquid-chalk-markerskeywords=cedar+markers>chalk markers , keep posting intriguing stuff like this!