
Table of Contents:
- Paint Wooden Eggs for Easy Easter Decorations
- 12 Designs to Add to Your Easter Decor
- Recommendations
Paint Wooden Eggs for Easy Easter Decorations
Using eggs to mark an important event has been a tradition since the pagan rituals of the 13th century, when they believed eggs to be the symbol for life. The early Christians may have been the first ones to color eggs, specifically by dyeing them red to signify the blood of Jesus and to symbolize his resurrection. Today, most of us decorate eggs at Easter to help us celebrate and usher in spring. At this time of the year, you’ll see colorful egg wreaths, eggs used in flower bouquets, and adorning little egg trees. I like to put some in baskets or bowls that I place in the kitchen, family room, and my studio.
Decorating eggs is an easy project anyone can do. It’s a fun activity for kids and grown-ups alike, and by using wooden eggs instead of the real thing, you can decorate to your heart’s content without worrying about cracking or breaking them. With the help of the Arteza artists, I’ve assembled 12 different ways to paint eggs that I know you’re going to enjoy doing as much as we do!
12 Designs to Add to Your Easter Decor
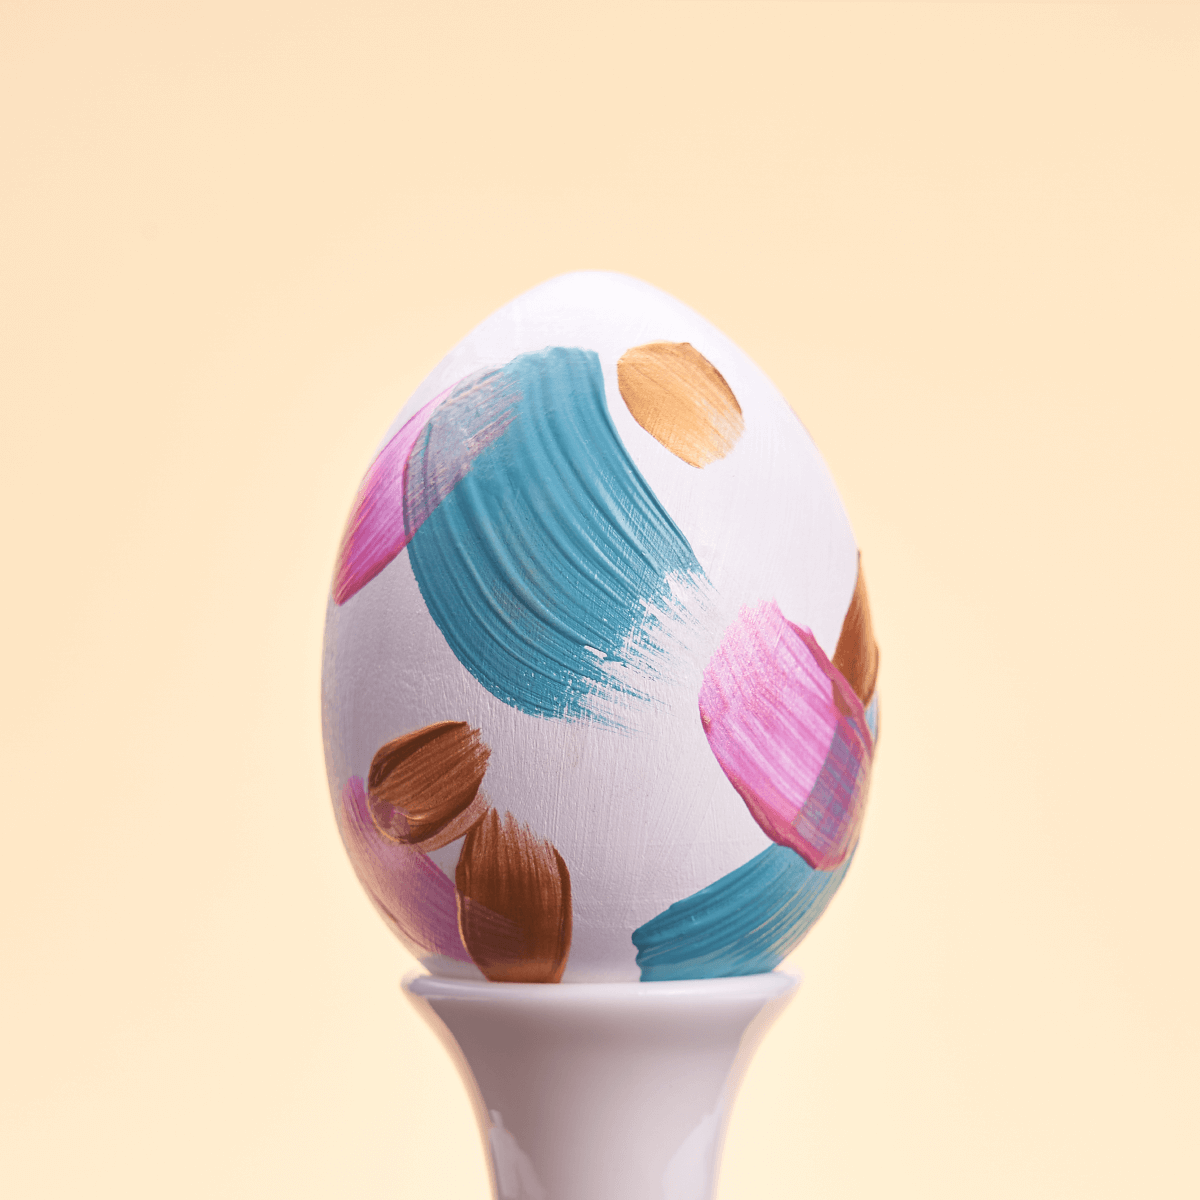
Splashy Strokes
Paint the entire surface of the egg white. Using green acrylic paint, make broad strokes randomly on the egg. Next, overlay those strokes with ones using pink iridescent paint. Last, add small intermittent strokes of gold metallic acrylic. I love how contemporary this looks and how it elevates the egg to a true piece of art.
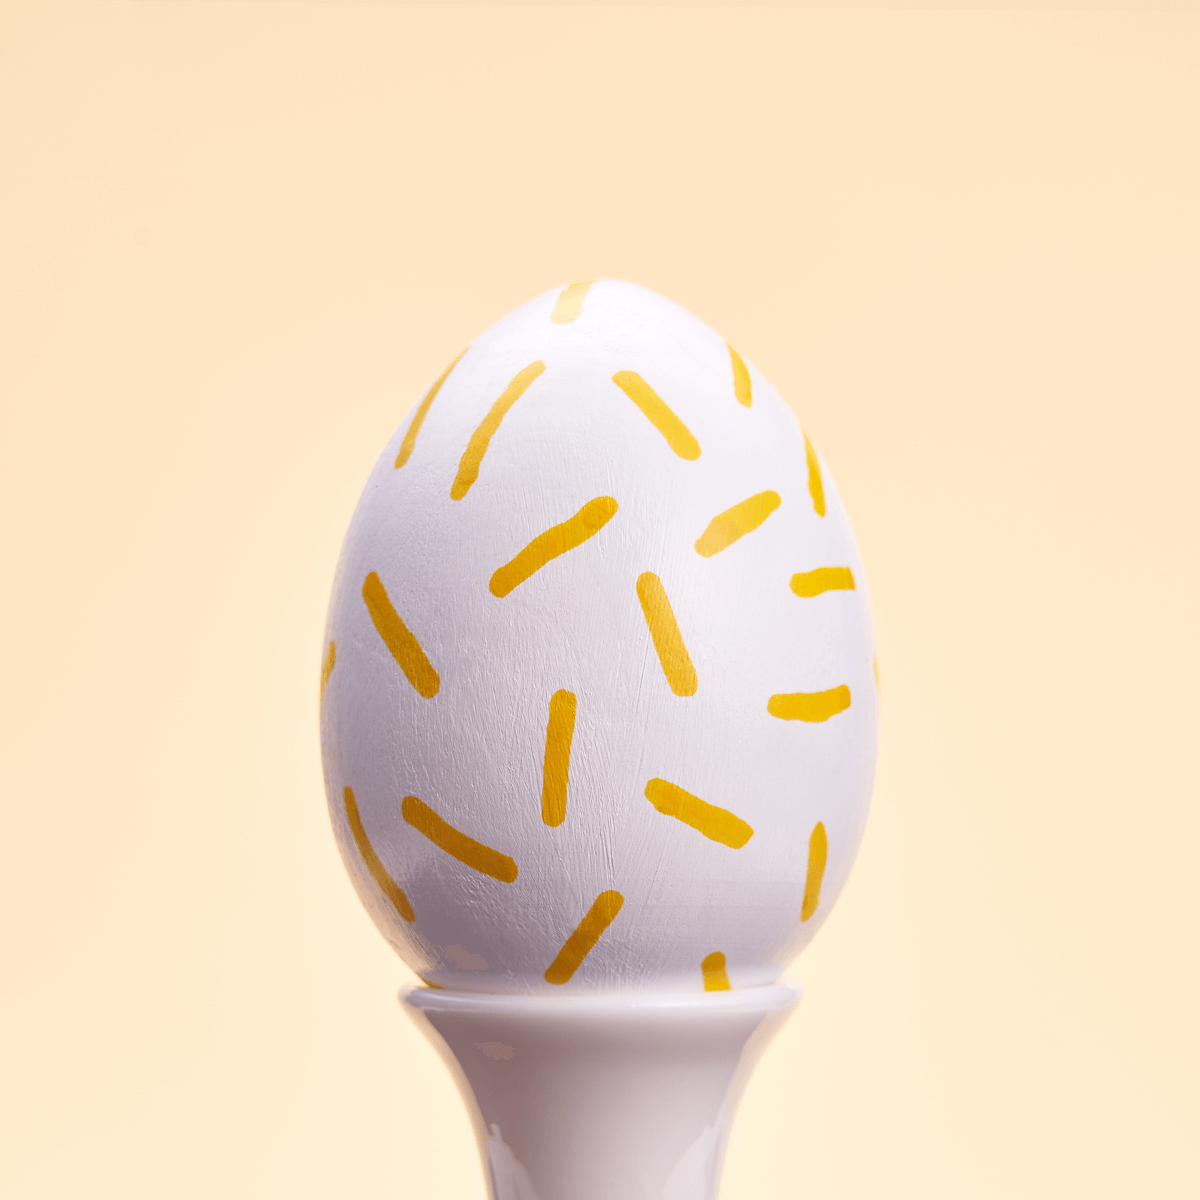
Graphic Marks
This is what I tell my friends who say they’re not good at art. If you can draw a line, you can make art and this egg proves it. It was painted white first, and then simple, straight lines with a bright yellow acrylic marker were placed in alternate directions to create this abstract design.
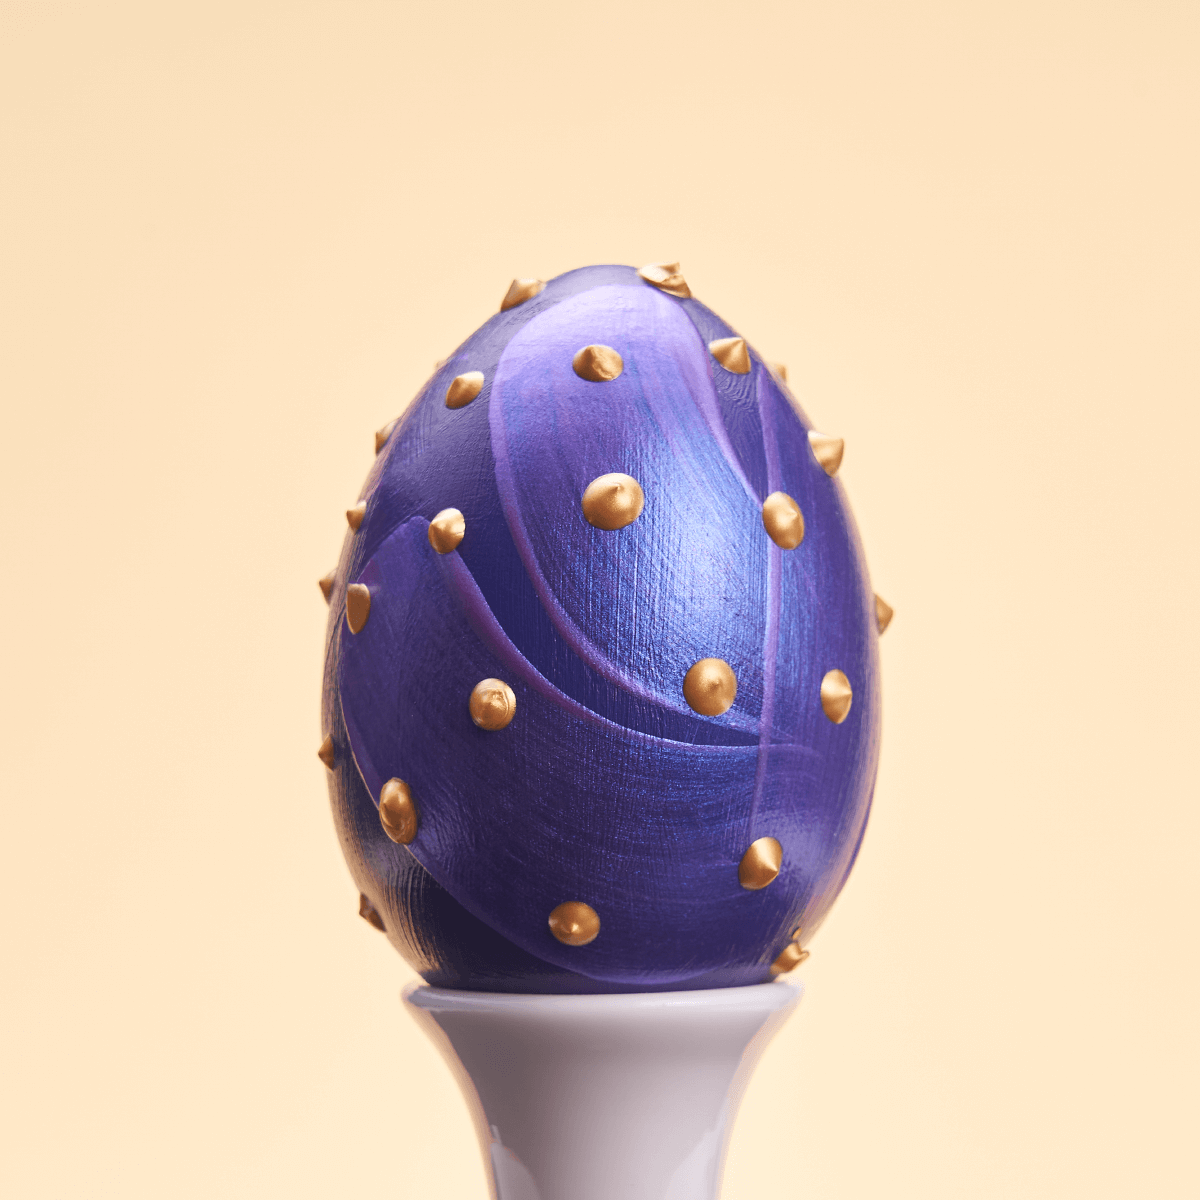
Gold Dots
I may not be able to afford a Fabergé egg, but using puffy fabric paint I can create gold dots that look like jewels. Mix the paint to get a deep blue and paint the egg first. Once dry, put irregular strokes of iridescent purple and then let it dry completely. Finish it off with gold paint dots that puff up and add that royal touch.
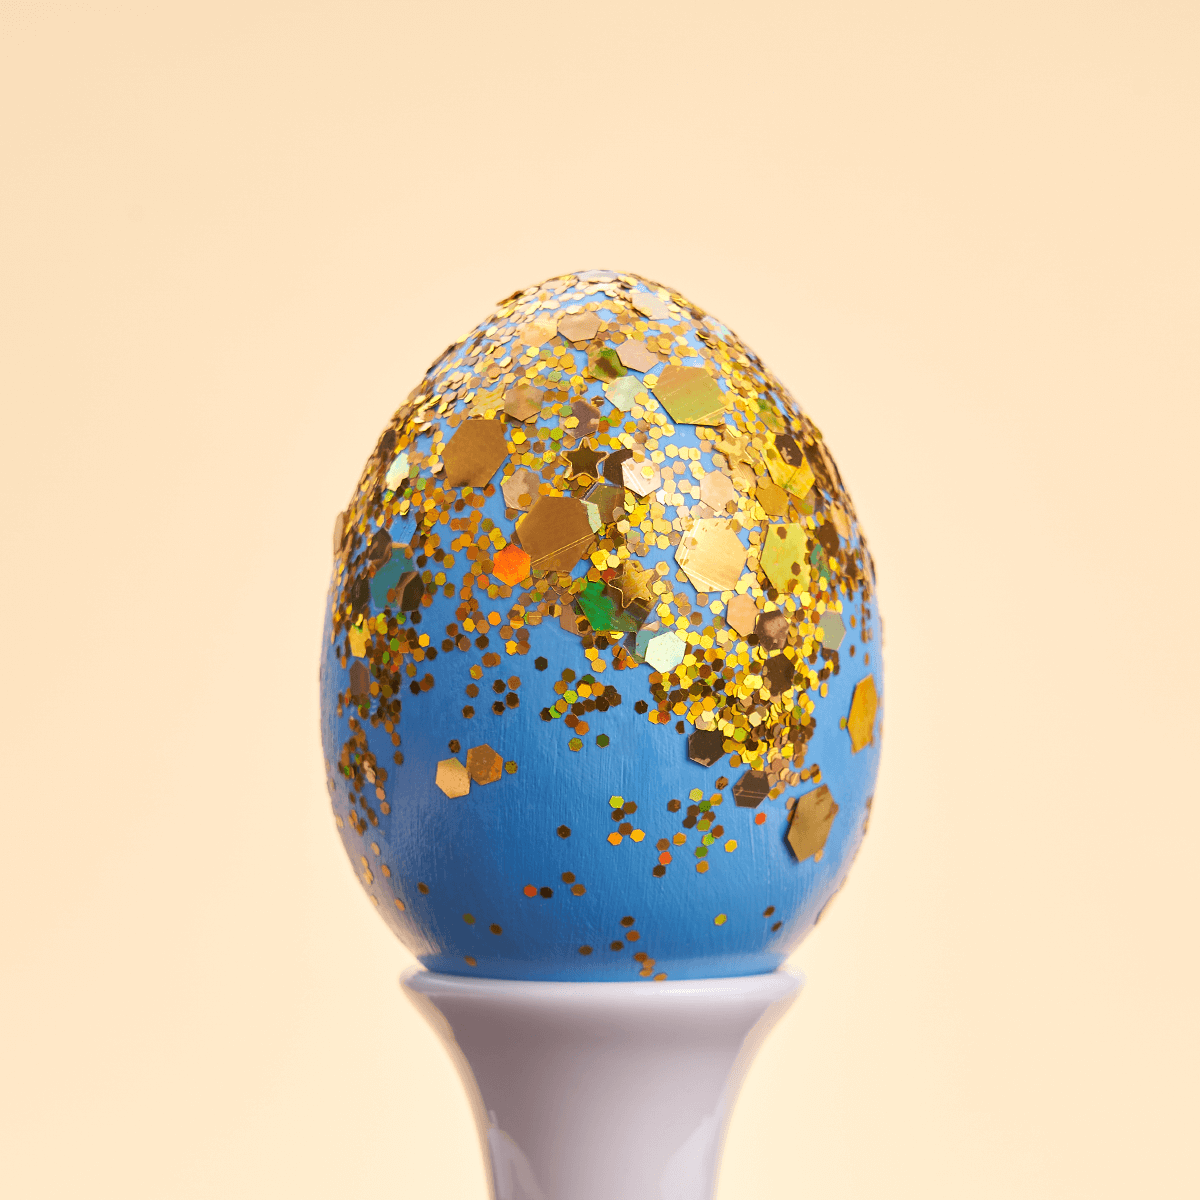
Glitter Egg
I believe everything looks better with a bit of glitter and the same goes for eggs. To get this bedazzled effect, start with painting the surface with blue outdoor paint. Then brush on some white school glue, starting with full coverage at the top but dwindling the amount of glue as you get to the center. Sprinkle the glitter all over the egg, press it with a paper towel, wipe off the excess, and voila!
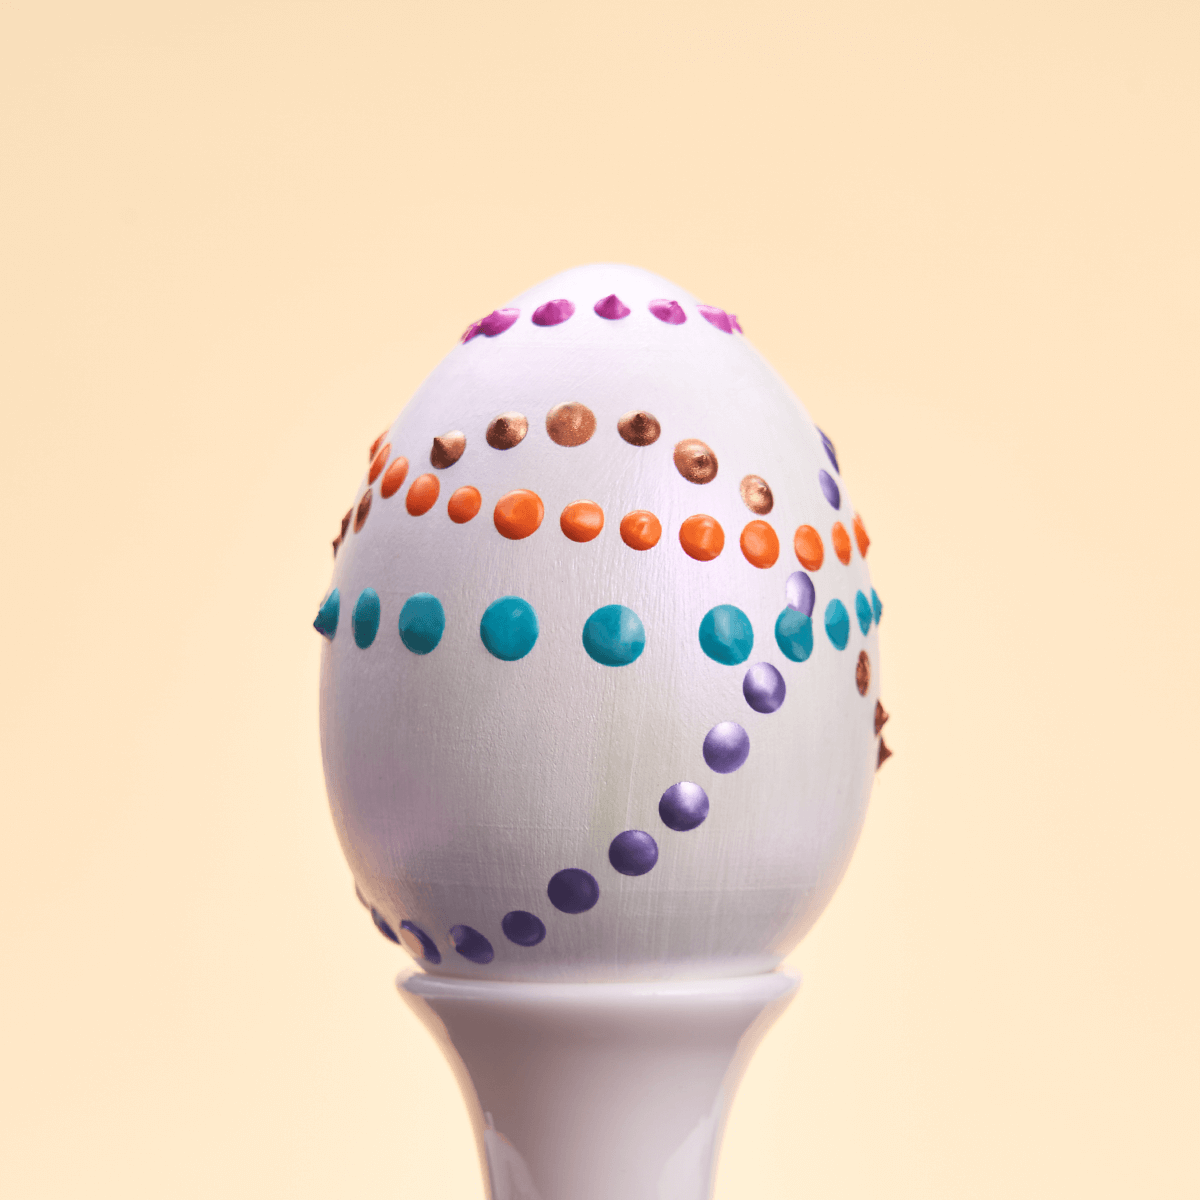
Puffy Dots
Here’s a whimsical way to dress up your egg. First she paints it white, then adds a layer of iridescent paint before using fabric paint to apply a series of dotted rows. Notice how the artist didn’t make straight rows, but instead looped them around and over one another. As the dots puff up, they look like beads on necklaces draped on the egg.

Bashful Bunny
Put this sweet little bunny face on your egg by priming it white and then sketching the outline of the bunny’s head and ears. Paint acrylic around the outline with orange. Use pink to denote the inside of the ears and the rabbit’s rosy cheeks. With a black acrylic marker, go over the outline and draw in the nose, mouth, and eyelids with lashes. I just love how precious this little bunny looks, don’t you?
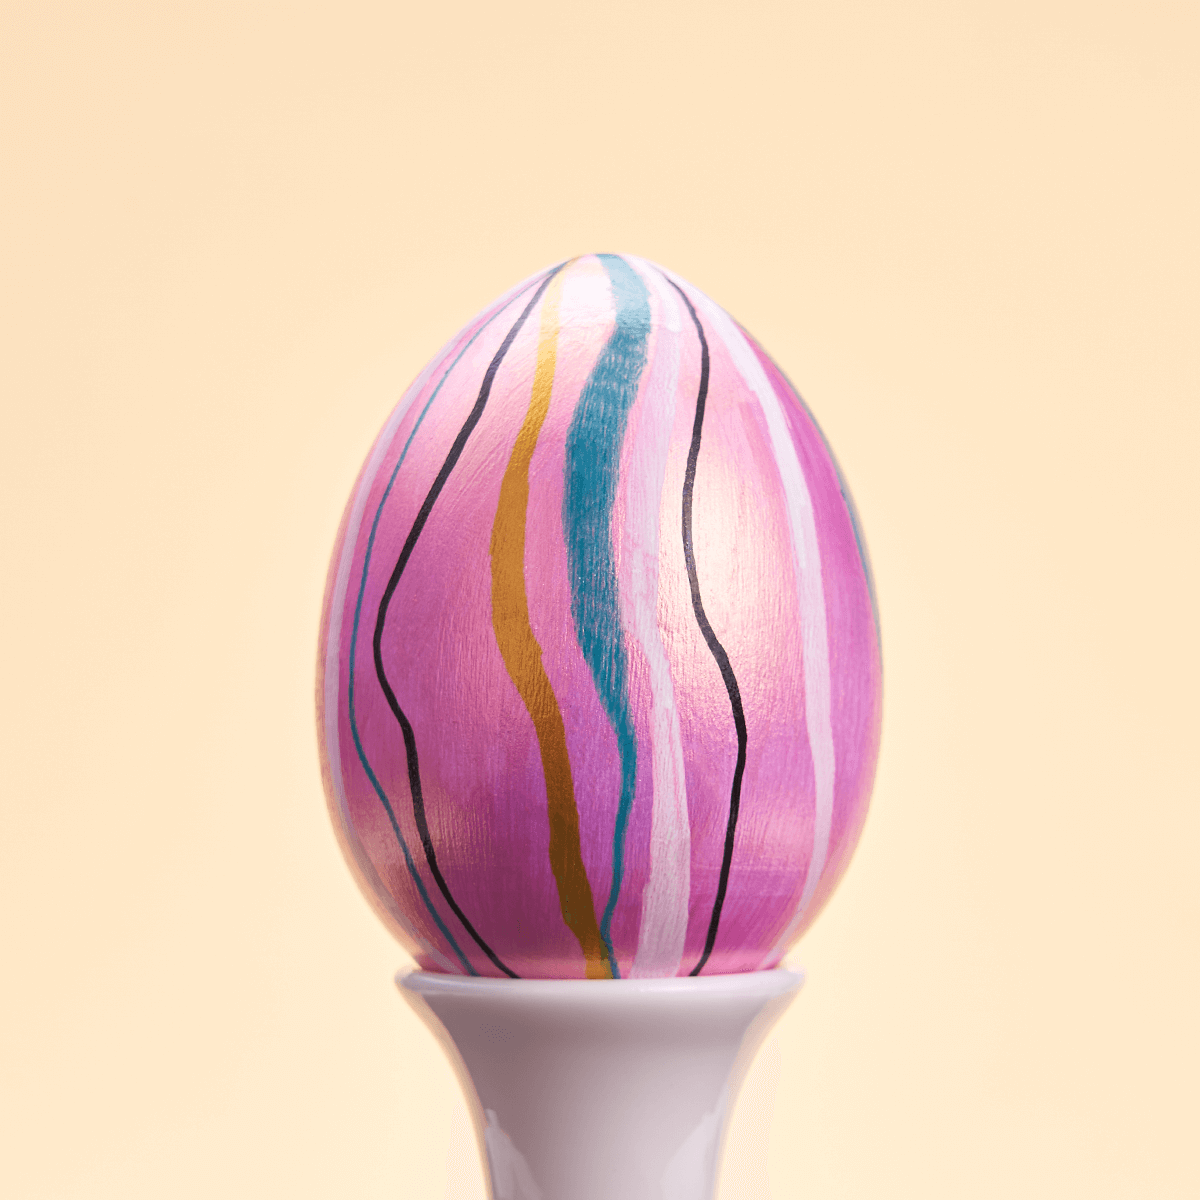
Artful Stripes
Once again, here’s a very easy, yet artsy way to paint an egg. Start with pink iridescent paint on the outside of the egg. Look how it already has a great shine to it! Using differently colored acrylic markers—such as the teal, gold, white, and black ones used here—start at the top of the egg and draw lines down to the bottom. Make each one different, adding curves and varying the widths to create a classy and modern design.

Baby Unicorn
I’m in love with unicorns! So any chance I get to include them in my art I take it, even when it comes to Easter eggs. This baby unicorn is not as hard to make as it looks. Just paint your egg all white. Then paint the bottom half pink. Use polymer clay in gold, pink, yellow, and green to roll and cut tiny pieces to shape into flowers, leaves, and the horn. To add a touch of glimmer to the horn, use a paintbrush to dust it lightly with gold mica powder. Draw in the little smile, eyes, and eyebrows with a black marker.

Marble Egg
Marbelizing eggs is pretty simple. All you need is an egg primed white, two shades of your favorite color (we used blue), and a paper towel. For best results, use pouring paint for this. Dip the towel in one of the colors and dab onto the egg. Dip and dab in the other shade. Keep alternating until you get the amount of marbelizing you want. The texture of the paper towel helps give it a realistic look.
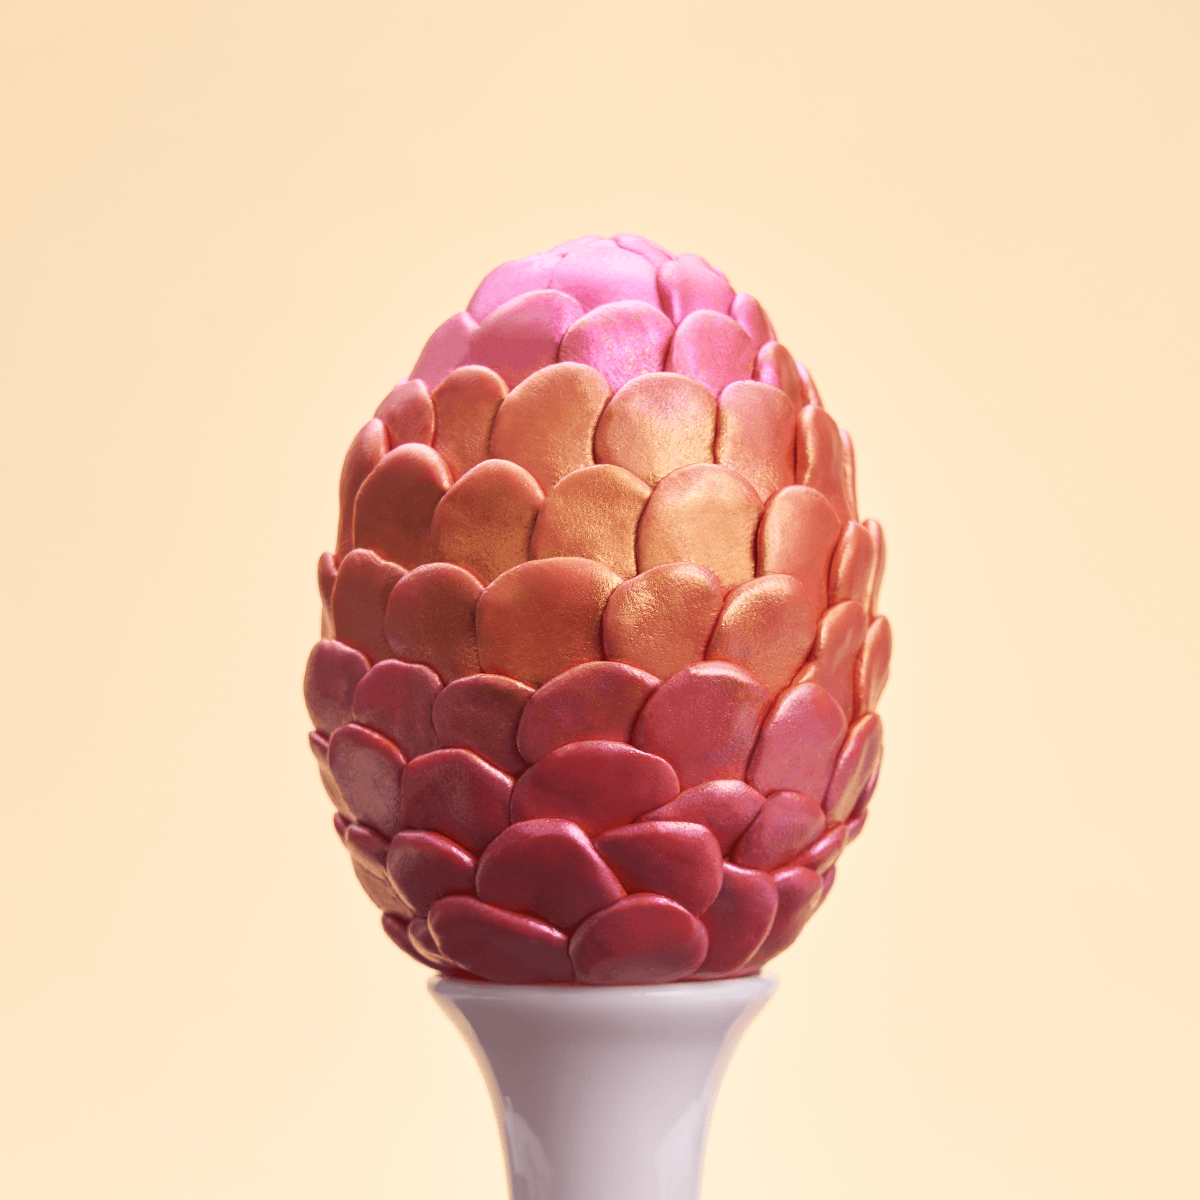
Pretty Pinecone
Turning an egg into a magical pinecone is easy when you use the Arteza Polymer Clay, Set of 42 Colors + Tools & Accessories. Here the artist used orange and pink clay to get the base color. She created the scales by making a long, thin roll and cutting them into sections. She formed and applied these in an overlapping pattern, then used gold, purple, and white mica powder to give it that gleam.
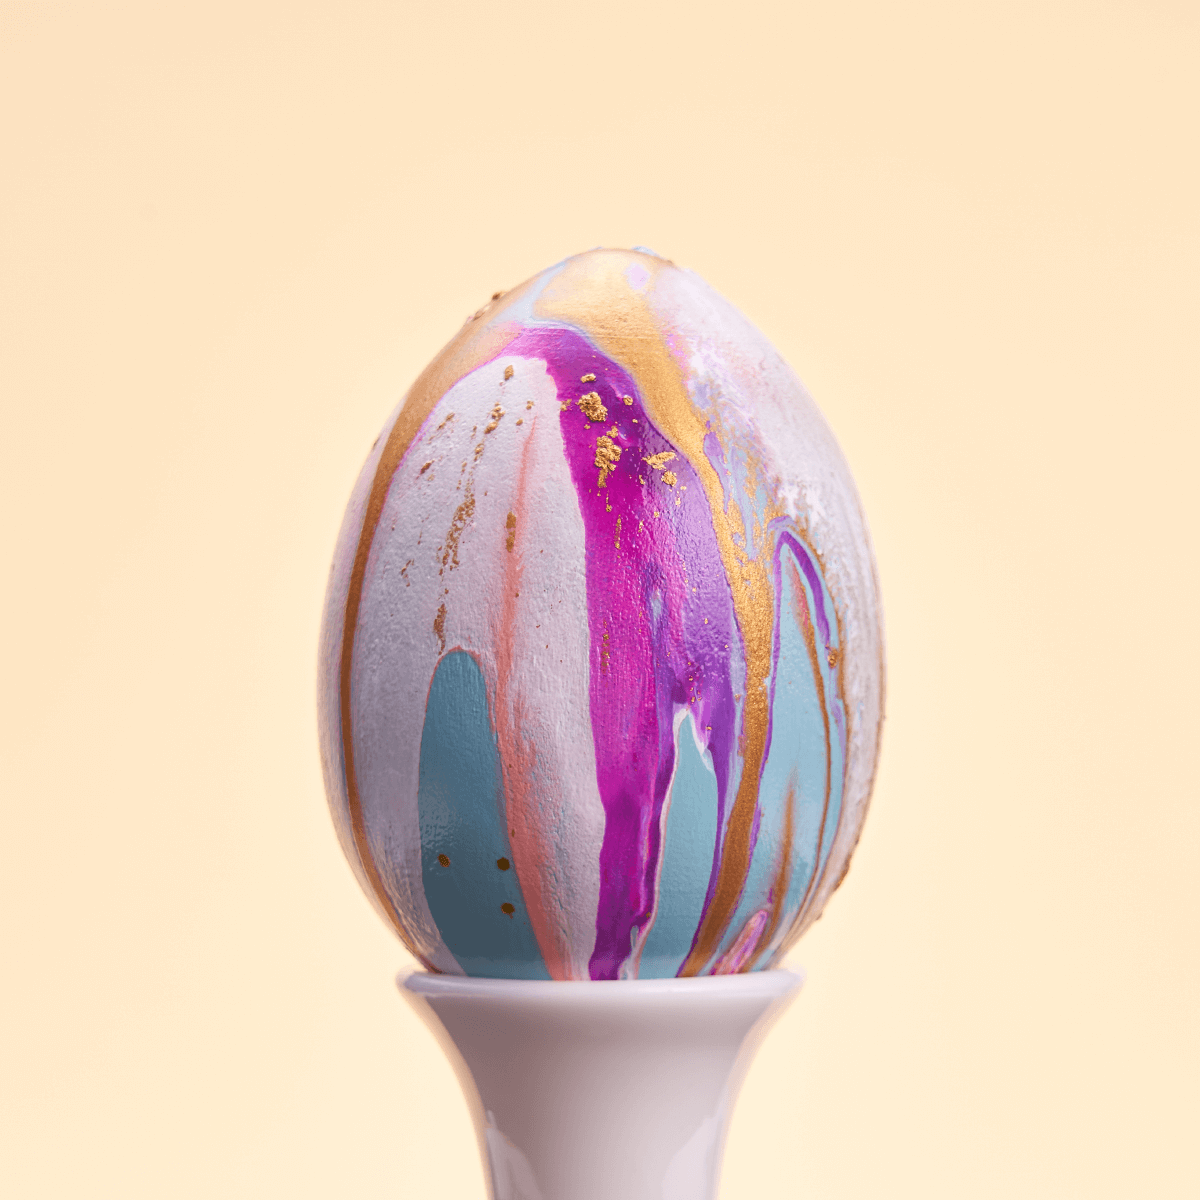
Poured Paint
This is one of my all-time faves for decorating eggs because it does not get any easier and you cannot make a mistake, so don’t be afraid to go for it! First, prime the egg with a coat of white paint. Then, using any colors you like (our artist used turquoise, purple, gold, coral, and white), pour the paints directly over the egg, alternating colors. Add a dash of the mica powder and let dry. Acrylic Pouring Paint has the consistency you want to get stunning results.
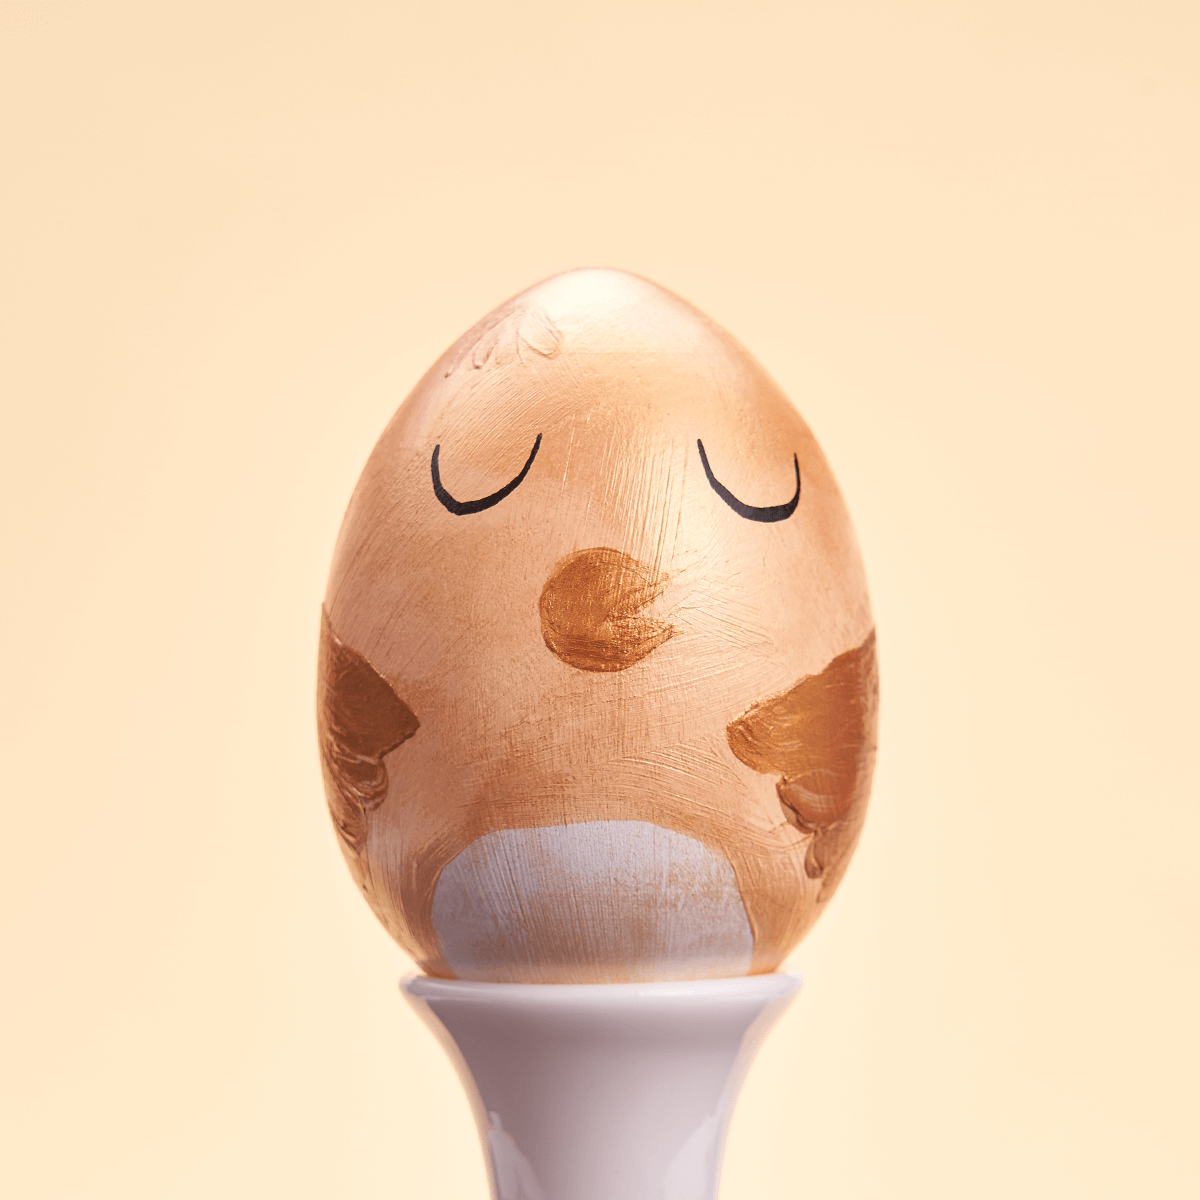
Sleepy Chick
After priming with white paint, paint the egg with cream outdoor paint. Next, rub the surface with gold mica powder, then dust and polish with the purple powder. Paint the wings, beak, and a few feathers with dark gold paint. Draw the eyelids with an acrylic black marker. How adorable is this?
Recommendations
- It’s important to prime wooden eggs if you don’t want to see the grain of the wood through the paint. You can use white acrylic paint for this.
- You’ll make it easier to experiment with all these designs and more if you go ahead and prime a bunch of eggs at one time. Just line them up, paint each on white, and set them aside to dry. By the time you get to the last one, the first one will be dry enough to start your design.
- For the pouring technique, we recommend covering your work surface with a drop cloth and wearing an apron.
- To keep your designs from wearing off over time, use a clear varnish and seal each one.
You don’t have to wait until Easter to make decorative eggs. Any season is a good time to have them around. You can make red, white, and blue ones for patriotic decor, orange and black for Halloween and red, green, and gold to include in your Christmas decorations. Pink and blue ones would be so cute in a baby’s room or how about using them in white and gold as place cards for your wedding reception? They are so much fun to make, I encourage you to give it a try! We’re really interested to hear about your experience painting eggs, so please leave a comment below!


4 comments
You can find wooden eggs at your local craft store or online stores that offer them!
Absolutely! However, be sure to prime your plastic eggs to ensure that the acrylic paint will stick to them.
Can you use plastic eggs???
Where is the best place to purchase wooden eggs?