
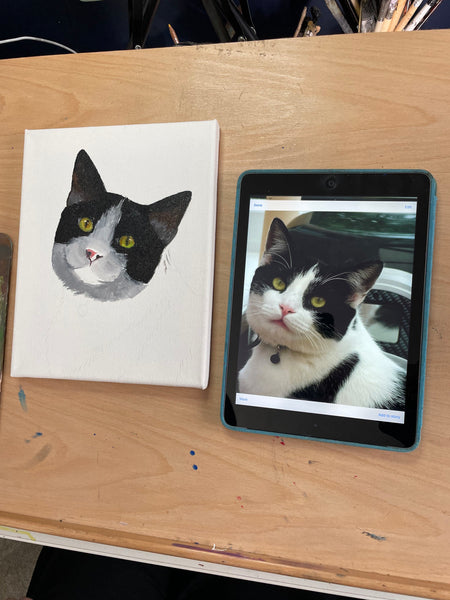
Sarah Stribbling, one of our Fuel Your Creativity artists, is known for her realistic oil paintings of wildlife. Read more about her inspiration and how she became an artist here. Before Sarah can add precise details to her oil paintings, she needs a good base layer. In this technique video, Sarah will be creating a tuxedo cat using Aretza Oil Paints and Arteza Paint Brushes. Keep reading to make the perfect base coat for your paintings!
Supplies Needed:
- Oils Paints
- Paint Brushes

Base Layer
Sarah chooses Arteza's Oil Paint for its smooth and silky texture that results in an excellent application on her canvas. Starting with the eyes, outline the eye shape with black paint and a thin paintbrush. This rough stage doesn't have to be neat because it will be blended at the end. Additionally, Sarah does not thin the oil paint when creating the base layer.
After one eye is complete, dip a flat brush in black paint and start painting the rest of the piece. Sarah calls this the 'messy stage' because you don't need to worry about highlights or details, and it doesn't need to look finished. She continues this process for the cat's other eye, facial features, and body. Now that the rough base layer has been created, we can move to blending.
Tip: For Sarah's base layer, the colors are always a bit darker than in the reference photo, and then 2 to 3 days later, when the piece is dry, she'll add the fine fur details (to read that blog, click here)

Blending Base Layer
Grabbing a large soft, fuzzy brush (that is dry), Sarah starts blending in the direction of the fur of her subject. She wipes off any excess on a paper towel between strokes. This light motion combines all of the areas, so you do not see any canvas underneath the subject. Additionally, blending helps with the detail layer by having a guide for the direction of the fur.
Tip: Inspect if any furs from the brush came off the painting, and gently remove any with a dry, clean paintbrush.
Painting Background
Sarah uses a thicker flat paint brush and light blue paint for the background . She makes sure the tooth of the canvas is fully covered by ensuring the oil paint is not too thin. Once the background is complete, grab a small dry brush, and blend the edges between the cat and background. Sarah consistently wipes the brush on a dry paper towel in between blends. The next, and last step is to use the large fuzzy brush again to blend the light blue background. The key to this is blending outward with the background and blending inward for the area around the cat so that the dark color of the cat isn't going into the light background.
Tip: Keep in mind the borders of your subject when painting the background so that you're not putting a dark color against the dark part of your painting (same for any light background and light part of a painting)
Now that you've learned how to make a base for an oil painting, you can move on to the detail phase! Read Sarah's detailing techniques blog here. We hope this has helped you learn some tips and tricks to create the perfect base for your next painting. Make sure to share your artwork with us!


