
Want more great inspiration? Check out our other art camp tutorials!
- Art Camp Day 1 - How to Draw a Toucan in 7 Steps
- Art Camp Day 3 - Dive Into Acrylic Art with an Adorable Pool Painting
- Art Camp Day 4 - Seashell Drawing Using Arteza Drawing Pencil Set
- Art Camp Day 5 - How to Draw Ice Cream with Colored Pencils
- Art Camp Day 6 - Learn to Make Polymer Clay Jewelry
- Art Camp Day 7 - The Key to Making Art with Alcohol Based Markers
- Art Camp Bonus Day - 7 Easy to Draw Pictures Kids Will Love!
Table of Contents:
Let’s Paint a House with Gouache
On this second day of Arteza Art Camp, we’re going to be looking at a medium you may not be familiar with— gouache. Gouache is a type of watercolor paint that is more opaque and not as “see-through” as the watercolors you’re probably used to using. Its chalky nature allows you to get more solid colors without the glossy finish of acrylic paints. Yet, you can still water it down to get those lovely translucent layers watercolor paint is known for.
For your convenience, I’ve added a list of the actual colors I used in the video. These are all in our Arteza Premium Gouache Paint Set and I think you’ll find these paints both vibrant and easy to work with. That’s why they’re my favorites!
List of Supplies
- Arteza Premium Gouache
- Arteza Mixed Media Pad
- Paintbrushes: Flat, Round, Detail/Liner
- Palette
- Paper Towel
- Water
Adding Gouache to a House Drawing
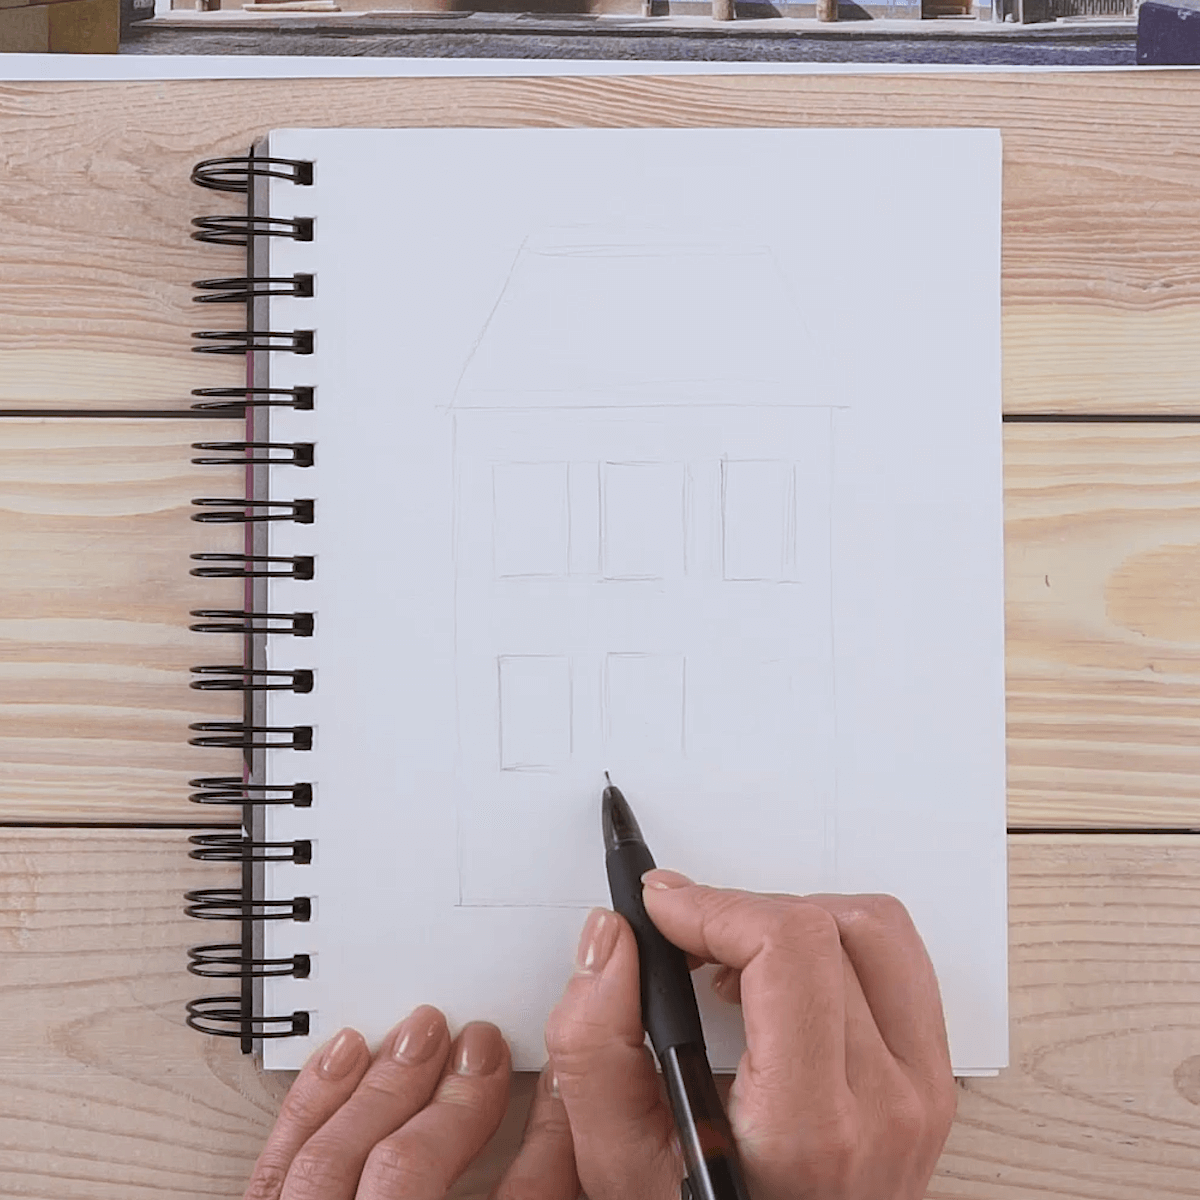
Step 1. Draw the House
To make my sketch of the house, I am using a picture from the internet as my reference. I decide to do the blue house, but I’m going to add a few changes to make it uniquely my own.
The roof is a trapezoid, so I draw it first. The house itself is a rectangle. Next, I add in the windows and the front door, using smaller rectangles and draw the chimney.

Step 2. Add the Landscape
Next, I add two potted shrubs in front and place an elongated tree on the right. At the bottom, I add a stone pathway with a few small ovals on the ground in front of the house. Then, I draw a couple of clouds in the sky.
Now that my sketch is complete, I erase the hardness of the pencil lines so all that remains is a light outline.
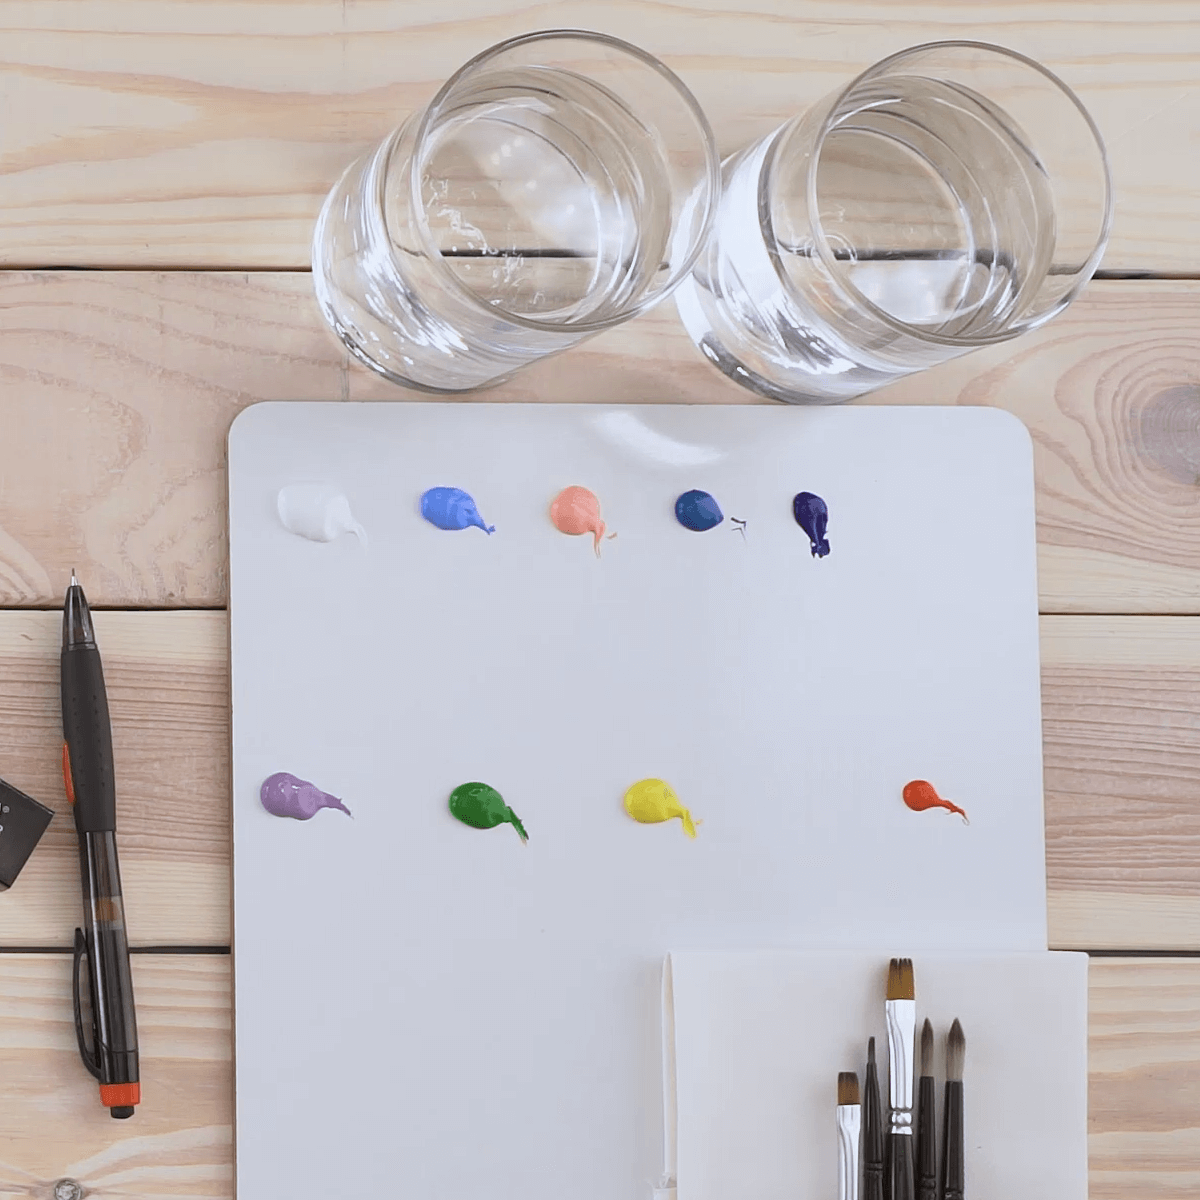
Step 3. Set Up the Palette
It’s time to paint! The first thing to do is to set up your palette with all the colors you’re going to use. For this painting, here are the colors you will need:- A163 White
- A154 Sky Blue
- A133 Peach
- A138 Aegean Blue
- A110 Ultramarine Blue
- A137 Mauve
- A164 Sap Green
- A102 Lemon Yellow
- A145 Vermilion Red
- A128 Latte Brown
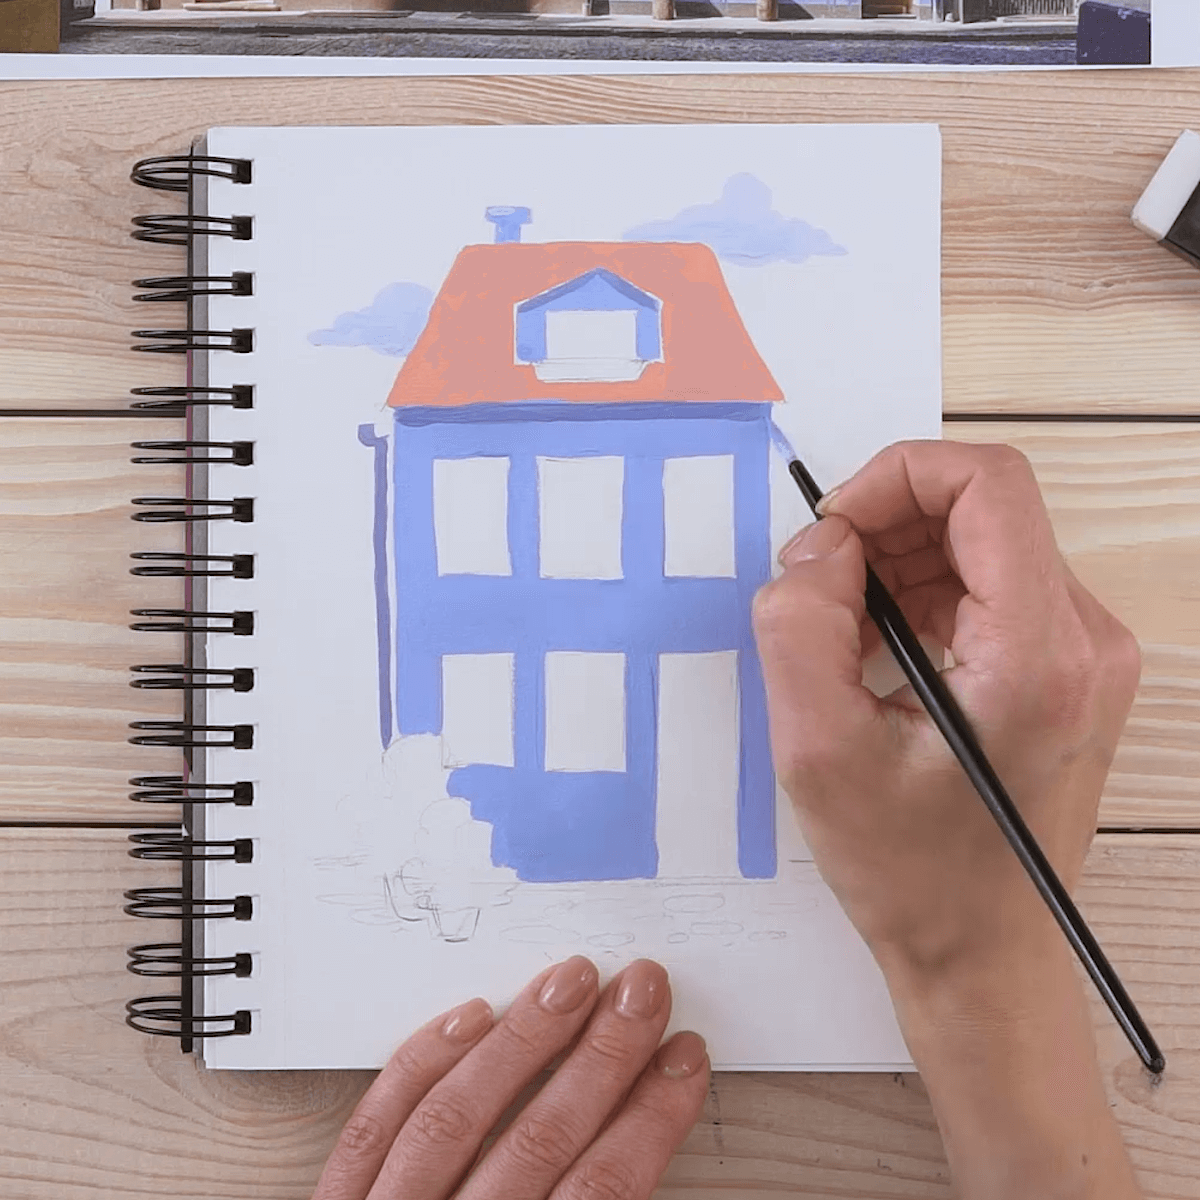
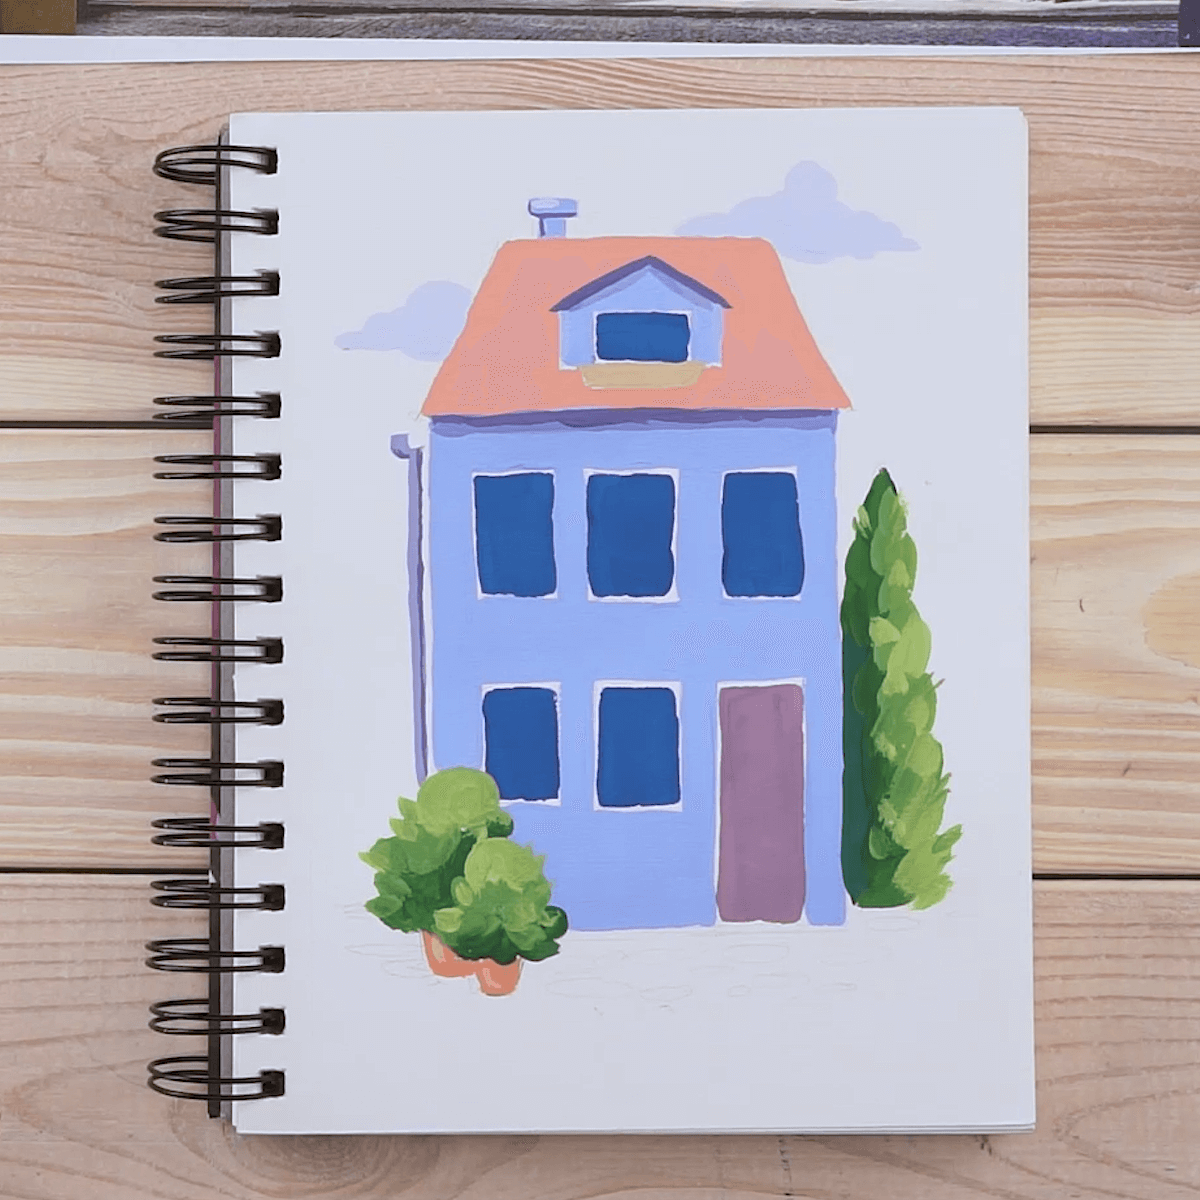
Step 4. Paint the Large Shapes First
For all the rectangular shapes or forms that have straight edges, I prefer to use my flat brush. This gives me a nice even line and fills in the area quickly and smoothly.
I begin with the roof with A133. For the facade of the house, I mix white with A154. I also use this hue on the front of the attic window and the chimney. I add more white to get a lighter shade of blue that I use for the clouds.
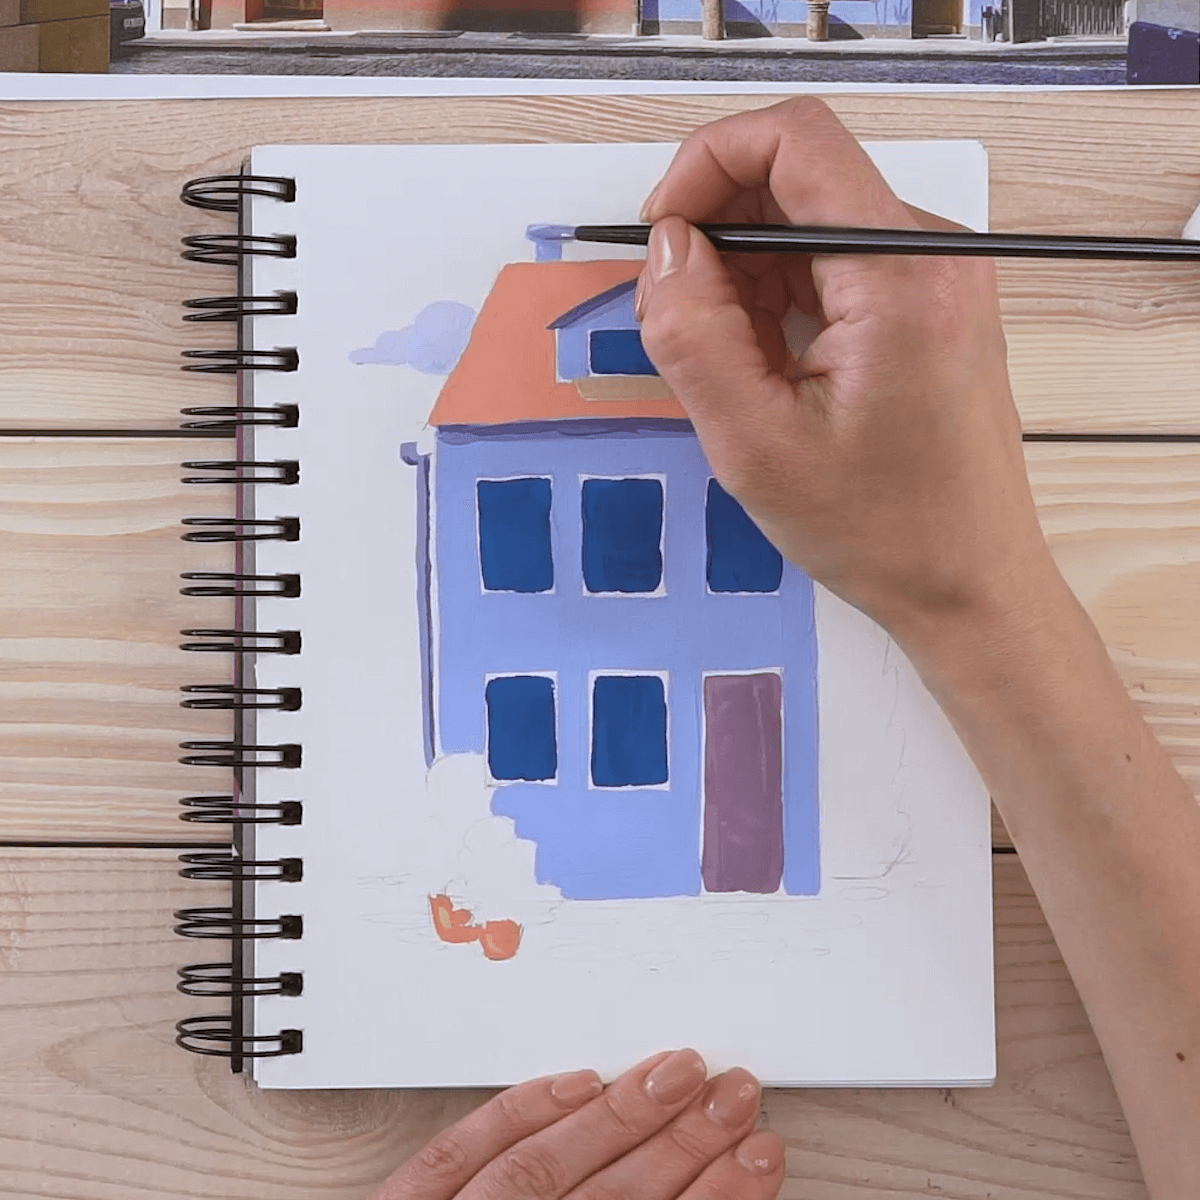
Step 5. Fill In the Exterior Details
Next, I work on filling in the flower pots next to the house with a mix of A145, white and a bit of A102. I decide to have one of the upstairs windows open with a small plant on the windowsill, so I paint a tiny pot there, using A128 mixed with a tad of white.
I mix together A138 and A110 to paint the inside of all the windows. For the door, I give it a coat of a mixture of A137 and A133. Using A137, A110 and white, I paint the roof of the attic window. With that same shade, I place a darker shadow under the house’s roof, a shadow on the waterspout and shadows on the chimney. I paint the attic window more carefully, using the same colors that were used to paint the front of the house.
Step 6. Color Tree & Shrubbery
It’s time to work on the tree and shrubbery. I add rows and layers of A138, A110, A164, A102 and white. Note how I’ve gone from the darkest color to the lightest. This way I will end up with bright highlights.
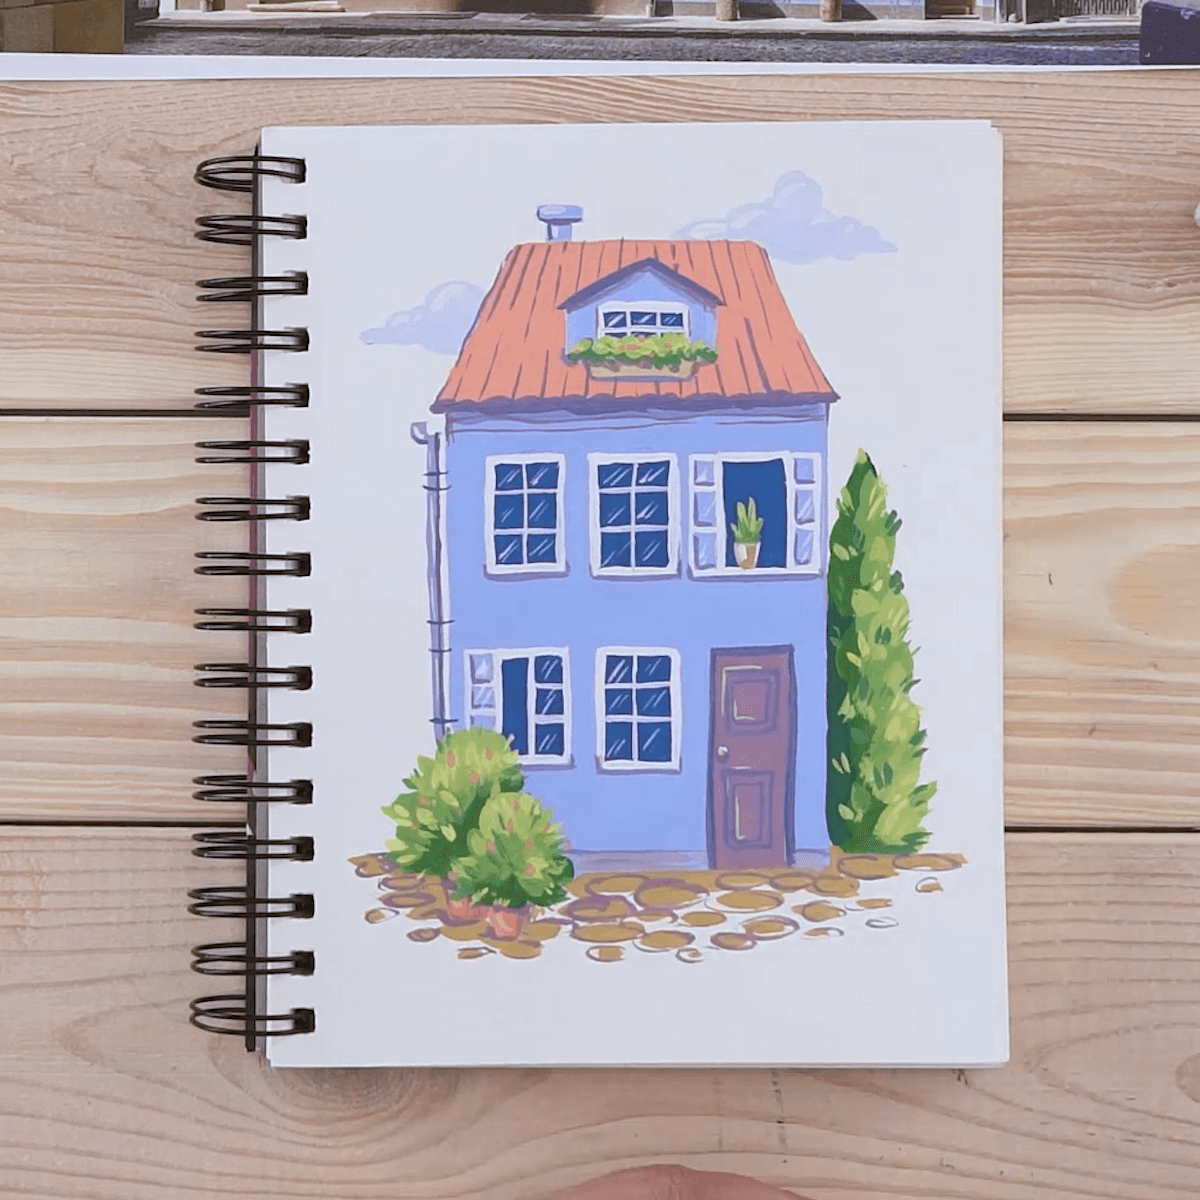
Step 7. Add the Details
The details I’ll add will really make this look like a house, so I start with the window frames, painting them in white. To give them even more life, I add some open shutters. Underneath all the windows and the shutters, I use A137 for shadowing.
On the second-floor window, I add plants to the little pot as well as in the window box below the attic window. I continue with details on the bushes, adding leaves and shadows under those pots. I detail the door.
On the ground in front of the house, I have drawn small ovals to imitate stepping stones. These I color in with A128 and to give them more volume, I place accent shadows with A137. Next, I add some details to the drainpipe that runs along the side of the house.
It’s good to take a moment and step back from your painting to see if there’s anything else you need to add or adjust. This is when I supplement with shadows and overtones, detail the roof and add even more leaves to the plants.
Hooray! You’ve just completed an adorable house painting in gouache.
Recommendations
- When using gouache it’s best to use a heavier paper of at least 140lb (300gsm). This will ensure your paper won’t warp once it gets wet.
- For my initial sketch, I like to use an HB pencil or one with a very hard lead. This gives me the lightest lines so I don’t worry about being able to see them once the painting is done. They are also very easy to erase as I work on my drawing.
- Whenever working on any complex object or reference, I mentally divide it into simple forms, then it will be clearer where to start and how to construct it.
- Sometimes before I start a project, I’ll make a swatch chart to see how the colors will actually look on the surface I’ve chosen. It’s simple to do; just make a grid and fill in each box with the colors you’re thinking about using. Keep this close to your work and you’ll have a really handy reference guide.
I hope you’ve enjoyed learning how to paint with gouache as much as I’ve had teaching you! Practice makes perfect, so the more you give it a try the better at it you’ll become. Although I can find lots of images on the internet, I really prefer to take my own pictures. If I’m out and about and I see something I think will make a good painting, I just take a quick snap with my phone. Once at home, I can either use the one on the phone or print it out. Doing it this way, I end up with an original painting that has so much more meaning to me.
Stay tuned for more art camp tutorials and check out all our art camp blogs!


2 comments
Great tutorial!! Where can you get the palette you use to mix the paints? Thanks
Thank you so much for his tutorial, it really was a lot of fun and much inspiring! <3