
- Art Camp Day 1 - How to Draw a Toucan in 7 Steps
- Art Camp Day 2 - Create a House Drawing & Paint with Gouache
- Art Camp Day 3 - Dive Into Acrylic Art with an Adorable Pool Painting
- Art Camp Day 4 - Seashell Drawing Using Arteza Drawing Pencil Set
- Art Camp Day 5 - How to Draw Ice Cream with Colored Pencils
- Art Camp Day 6 - Learn to Make Polymer Clay Jewelry
- Art Camp Bonus Day - 7 Easy to Draw Pictures Kids Will Love!
Table of Contents:
Draw a Cup of Sea with Art Markers
I don’t know about you, but I’m really looking forward to going to the beach again. But, until then I’ll settle for making drawings showing the ocean. For Day 7 of your art camp adventure, I’ll be taking you step-by-step through the process of using Arteza EverBlend markers. To do this, I’ve chosen a cool image—a cup full of the sea sitting on the beach, complete with a tiny boat and starfish! I really think you’ll love drawing this because it’s a simple design that makes you look at the ocean in a whole new way.
EverBlend markers are alcohol-based markers that are really vibrant and dry fast. They make drawing and coloring easy because they have a triangular barrel that makes them really controllable and easy to hold, plus each marker has two tips—a bullet tip for fine lines and a chisel tip for covering large areas. I’ll show you how they work and I know that once you get started, you won’t want to quit.
Let’s get started!
List of Supplies
- EverBlend Art Markers: А428, А489, А487, А45, А415, А949, А934, А2497, А416, А9423, А268, А2557, А265, А262, А936, А751, А4104, А9431, А4100, А0.
- Paper
- Kneaded eraser
Step-By-Step Marker Art with EverBlend Markers

Step 1. Draw the cup.
I start this drawing by placing a vertical line in the center of my paper. This will keep my cup symmetrical. Next, I place horizontal lines perpendicular to the first line to mark the top and bottom of the cup.
To make the cup’s opening, I mark a spot on the horizontal line that is closer to the top line than the one at the bottom. Using this mark as a guide, I draw an oval with equal sides, from the top to the mark. Then, I place another oval, inside the first and close to its edges, to create the cup’s rim.
By connecting the first oval with curved lines on either side to the bottom horizontal line, I have my cup drawn! Once I add the handle, this part of the drawing is complete.

Step 2. Draw the starfish, sand and ship.
At the cup’s base, I draw the starfish leaning up against it. Remember, the starfish has five legs and lines within each one that meets in the starfish’s center. I draw the sand the cup is sitting in and add the starfish. On top, I add a sea wave and a small ship.
It’s time to erase my initial construction lines with the kneaded eraser.
Let’s move on to markers!

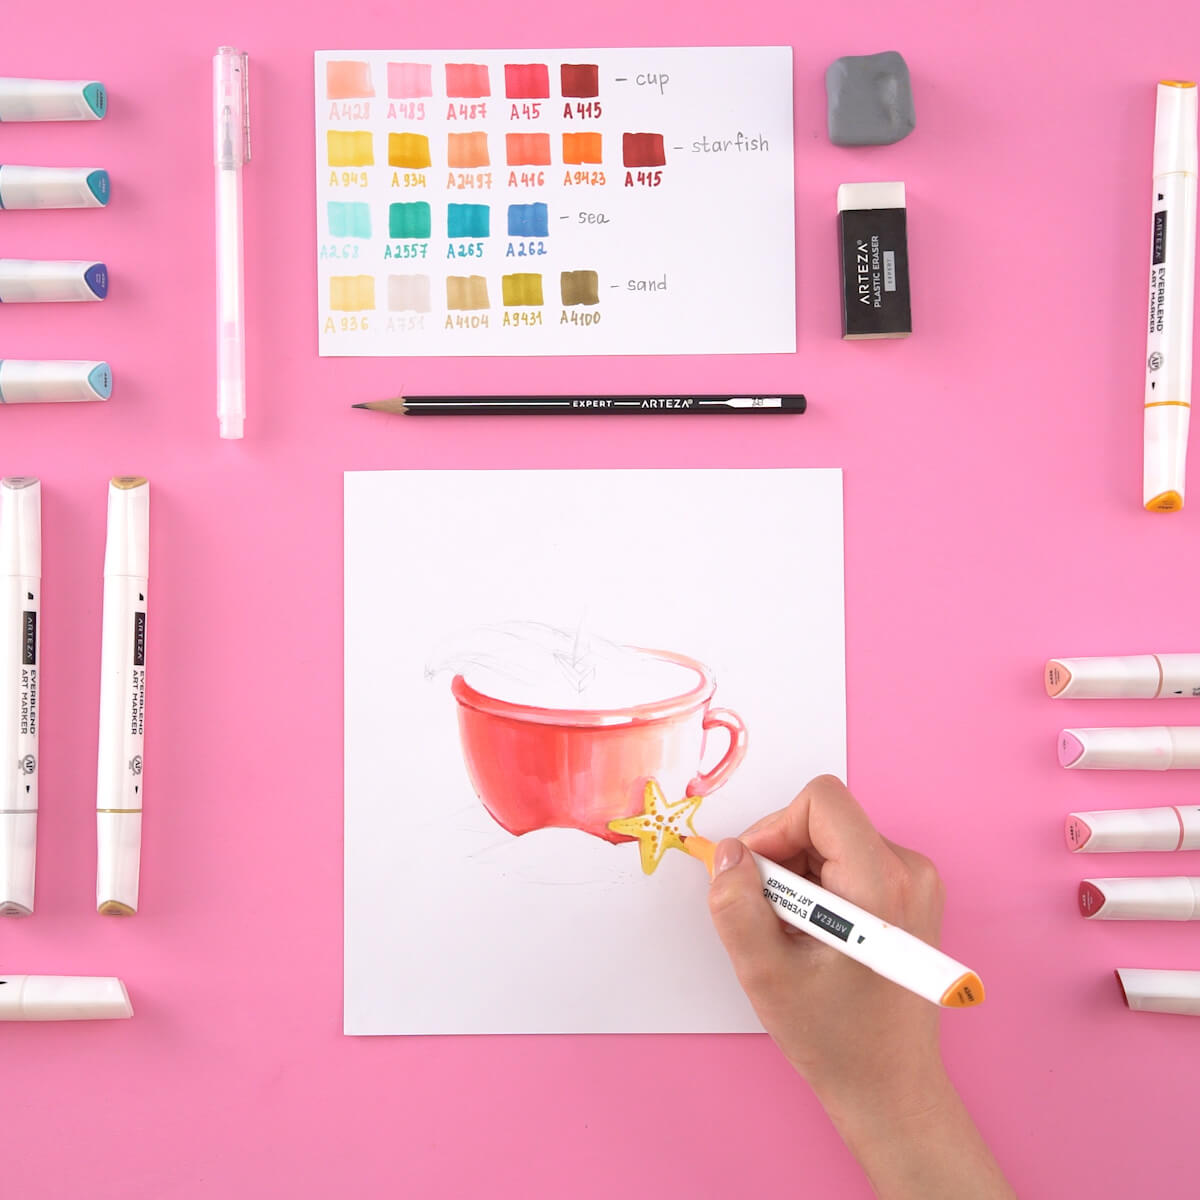
Step 3. Add color to the cup
Use the following colors for the cup: А428, А489, А487, А45, А415.
Since the cup is the focal point of the drawing, I’ll start with it. First, I use the blender marker А0, along with A428 to make a soft gradient at the edge of the cup to make it stand out from the white sheet of paper. Then, I apply A489 and marker over the rest of the cup with A487. I continue with this color to draw shadows along the rim and around one side of the starfish.
I use A428 to paint over the cup’s handle, leaving a bit of the white paper showing through for a highlight. I add a shadow to the handle using A487 and A489. I repeat this process on the rim.
To make the drawing more voluminous, I add A45 and A415 to darken places on the cup that would not normally receive much light.
Step 4. Color the starfish
Use these colors for the starfish: А949, А934, А2497, А416, А9423, А415.
I apply A949 over the entire surface of the starfish, leaving white areas of the paper where the brightest light would be. I use А934 to draw its spikes in the form of circles of different sizes. For the dark areas, I use A2497, A416, A9423, A415 and A45.
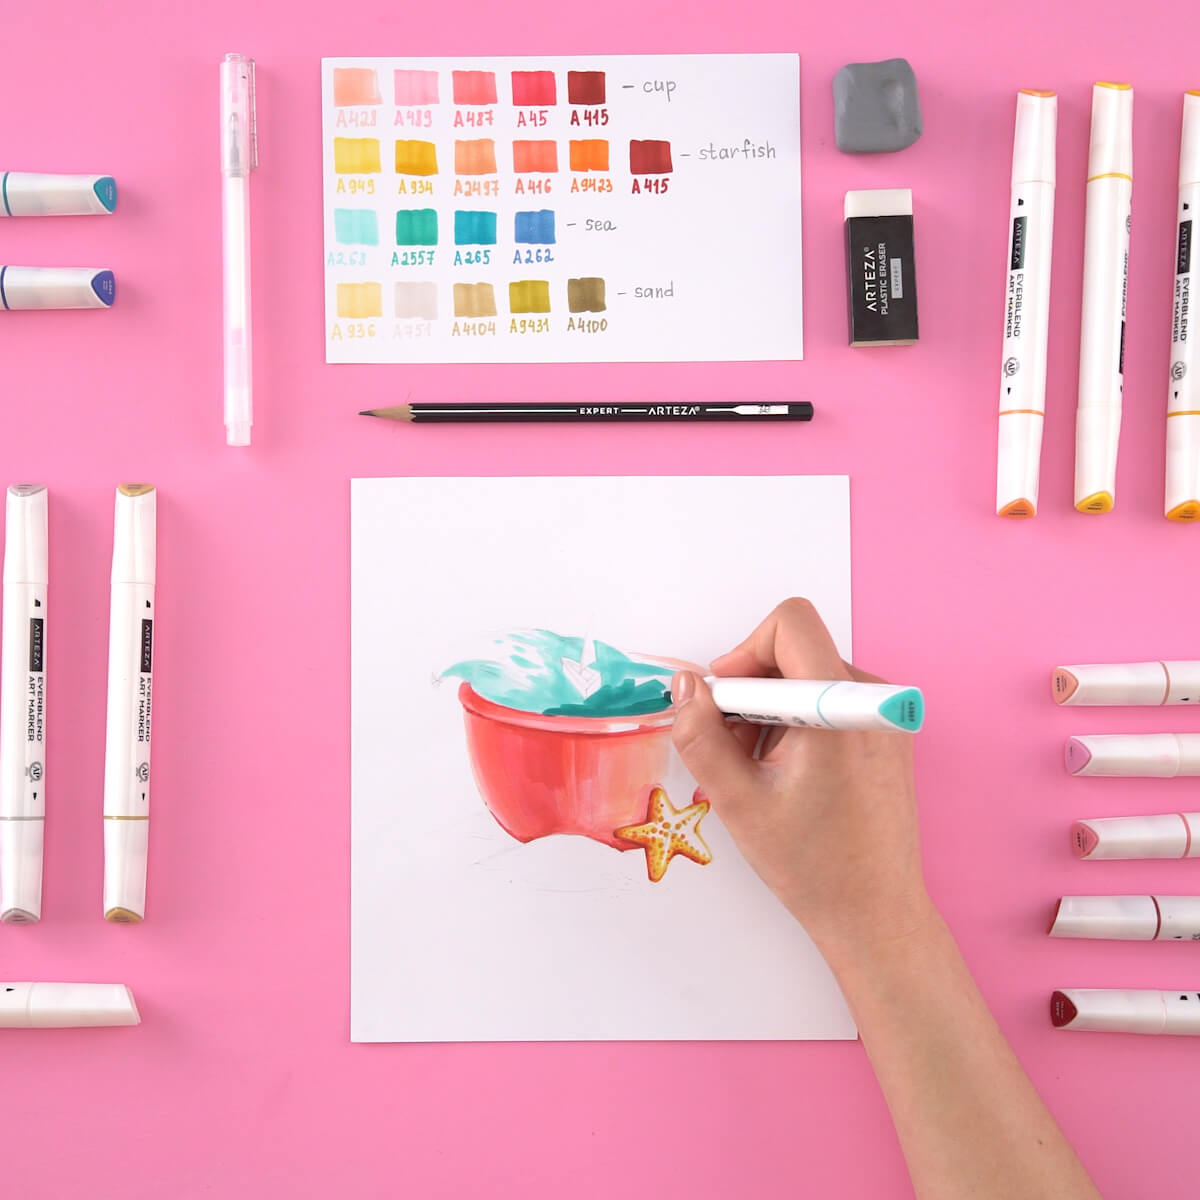
Step 5. Create the wave
For the wave, you need the following colors: А268, А2557, А265, А262.
I start with А268 to paint the water. The shadow under the wave is colored with А2557, and then I take А268 again to make a smooth gradient between these colors. I use the A265 and A262 to draw dark areas on the water and the ship.
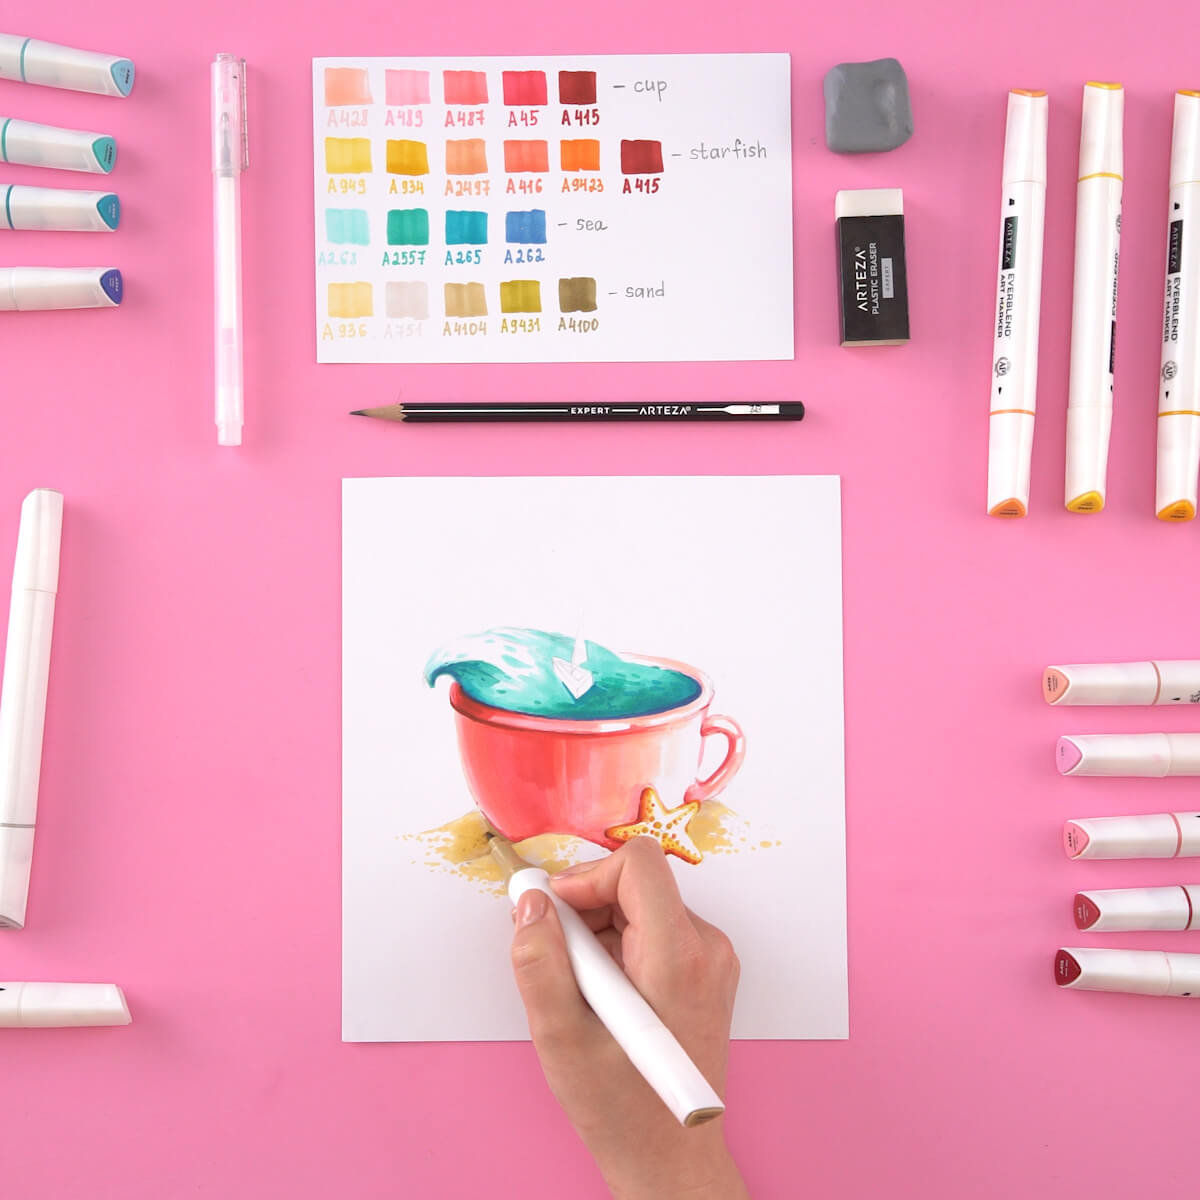
Step 6. Add some sand
For sand use the following colors: А936, А751, А4104, А9431.
I draw the sand in the lightest area first, leaving some white paper showing. Next, I paint with A936 and A751, mixing and alternating them with each other. In places where there should be a shadow, I use A4104 and A9431.
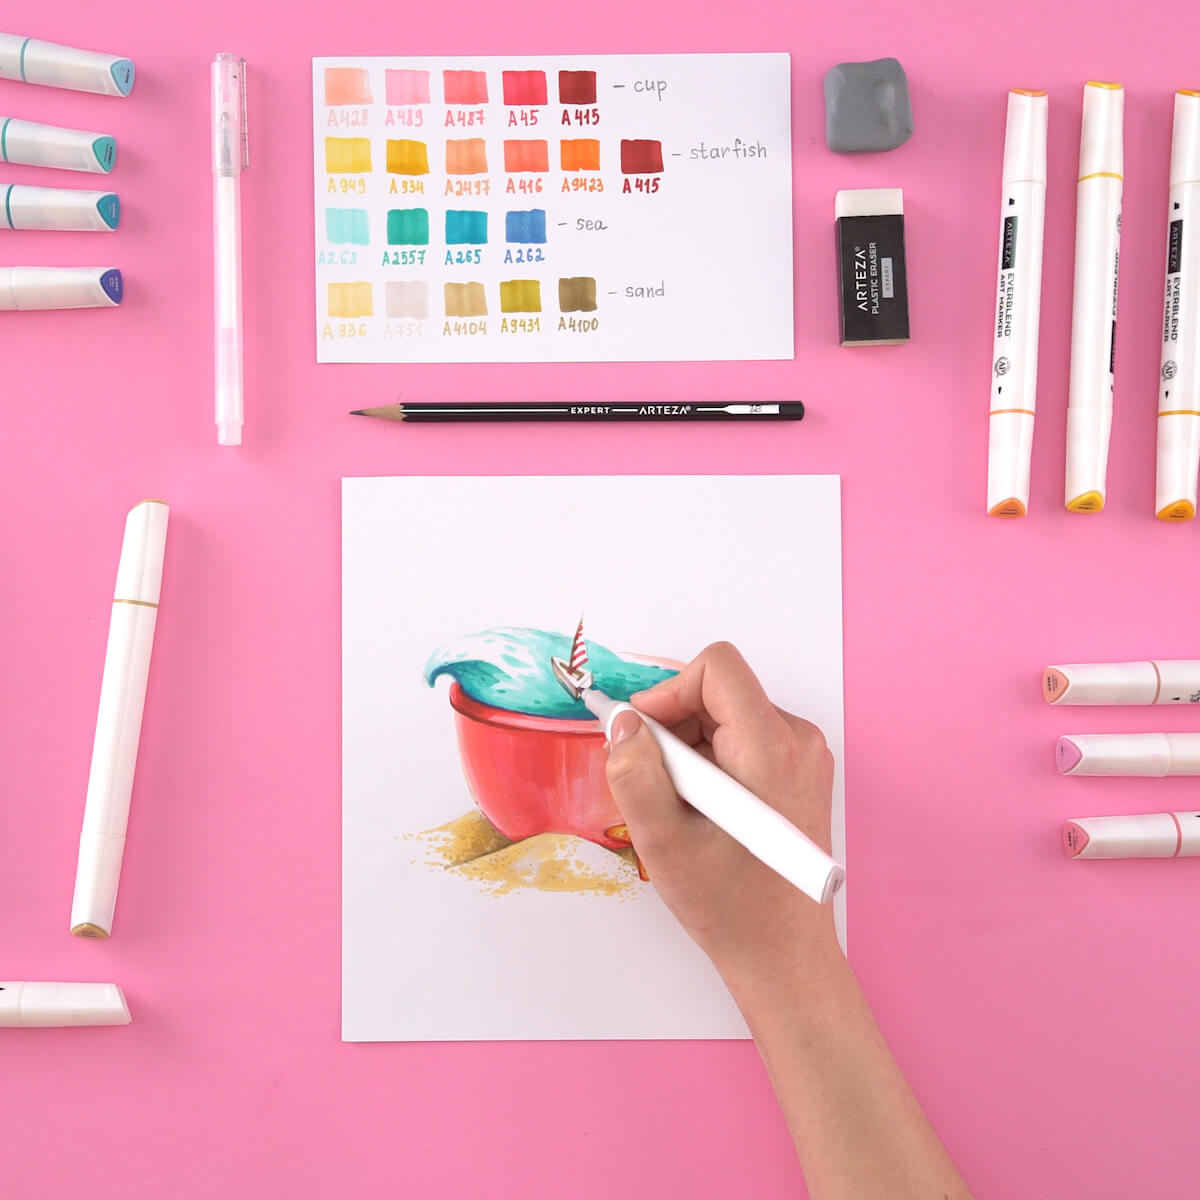
Step 7. Color the ship
Use these colors for the ship: A751, A4100, A45, A415 and these for the background: A936, A949.
For the ship’s hull, I use A751. I darken the interior of the deck with A4100. I place stripes on the sail using A45 and A415.
I create a background with А936, partially using А949 to make it brighter.
To complete the drawing, I use a white pen to add touches of sea foam, splashes and a glare on the cup. One last thing I do is to use A0 to blur the background’s border.
Wow! How cute is this little cup of sea? And, it was so much fun to do, too!
Recommendations
- I have found that the more colors I have, the more creative I can get. That’s why I recommend buying a set that contains a large variety of markers to have a rich color palette.
- To get smooth gradients and transitions, slightly overlap the colors while they are still wet.
- Use the light to dark rule. This means keeping in mind where the light will be shining on your subject and placing your lightest shades there. Then work your way from this light point to mid-tones and then your darkest shades. Remember: you can always make things darker, but you can’t get back a light shade once it’s gone.
I hope you enjoyed drawing along with me and got some creative inspiration from this lesson. As you can see, art markers can add so much vibrancy to all your drawings. I not only use mine as an illustrator, but I use them whenever I take my sketchbook out for some urban sketching. They are very portable—I can throw them in my art bag with my sketchbook and I’m ready to go! Please give them a try and above all else, keep creating!
Here’s the video to see all the steps I took to create this drawing.


2 comments
Hi Rebecca! The images are stills from the tutorial video we posted. If the images are too small, just set the video to Full Screen and play. The video can be paused if you’d like to pace yourself differently. We hope you enjoy the tutorial!
This how-to on marker art is informative but it would be nice if the image was larger so those following along could see the details of the drawing.