Table of Contents:
Halloween Face Paint Video Tutorial
Halloween is a time when everyone can face their fears by dressing themselves as ghoulish monsters and happy haunts. The night is filled with exciting frights, lots of yummy treats and of course, iconic costumes. Halloween is a great time to become a famous historical figure, silly item or legendary movie character! Cristina MonDragon created this glowing look that was inspired by the infamous movie Avatar. She will be walking you through all the steps needed to transform yourself into a Na’vi from Pandora.
Avatar Face Paint Step By Step
Step 1: Clean Face and Body
You’re going to be painting your face, neck and shoulders, so make sure that you’re wearing something suitable for this. If you have long hair, now is the time to tie it back and away from your face. Make sure your skin is a blank, clean canvas ready for painting! Pick out the colors you will be using. For this Avatar makeup, you will need Blue, White, Black, Green and Yellow.

Step 2: Apply Paint for a Blue Avatar Face
Using a sponge, dab blue paint from the Arteza Face Paint Kit onto your face, neck and shoulders. Make sure to cover the entire area as evenly as possible. This will serve as the base for our face paint and will give you the signature Na’vi look.
Step 3: UV Reactive Paint
Now use the white paint from our UV-reactive paint kit to begin creating some details. Starting with the forehead, create vertical lines in the center accentuated by lines around the sides of the face. You’ll want your lines to be slightly irregular so they look more like natural stripes. Work your way around the face but avoid the cheeks.

Step 4: Paint the Base for the Eyes
Now it’s time to add some other signature Na’vi details to your face paint! Gently apply the UV-reactive yellow paint to the eyelids, stopping at the crease of the lid. This will be the base for the eyes and will provide a surreal look that will have people believing you can see into the heart of the Pandora forest.

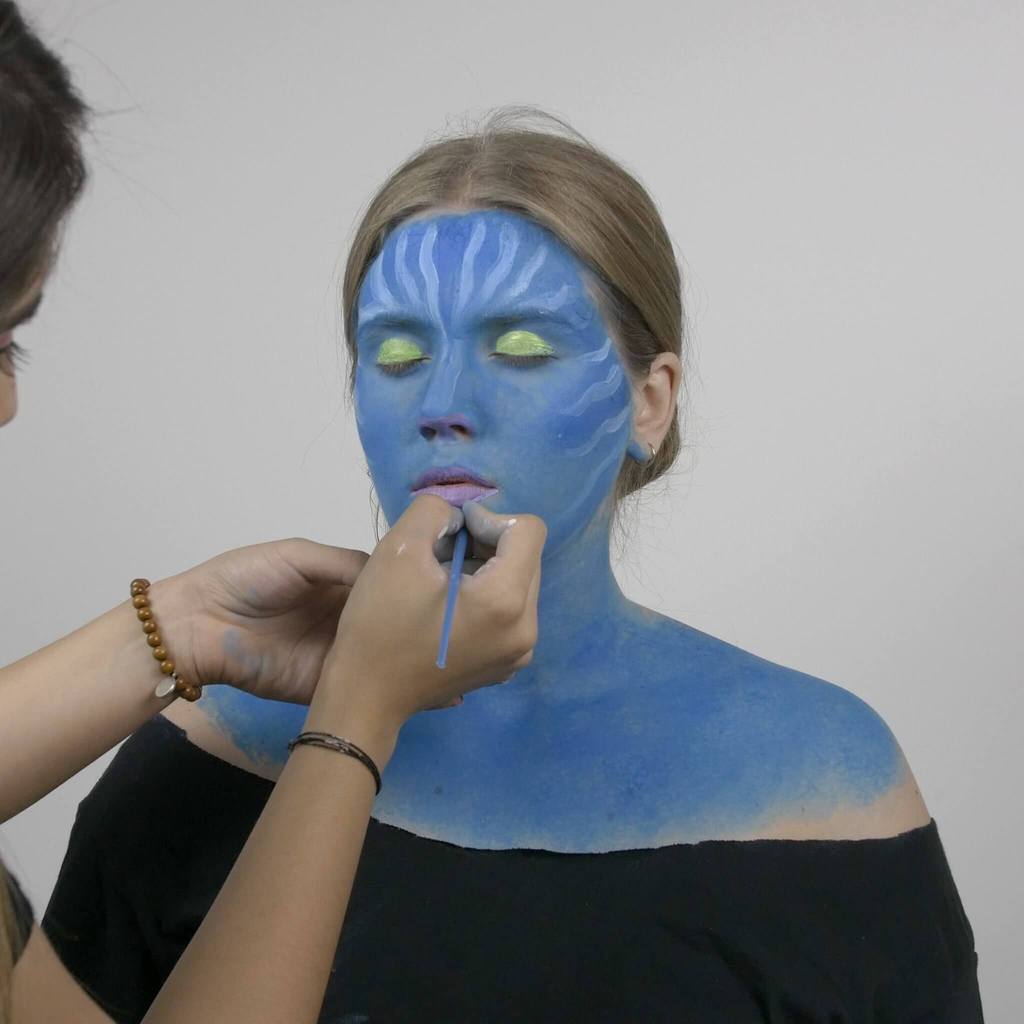
Step 5: Apply Paint to the Lips and Nose
Apply a UV-reactive pink paint to the lips as well as around the nostrils. This will make your facial features look more like the Na’vi’s.
Step 6: Paint Pupils Onto the Eyes
Make sure the yellow paint on the eyes is dry before moving onto this step. We’ll be adding more details to our eyelids with a detail brush. This will make the eyes more life-like and truly bring your Na’vi character to life.

Step 7: Add Dots and Glitter to the Face
Use a round detail brush to add white dots around the lines drawn on the forehead and sides of the face. Take blue or white glitter — or both! — to add some sparkle to your design. Lightly dampen either your finger or a sponge to pick up some Arteza Glitter and apply it to your face and neck. Be sure to limit the amount of water that’s used so you don’t wash away your hard work.
Step 8: Draw in the Necklace
Known for their esteemed friendships, the Na’vi wear what’s known as the Anurai necklace. This is passed from friend to friend as a show of devotion, and this is what you’ll be painting next. Use black face paint to draw a line for the necklace around your neck. Draw a circle using UV yellow paint at the center of the black line to create a pendant. Paint two smaller circles on either side of the pendant, then add highlights to make the beads and pendants seem three-dimensional.
Step 9: Add Some Details to the Eyes
Add more details to the eyes with black paint. Using a round brush, outline the edges of the eyes to make them more defined. Here you can even add in some eyelashes to make the eyes of the facepaint seem truly real.

Step 10: Check for Any Blank Spots
Shine a UV light on your face to check that your paint has been applied evenly and that everything is as defined as you need it to be. If you find some blank spots or places that need a touch-up, feel free to return to an earlier step to add some further details and fine-tune the look.
![]()
Wrap Up
Just like that, your face paint is done! With Arteza face paints, your look will last for hours so you’ll be turning heads all night long. Plus, the second you touch a blacklight or UV light you’ll glow like a true Na’vi. Now you’re free to walk amongst the trees of Pandora, or to win Best Costume at your next Halloween party!


