Table of Contents:
Make a Cute Duck Drawing
Whether you’re using a duck for your main subject or adding one into a scene, these aquatic birds are so beautiful and fun to draw! I love to sit next to a pond and draw them since they have so many poses. I can catch them standing in the grass, paddling around in the water or in full flight. After doing quite a few of these sketches, I started adding watercolor to them and my ducks really came to life. Now, I’d like to share with you my easy step-by-step plan for drawing and painting ducks.
Before I go into the steps, I would like to suggest some art supplies that will help you make the most beautiful and lifelike duck possible. I prefer to draw and sketch with the Arteza Professional Pencil set since it comes in several grades of leads. For this drawing, I used the HB pencil to get a light line that doesn’t show through once it’s painted over. I also use a heavier paper made specifically for watercolor painting. It’s thicker than regular paper and stays nice and flat even after it gets wet. As for which paint to use, I really love the Arteza watercolors for their vibrant colors and rich, creamy texture. A little goes a long way, which keeps me from wasting paint. Also, for this example, I used a small, soft paintbrush. It holds the paint really well and lets me make big splotches of color as well as small details.
Now that our supplies are all lined up, let’s get started on this easy duck drawing!
List of Supplies
- Arteza Drawing Pencils
- Arteza Watercolor Pad
- Arteza Watercolor Paint - Sky Blue, Cactus Green, Orchid Purple, Bronze, Mars Black, Frosty Blue
Draw & Paint a Duck in 9 Steps
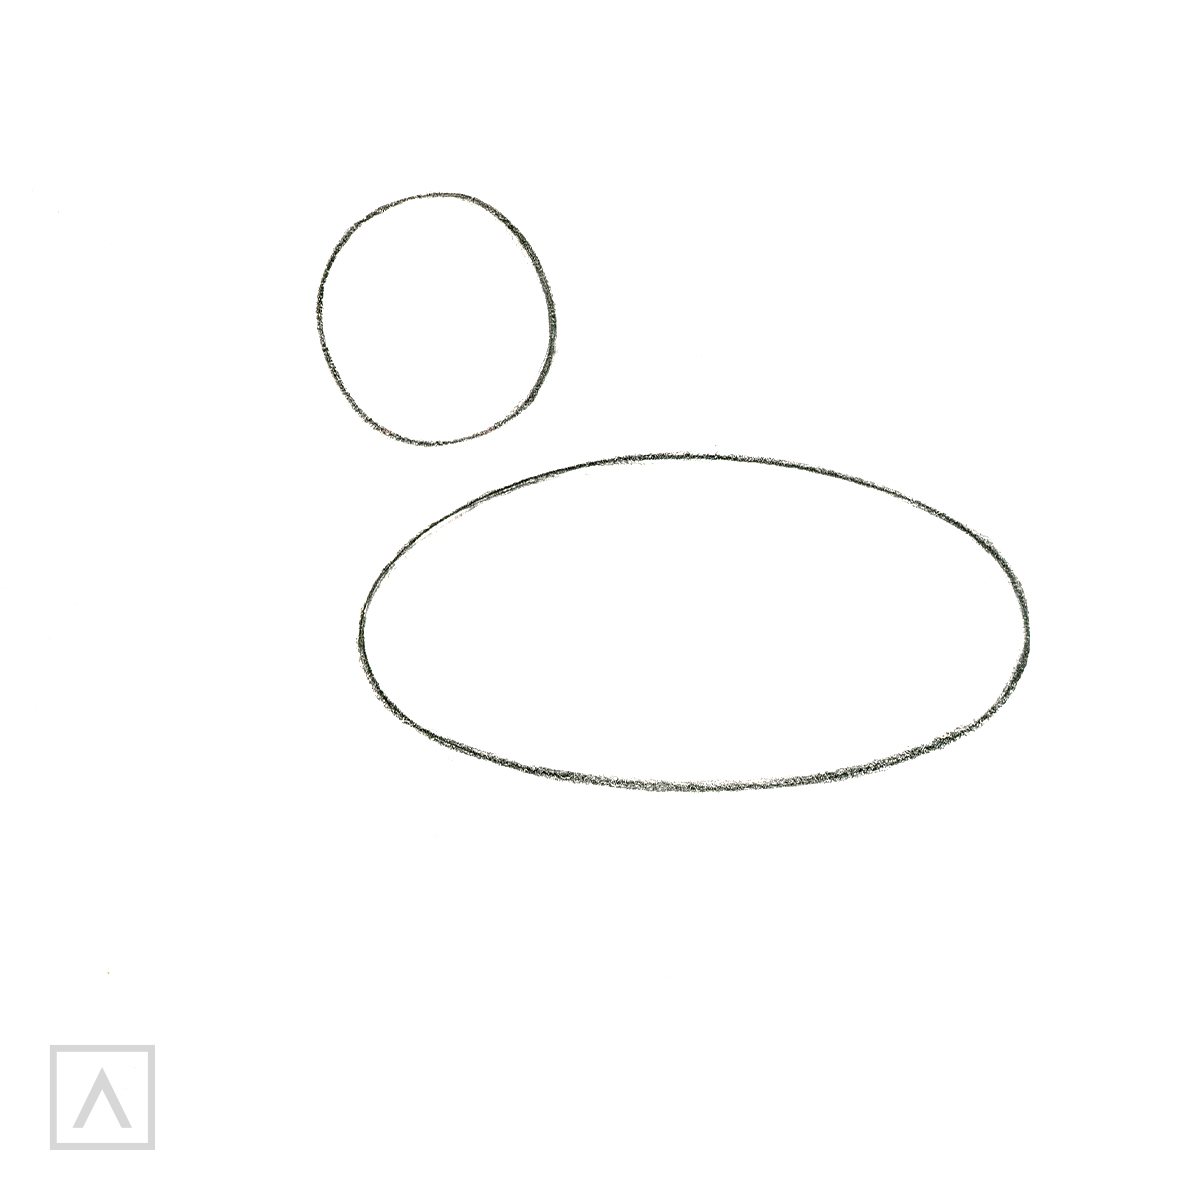
Step 1
First, I draw a circle for the head and an ellipse (oval) for the body.
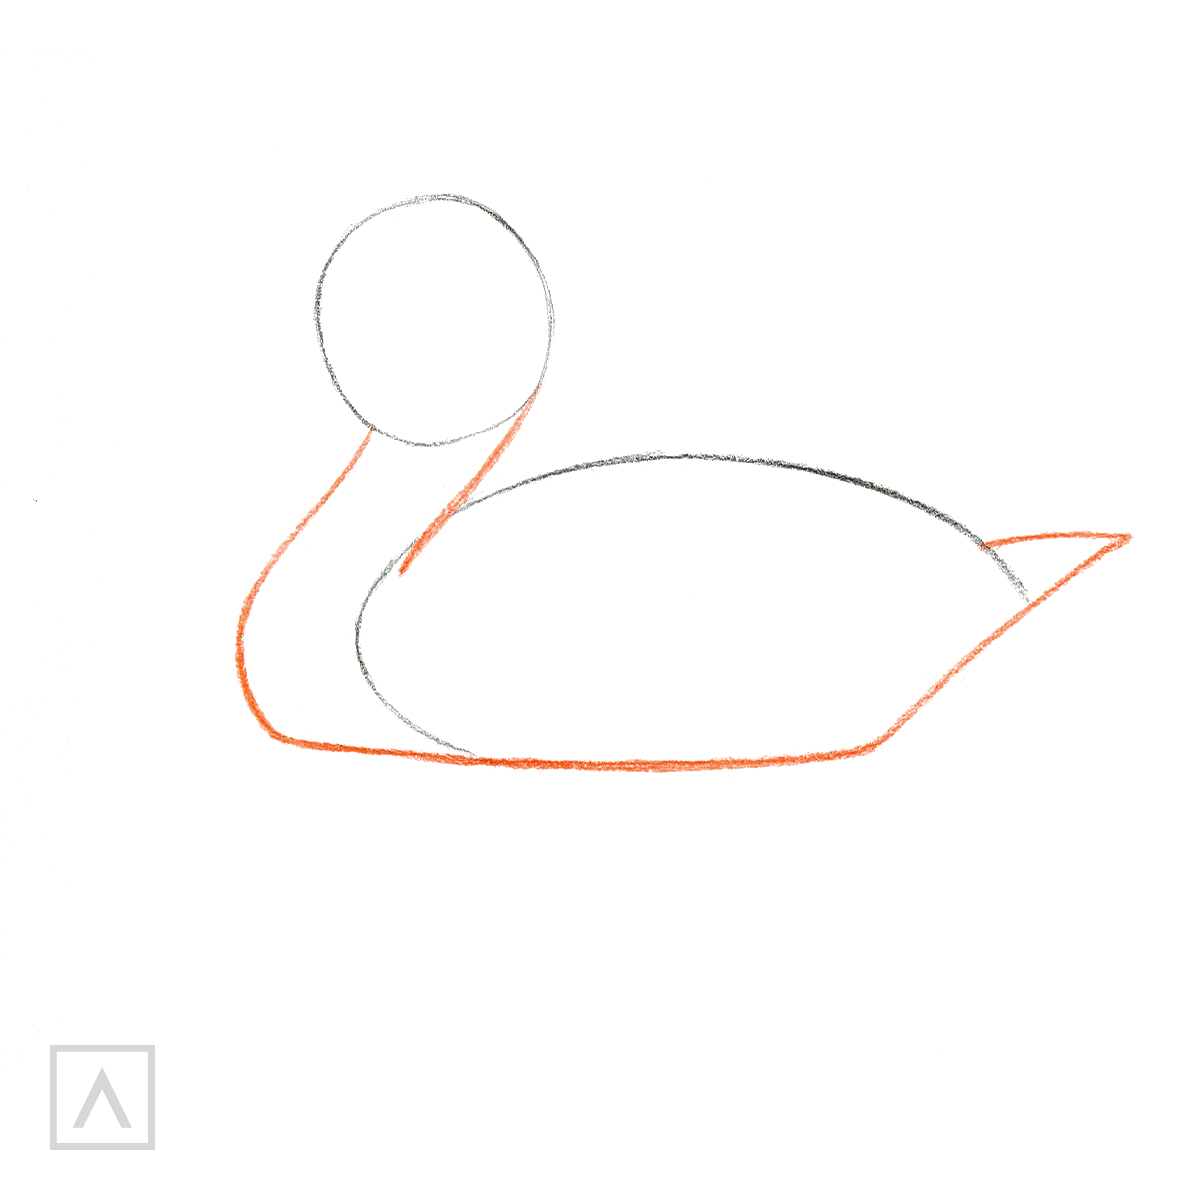
Step 2
Then, I connect the circle and ellipse with a curved line to make the duck’s back and another to form the neck and bottom of the body. I erase the right side of the oval and draw a straight diagonal line that ends with a pointed triangular tail.
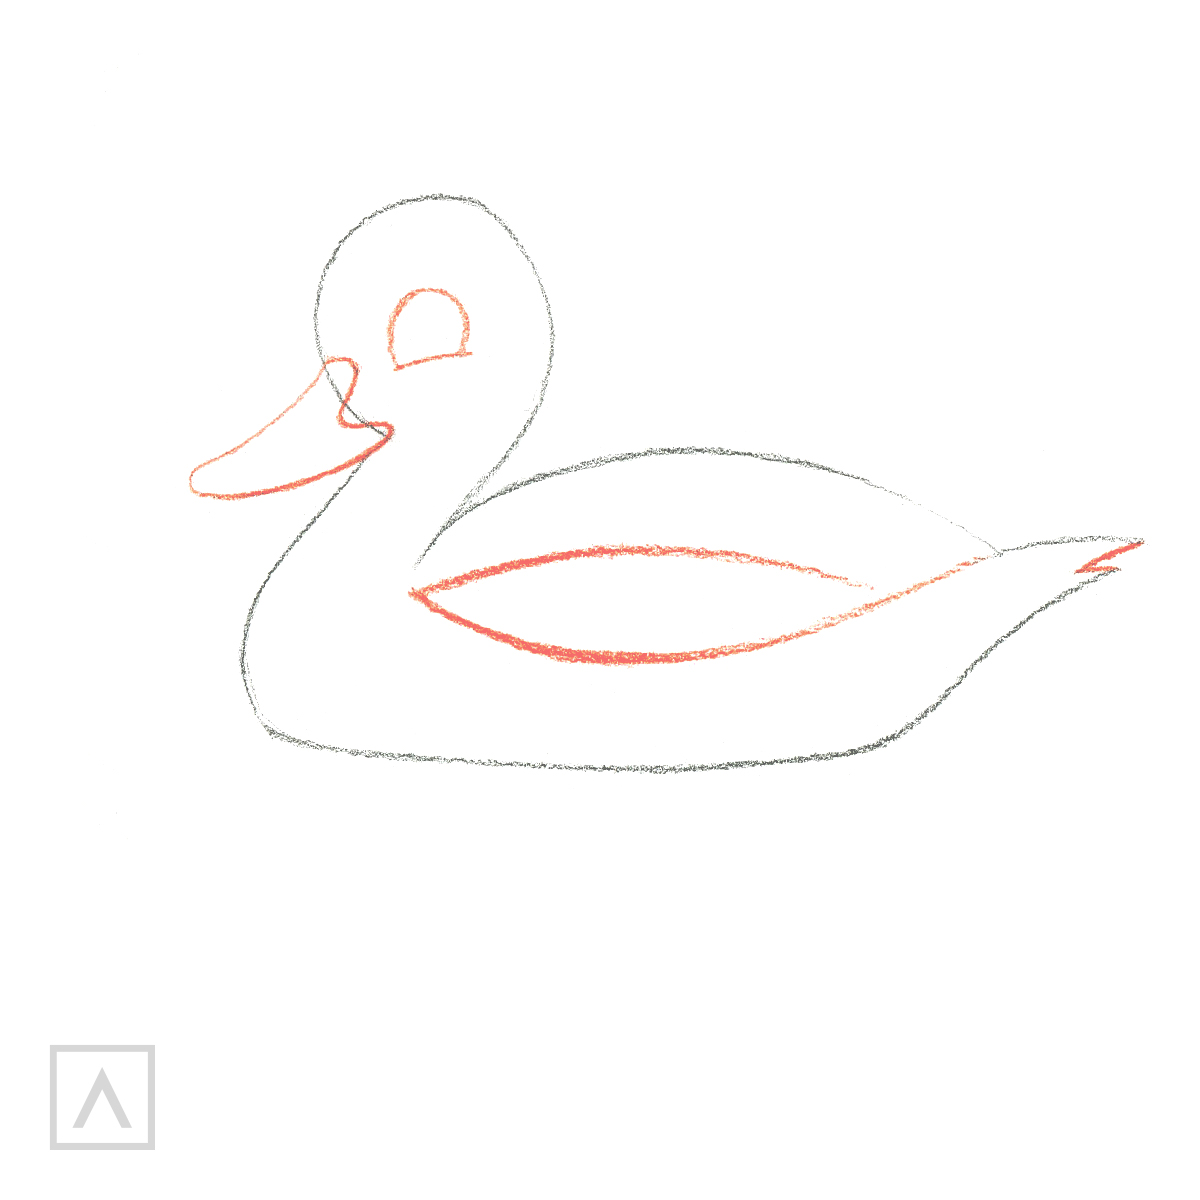
Step 3
At the junction where the head and neck meet, I draw the duck’s bill. I place a semicircular shape in the middle of the head for the eye. Next, I add a wing and some small marks for the feathers on the tail. Now, it really looks like a duck!
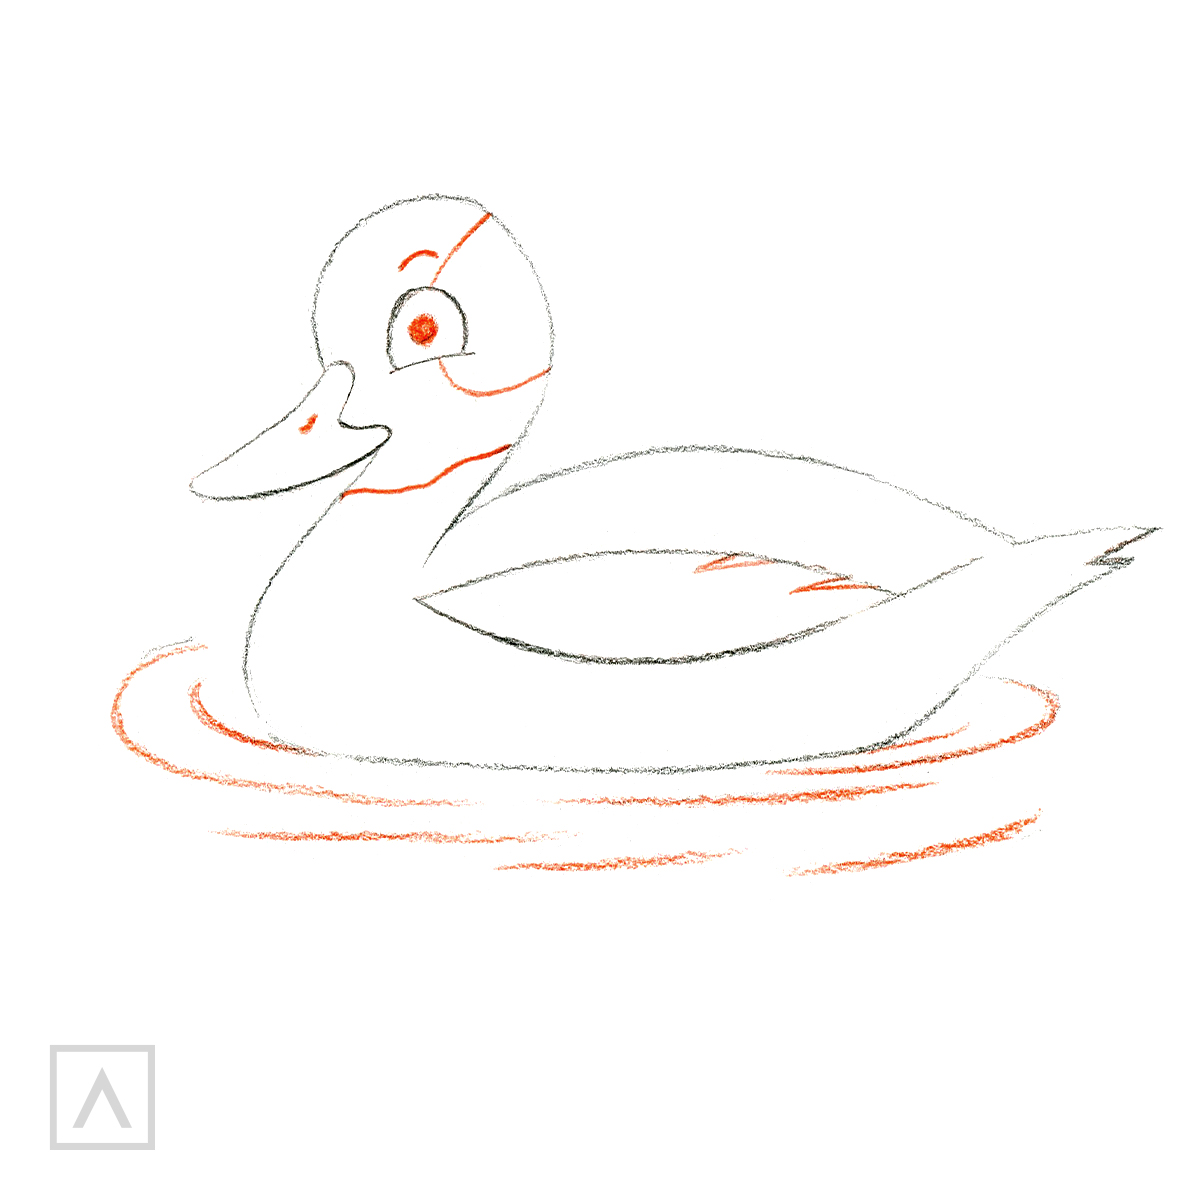
Step 4
Now, it’s time to add some details such as a pupil, an eyebrow and a nostril. I block off an area for the pattern on the head and add feathers on the wing. To make him look like he’s sitting in the water, I add some water ripples below.
Step 5
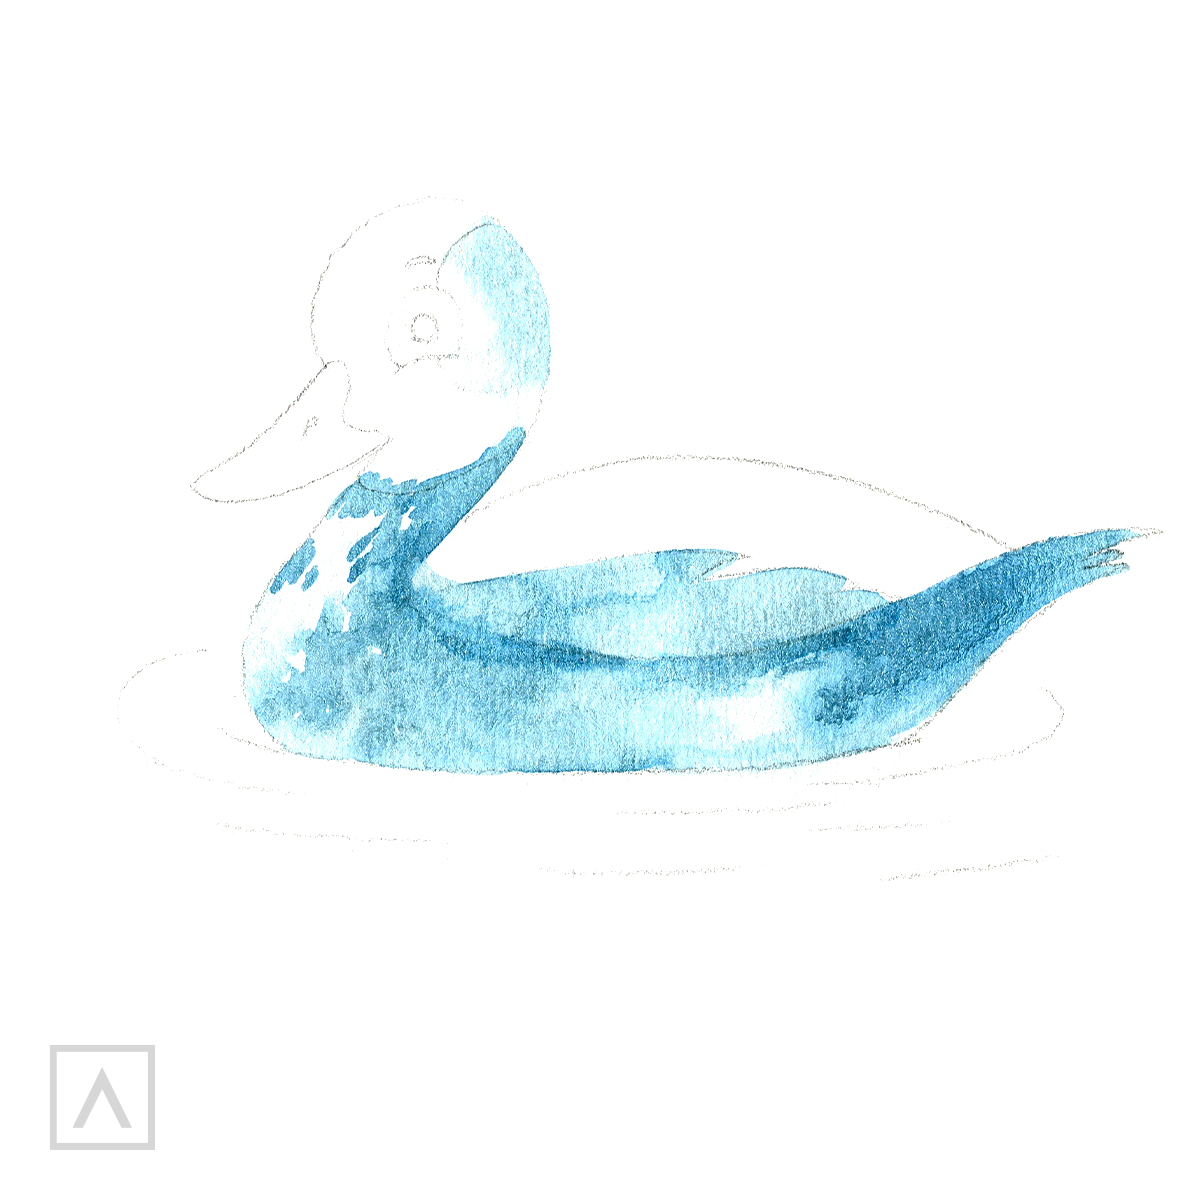
Before I begin painting, I remove all the excess construction details. Then, using Sky Blue, I paint over the bottom of the duck and the area I blocked in previously on the head.
Step 6
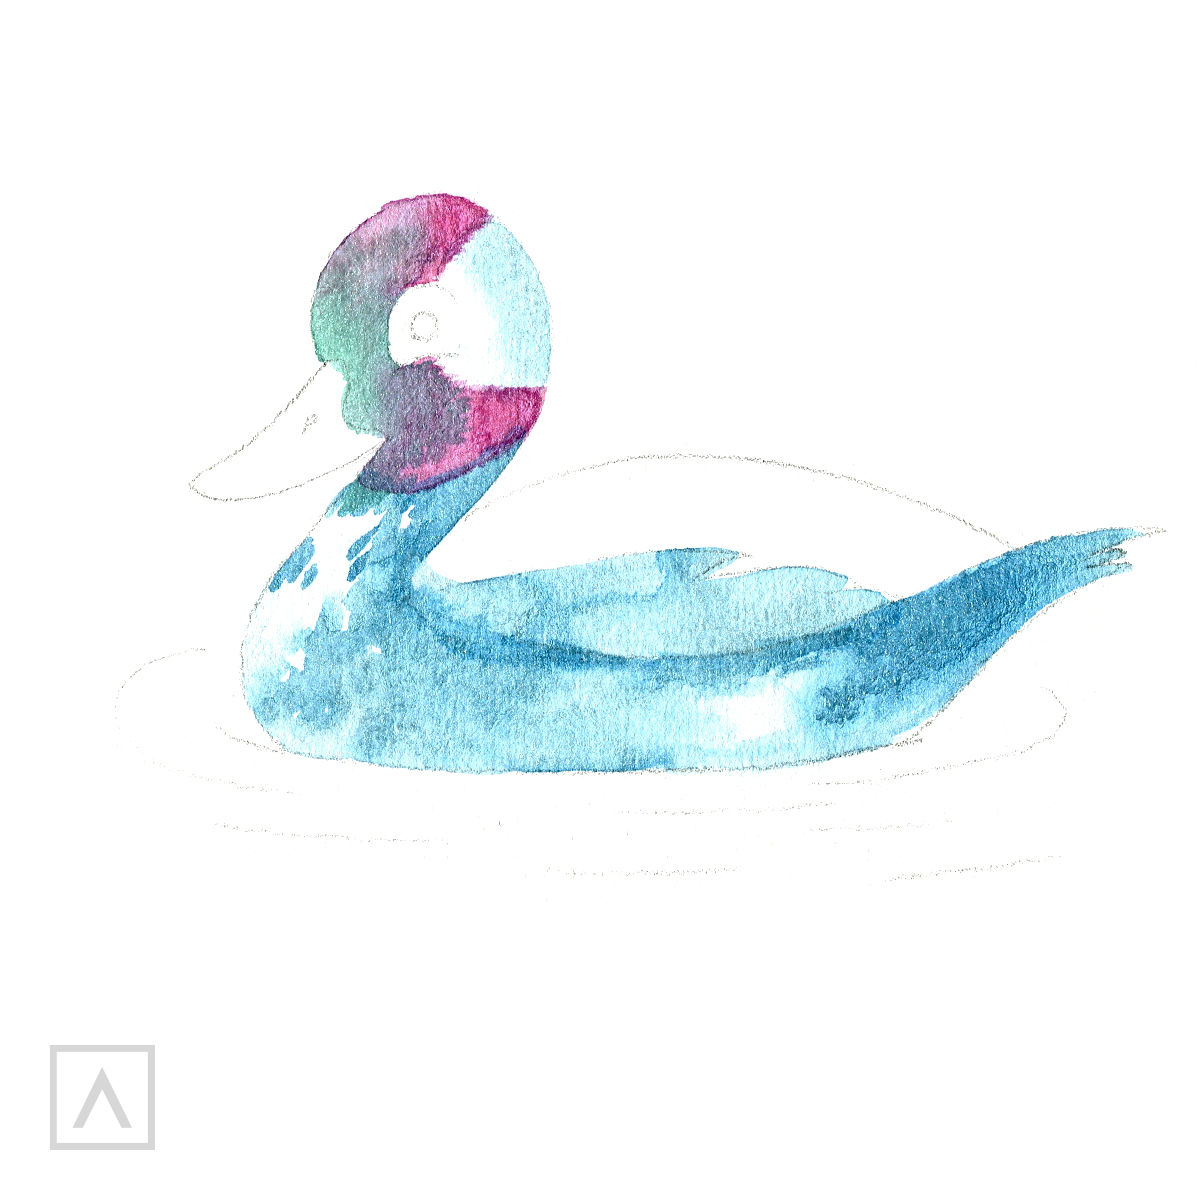
I use Cactus Green and Orchid Purple to color the duck’s face. To get a soft gradient of these two colors, I use the “wet-on-wet” technique when using Orchid Purple. This means I wet the paper above and below the green before adding my wet paint. This causes the paint to spread and blend together. To sharpen the green near the beak, I add a tad bit more Cactus Green there.
Step 7
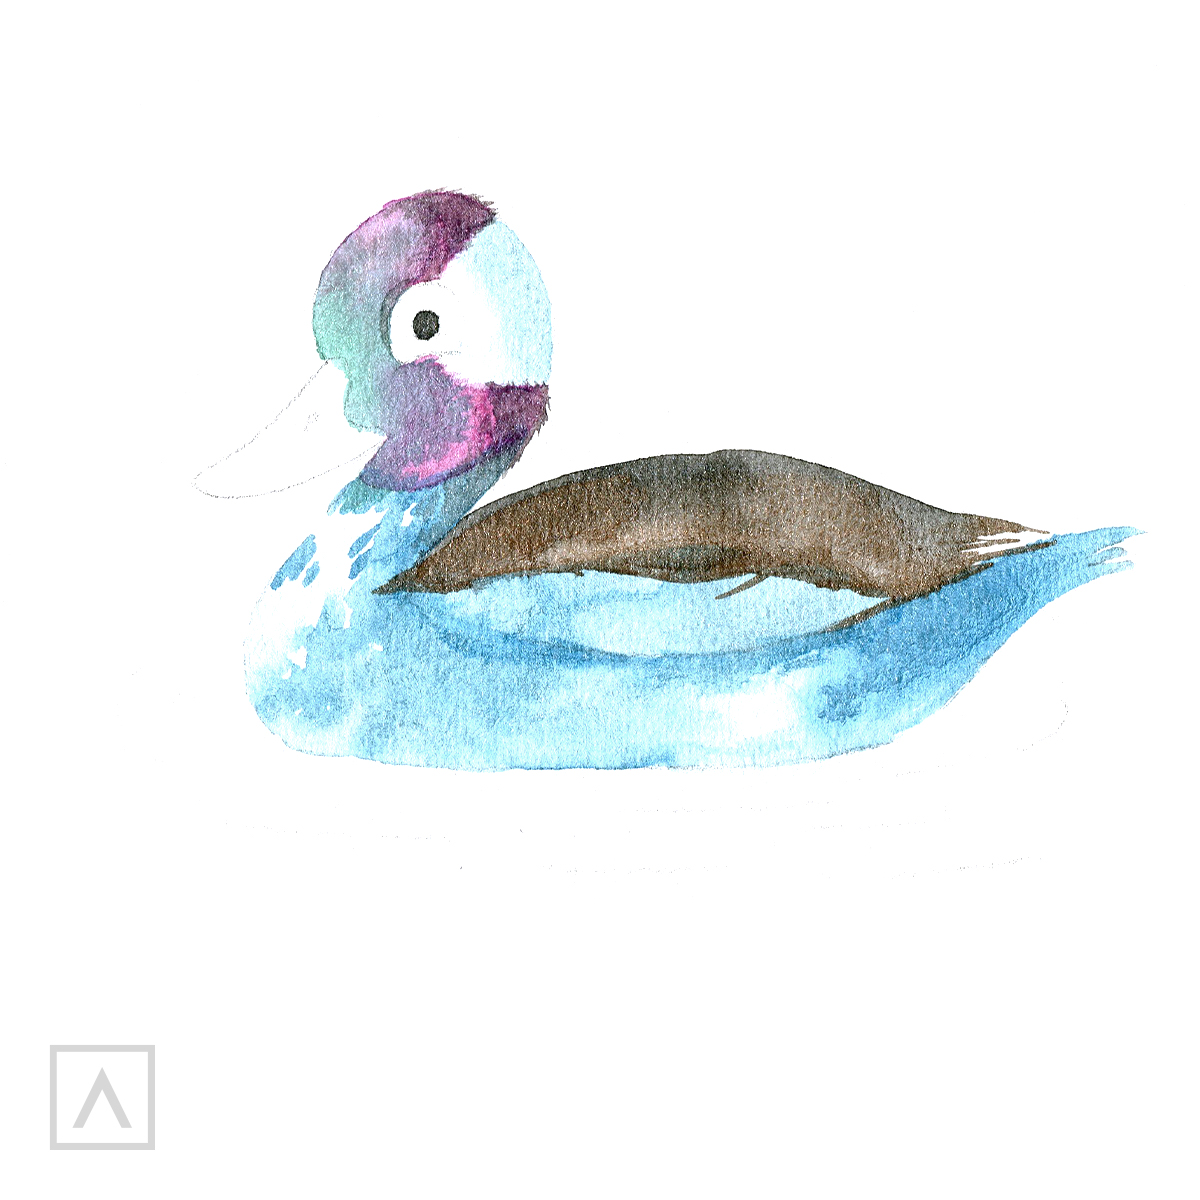
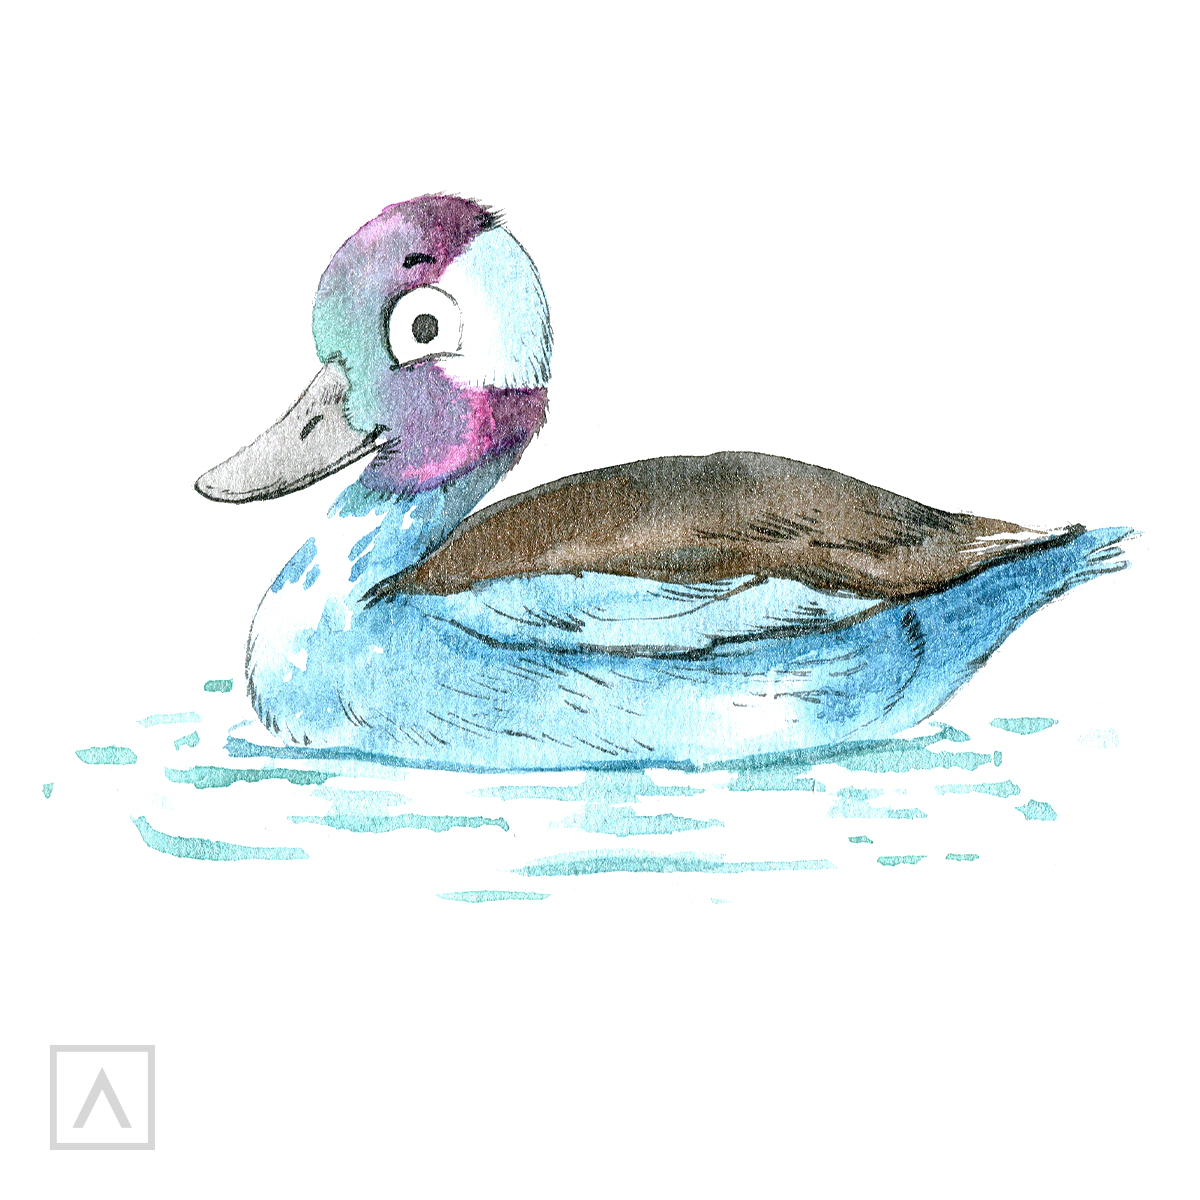
Next, I use Bronze for the color of the back and add a little Mars Black at the top to make it feel more rounded and three-dimensional. With Mars Black, I add the pupil and on the right side of the head for shadows.
Step 8
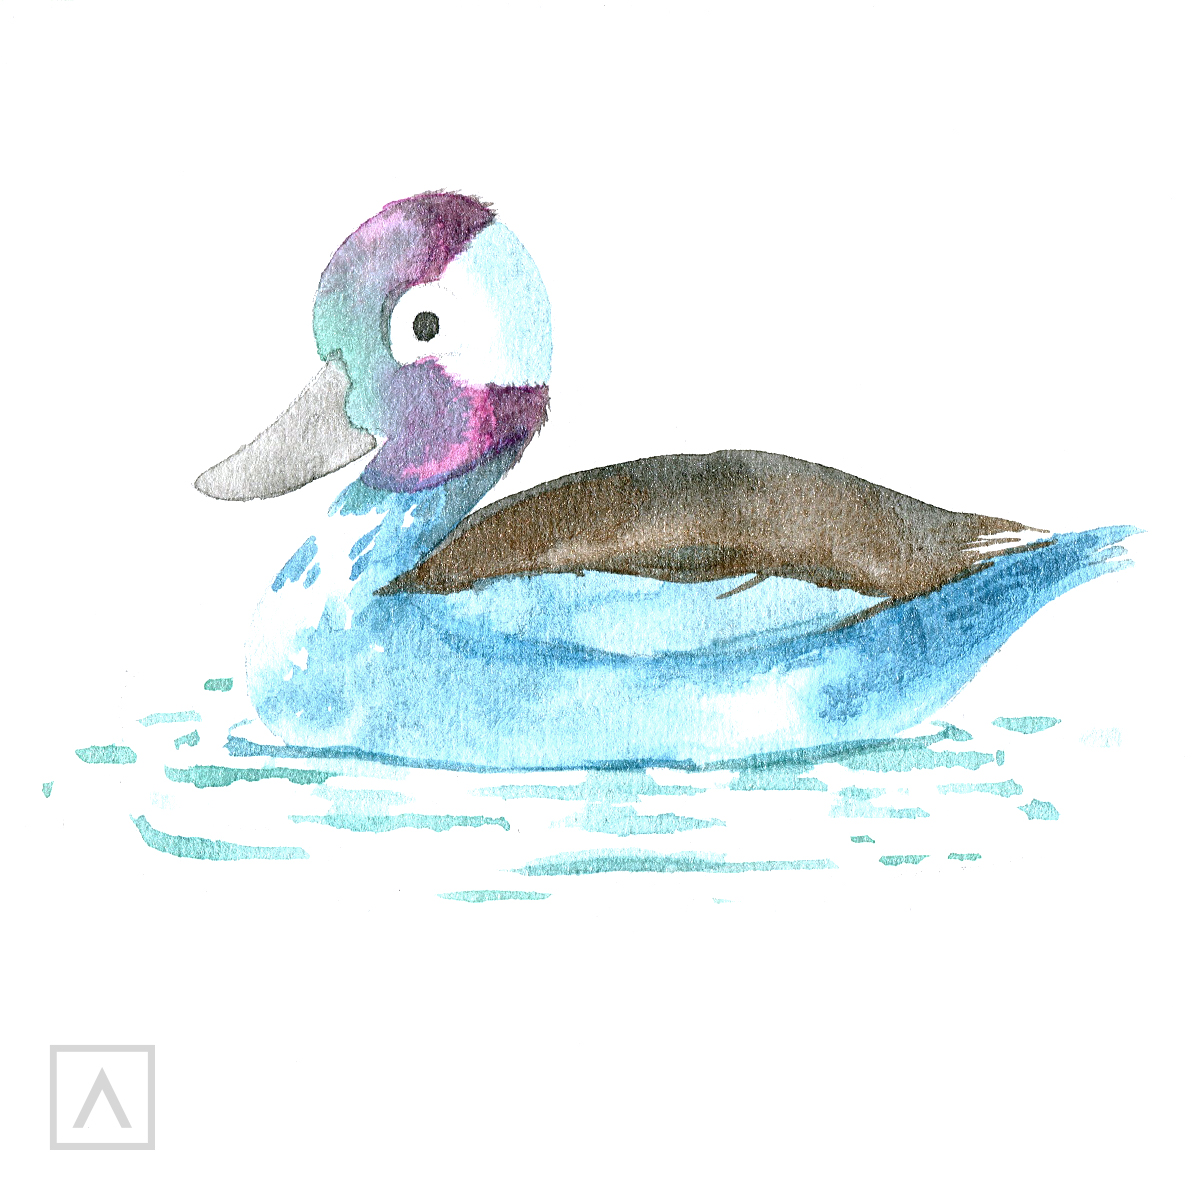
I mix the Mars Black with more water until it is almost transparent and use it to paint the bill. To give the ripples a watery appearance, I use the Frosty Blue.
Step 9
With a thin brush, I use Mars Black to darken the eyebrow, the contour of the eye, the bill, and nostril. Last, I add some lines for texture to the feathers.
Good for you! You’ve drawn and painted a duck and he looks fabulous!
Recommendations
- It is always best to start with simple shapes and then refine them as you go. This is what I did when I started with just a circle and an ellipse. You can break anything you want to draw into just a few basic shapes, as I did here.
- Make the initial drawing with very light lines. If your lines are too dark, you’ll be able to see them through the paint. If you think they’re too dark, you can use an eraser to go over them and lighten them up. Another way to avoid this is to make your initial drawing on a separate sheet of paper and trace it onto the watercolor paper.
- To see exactly how your colors will appear on your work, make a sample swatch card with the ones you plan to use first.
- Start by painting general areas until everything is filled in before working on the details. This way your details won’t get lost or blend into the foundational colors.
- Don’t try to mix too many colors at once. Begin with mixing just two colors at a time.
- You only need a tiny bit of water. Be careful not to use too much or your colors will lose their vibrancy and the paper may buckle.
Practicing drawing and painting ducks, birds and other animals is a great way to improve your skills. In this little exercise, you’ve learned how to draw the overall shape of a duck, to make gradients with watercolor paint, to create shadows and dimensionality and when to add those important little details.
I hope I’ve helped make duck drawing easy. So, the next time you’re taking a walk in the park or by a lake, take a few minutes and draw some ducks. I know you’re drawing and your day will go swimmingly!
I’d love to hear how your duck drawings are going, so leave me a comment in the section below.


2 comments
Aww, we’re so thrilled you enjoyed this tutorial! There will be more coming soon. Please, stay tuned!
Enjoyed this a lot!!!