
Table of Contents:
- Make This Simple Fox Drawing
- List of Supplies
- Steps to Make This Cute Fox Drawing
- Recommendations
- Watercolor Pencils Tutorial For Beginners
Make This Simple Fox Drawing
How to draw a fox? Foxes are such beautiful and mysterious creatures. I just love how they move through the woods without anyone knowing they’re there. I suppose that’s why I like drawing them so much. With their distinctive pointy ears and nose and their bushy tail, they give me lots of chances to capture their personality.
As an illustrator, I draw foxes in many different styles from hyper-realistic to cartoon characters. But, for this instruction guide, I’ll be drawing one that’s more on the make-believe side, but with lots of “real” details because it’s my favorite way to draw one.
In this demo, I’ll be using Arteza Watercolor Pencils. I like these pencils because they come in so many shades of vibrant colors. This is one of my all-time favorite mediums to use because they act like both a colored pencil and watercolor paint.
Watercolor pencils let you color in an area just like you would with a regular colored pencil, but when you moisten the color with water, it turns into paint that lets you use all the same techniques you would use with traditional watercolors. If you’ve never tried them, here’s your chance and I know you’re going to fall for them just like I did!
List of Supplies
- Arteza Watercolor Pencils
- Watercolor Paper
- Small Paintbrush
- Container of Water
Steps to Make This Cute Fox Drawing

Step 1
I start by drawing a circle and an oval at a small distance from each other.
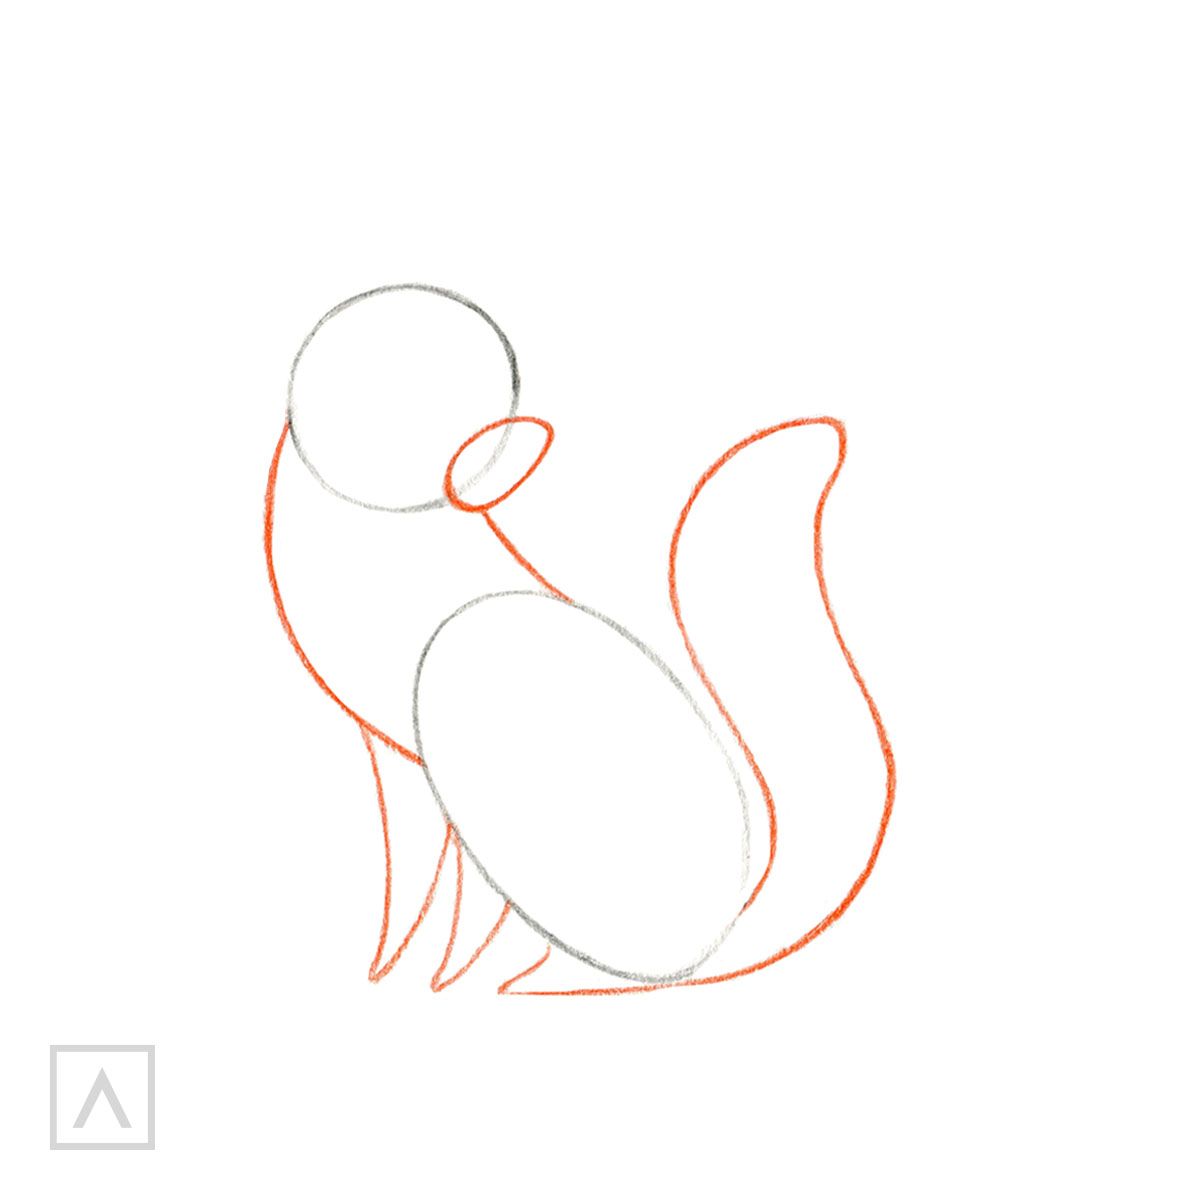
Step 2
I connect the circle and the oval with two arched lines to create the fox’s neck and upper body. Next, I draw the legs and his tail. I add a smaller oval on the right side where the circle and the shorter line meet. This will be the fox’s nose.
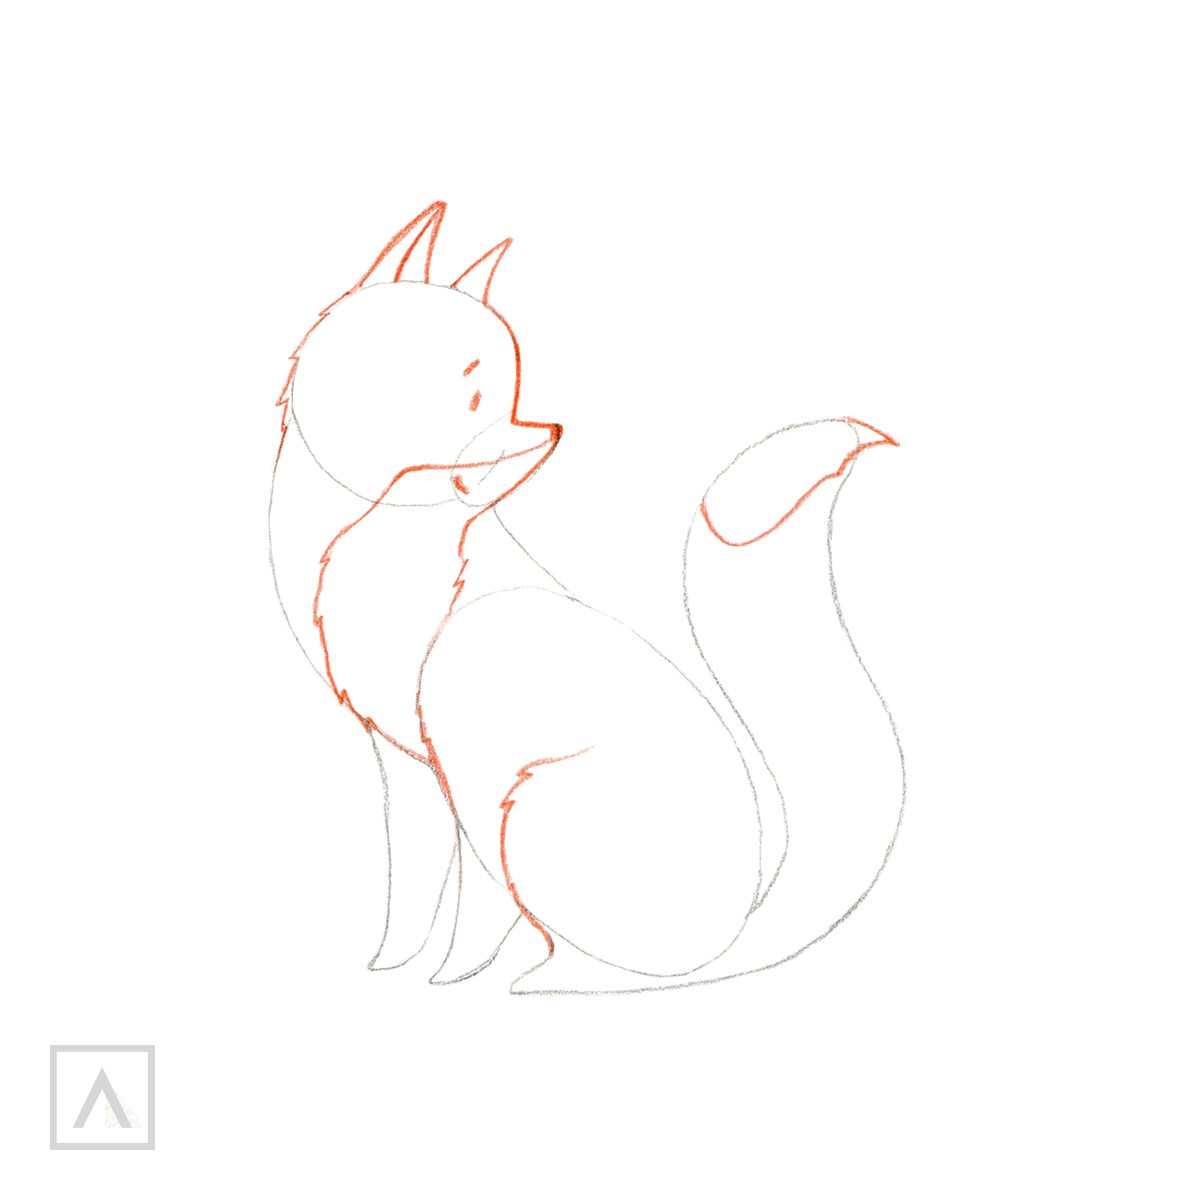
Step 3
Now, I add all the details that will really make him look like a fox—the ears, an eye and eyebrow, the mouth, the tip of the nose and jagged lines where the sections of white fur will be. Look how cute he is!
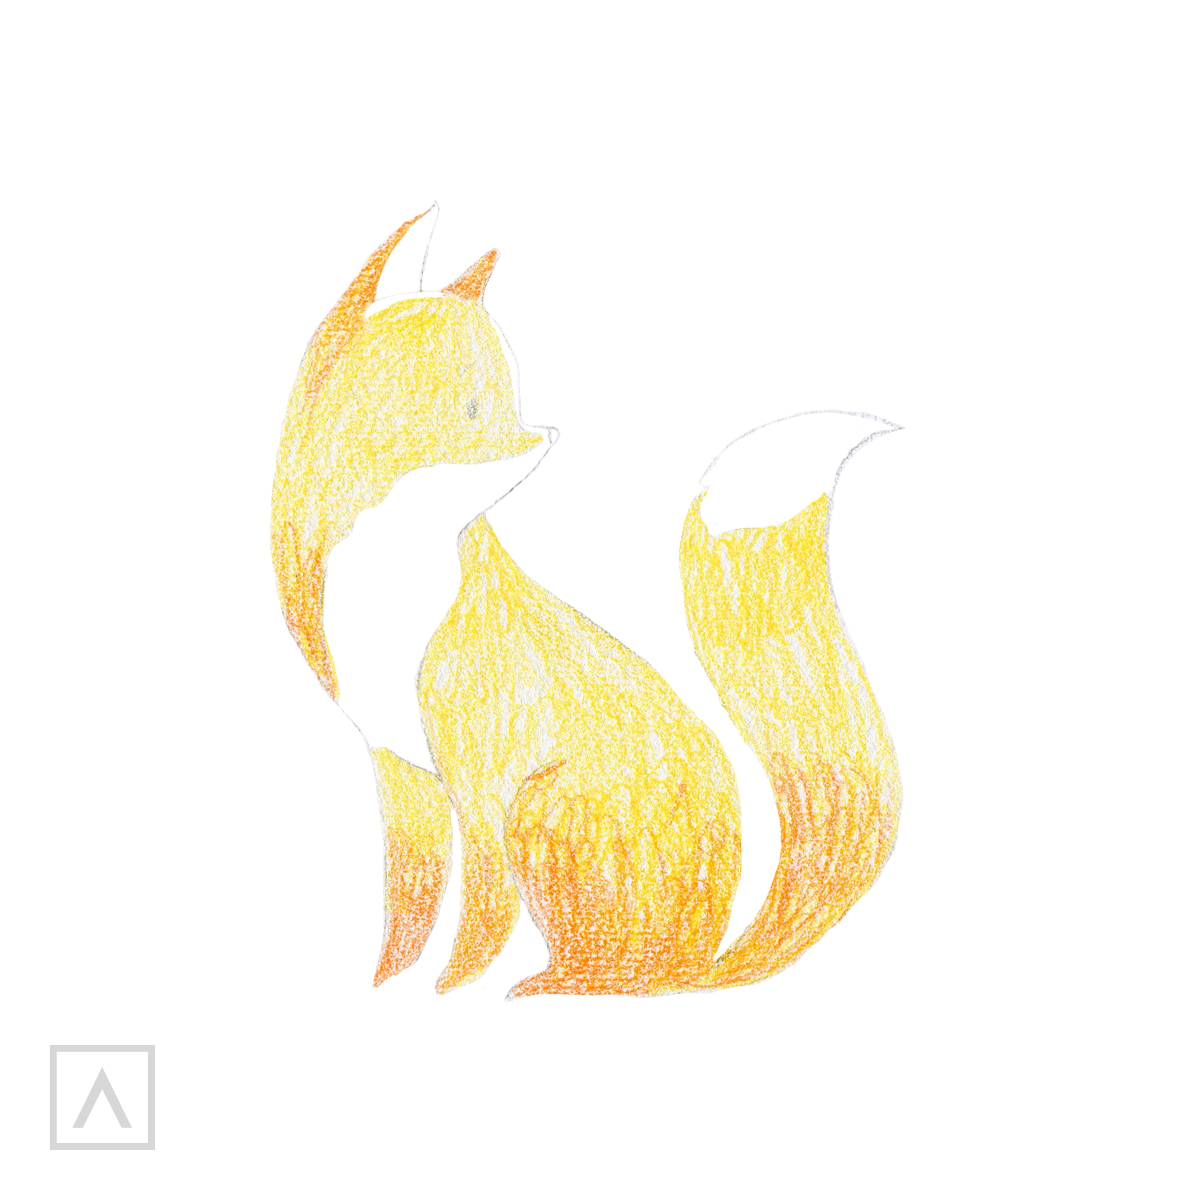
Step 4
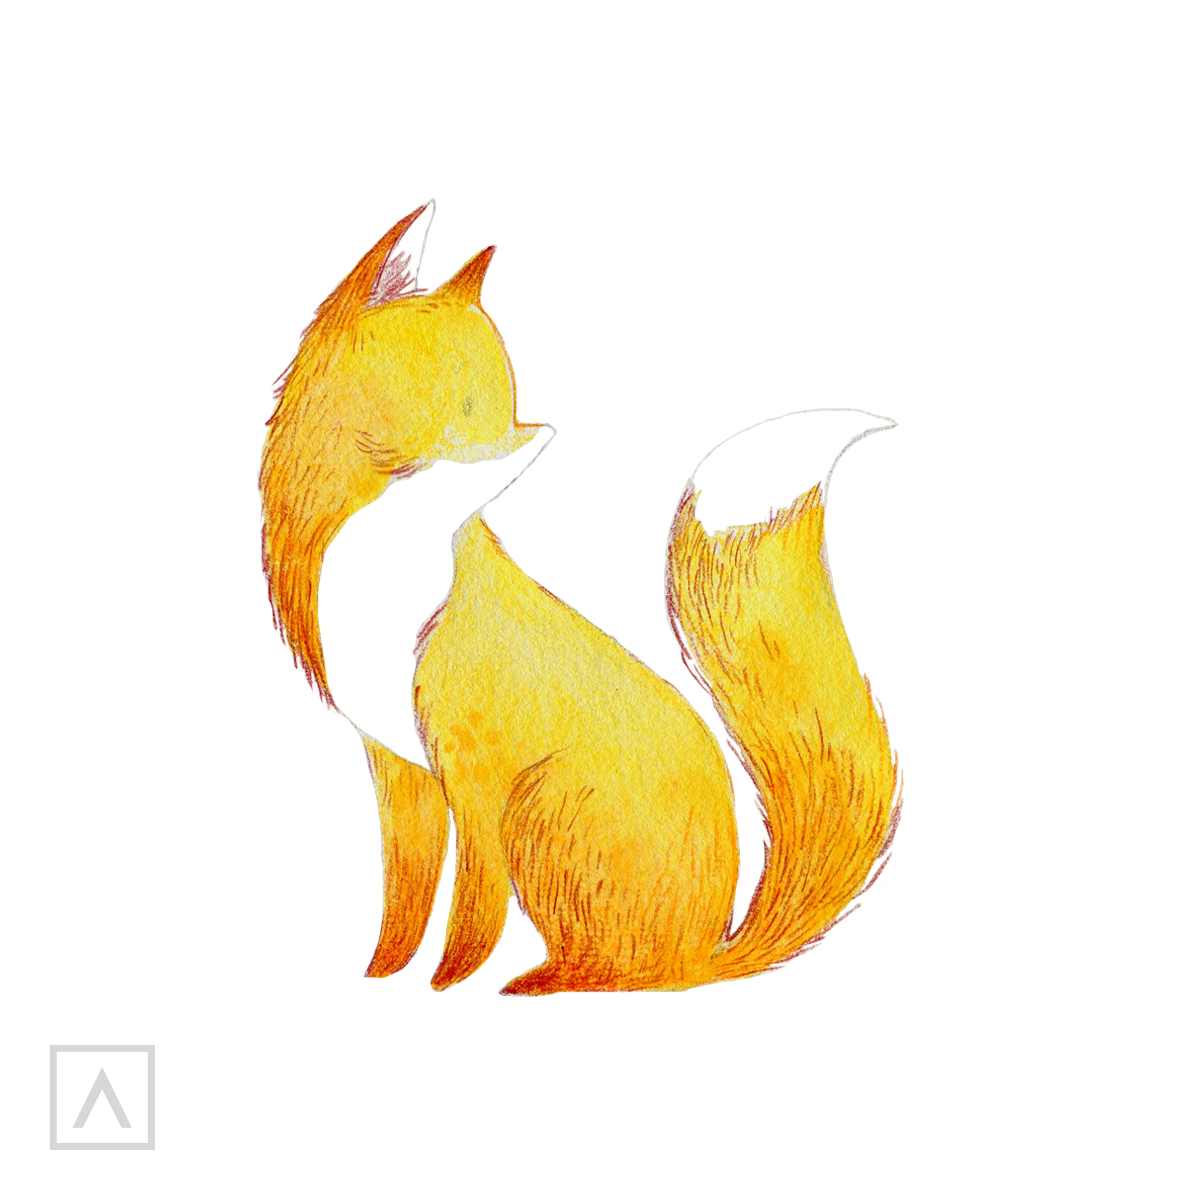
Time to add color! Using a watercolor pencil in Sunflower A016, I cover all the areas of the body except those sections I made especially for the white fur. Then I use Orange A003 to color over the lower part of the fox’s body and the ears.
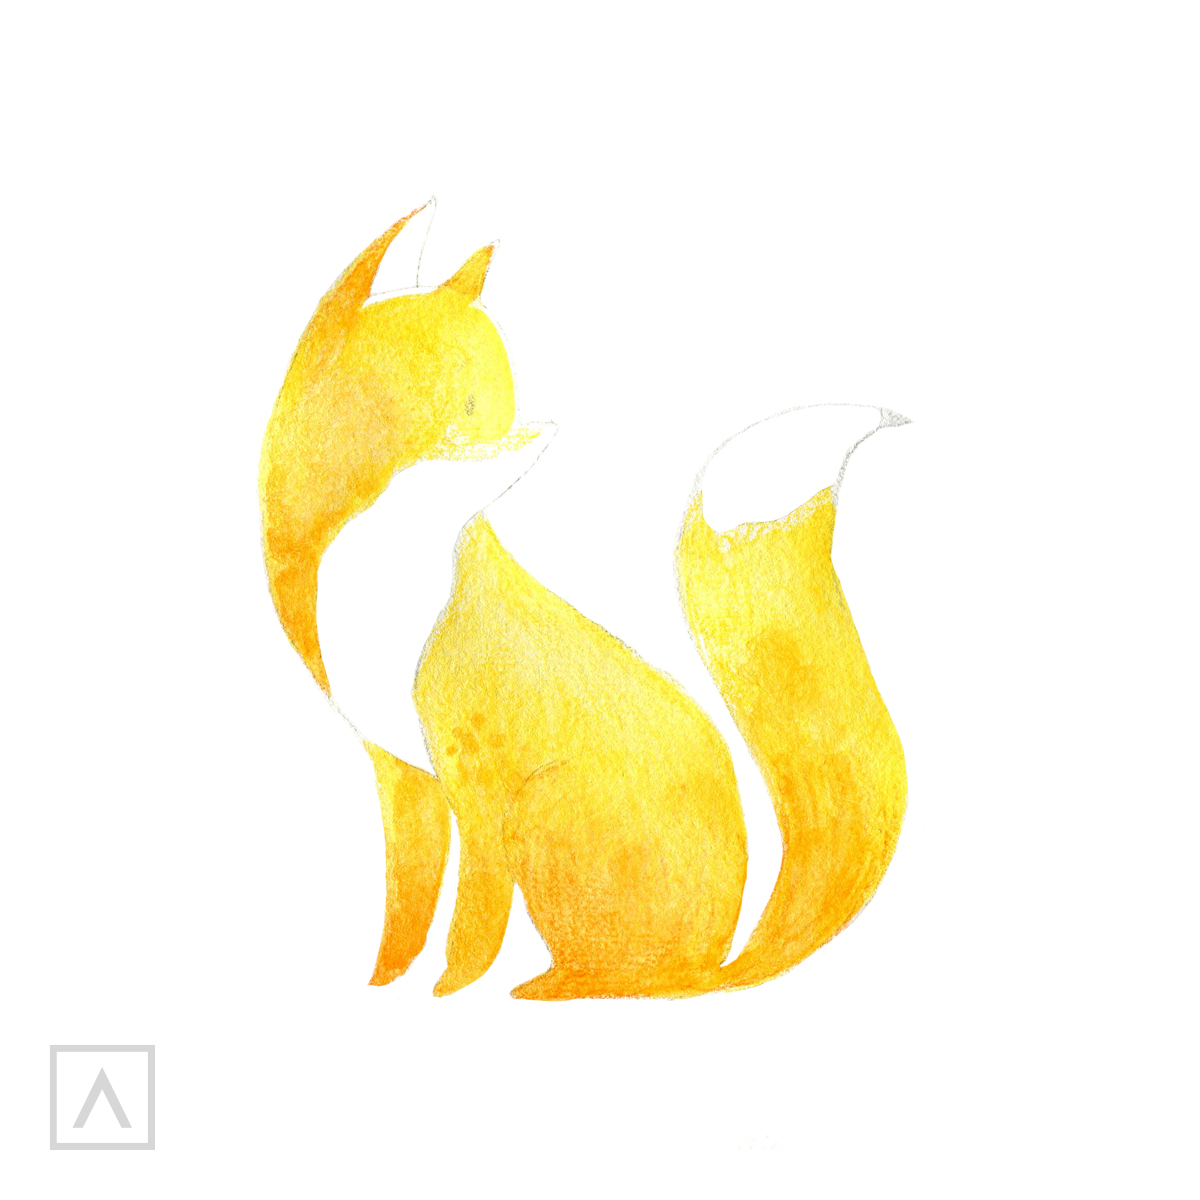
Step 5
This is the fun part and why I love watercolor pencils. By adding water to the pencil marks, it turns into paint! Now I can blend the yellow and orange for subtle gradations that soften his fur.
It’s important to wait for the paint to dry before proceeding to the next step.
Step 6
Once the paint is dry, I go back over his coat with Garnet A072. By placing short strokes, I can add the texture of fur, volume and dimension to his body.
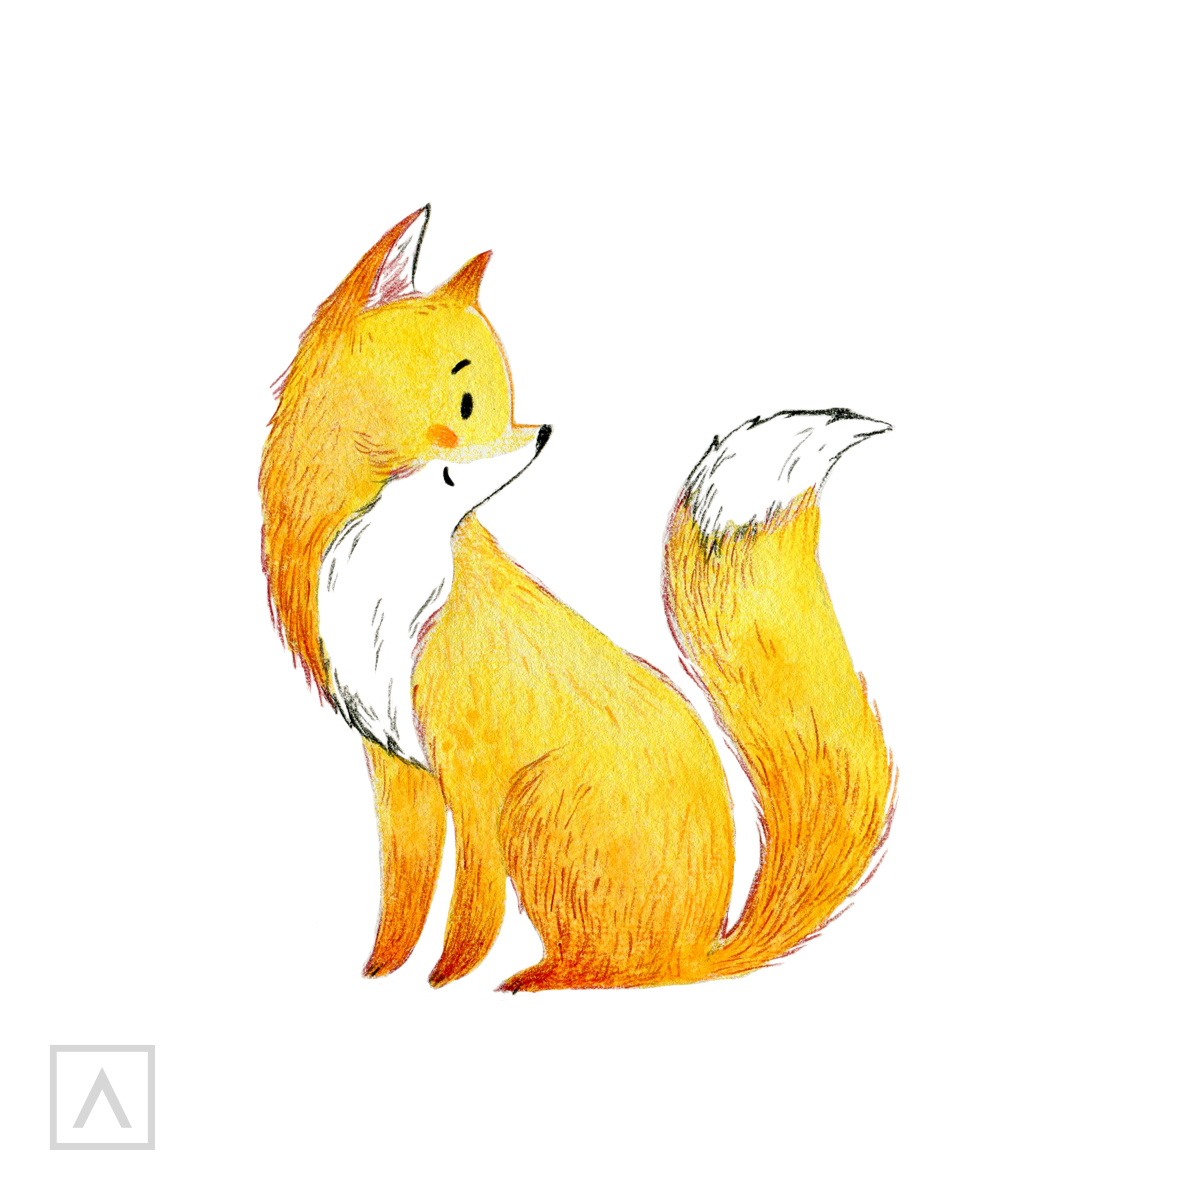
Step 7
I finish him off by outlining the edges of the white sections with Noir A012, adding a few small marks to give the feeling of thick fur in those areas. I also use it to darken his eye, nose and mouth. Finally, I color his cheek with Orange A003.
You’ve done it! You’ve just drawn the cutest fox ever! See, it wasn’t hard to do at all and now you know how to draw a fox!
Recommendations
- To get the look and feel of how a fox moves, I recommend looking at images of foxes in magazines, books or on the internet.
- To make sure the texture and colors show up well, I suggest you use paper with a granular surface instead of a smooth one.
- So that you don’t lose your lighter shades, it’s always best to start with your lightest colors and gradually layer areas where you want to achieve darker shades.
- It’s always a good idea to make swatches of the colors you want to use. With each color, I make one “dry” swatch and one “wet” one so I can see how the color performs each way.
I really hope you’ve enjoyed using watercolor pencils to create this fox. To gain more confidence in your drawing and painting, you can keep practicing with this one or come up with your own versions.
Don’t be afraid to take some chances, like changing the color or the pose. The more you practice the better you’ll get. But don’t forget the most important thing—having fun!
For more techniques with watercolor pencils, I invite you to watch this tutorial:


