
Today we’re going to create a beautiful peony flower painting using Arteza’s Metallic Watercolors Premium Artist Paints Set of 24, Professional Drawing Pencils Pack of 12, and our Watercolor Premium Artist Paint Tubes. Since peony flowers are known for coming in a rainbow of colors, our Metallic Watercolors are the perfect paints for the job! Before we start creating, let’s quickly touch on the meaning and symbolism behind peonies.
While peonies come in a wide variety of colors, the most common peony color is pink—we chose to paint our peony pink as a tribute to the beloved “Sarah Bernhardt” peony. This specific pastel pink peony became popular when in 1906 it was named after Sarah Bernhardt, the famous French actress, model, writer, businesswoman, and mother. Ever since, the peony has been associated with feminism, motherhood, happiness, and romance. Additionally, in Japan, peonies are known for symbolizing good luck, prosperity, love, and honor.
Whether you’re looking for prosperity, romance, or just to celebrate great feminists of the past, present, and future, adding more peonies into your life should only enhance it! For those of you looking to add peonies to your garden, you should know that they bloom in the late spring and early summer. It’s recommended to plant bare root peonies in the fall, before the first frost—this will provide you with your best chance of these gorgeous flowers blooming the following spring. While you may have missed your chance to plant them this year, you’re invited to create your own peony using these six easy-to-follow steps!
6 Steps to Create a Peony Flower
Step 1
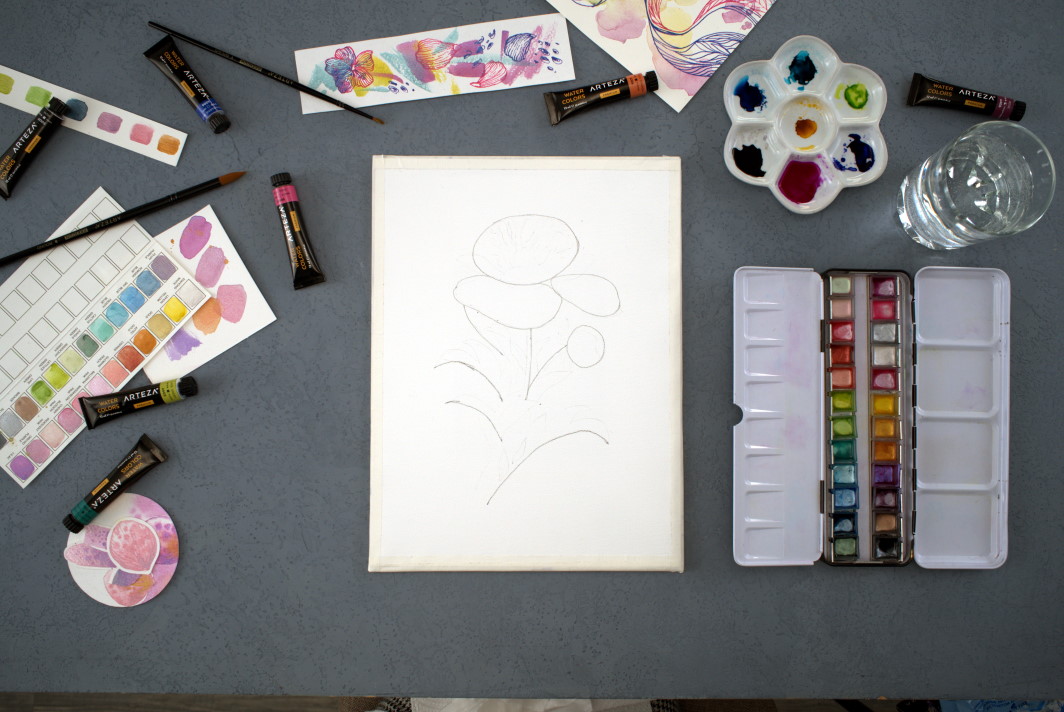
The most fundamental step of creating any painting is perfecting the sketch. To begin, draw a large oval which represents the bulk of the peony. Then draw two smaller ovals below it, these will become the petals of your flower. Next, add your stems and leaves, as well as a circle of a flower bud emerging from them. At this stage, you should be working relatively lightly with your pencil.
Fun Fact: Peonies are the 12th wedding anniversary flower.
Step 2

Once you feel confident with your initial sketch, continue adding details to develop your peony. Draw the petals in different sizes, to mirror the complexities of this honorable flower. Next, using smaller oval shapes, outline the leaves that cover your flower’s stem.
Fun Fact: Peonies are native to Southern Europe, Asia, and Western North America.
Step 3

At this stage you are perfecting those finer details before adding colors to the peonies. Draw a bunch of small peony petals in the center of the flower, where you created the initial circle. Then add the edges of the larger petals to your peony. To finish off turning the sketch into a drawing, outline and sharpen the leaves.
Step 4
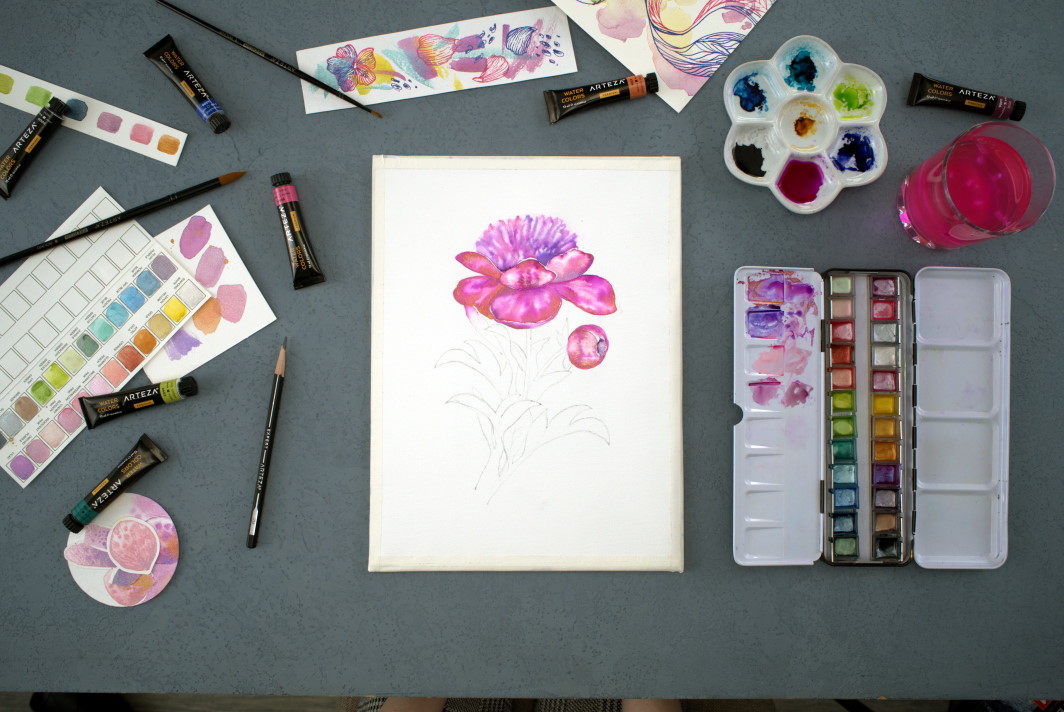
To prepare your sketch for paint, use a kneaded eraser to remove the excess graphite from the outline of your work. Once you’re ready to bring your peony to life, start by filling the petal area with water. Next, add the colors of your choice. Watch as the colors naturally create a beautiful watercolor effect, which becomes even more immersive as you add each color! Adding the water first, then your pigments proves to be a successful approach to watercolor painting.
Step 5
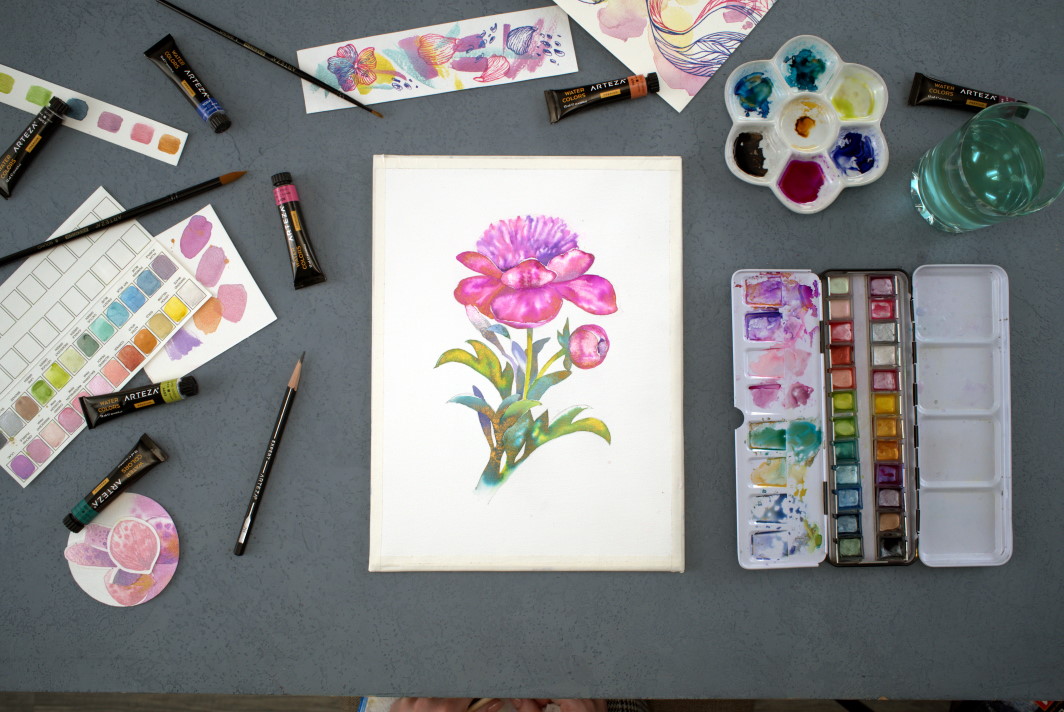
Next, address the leaves and stems of the peony. First, wet the leaves with water, then add whichever variation of greens you feel called to. Since the watercolors’ path was filled with water first, you shouldn’t have any issues with your colors running outside of your established outlines. Adding yellow and gold shades to the leaves and stem will help to create a more harmonious color scheme in your painting!
Fun Fact: Peony plants can live to be 100 years old and still produce flowers.
Step 6
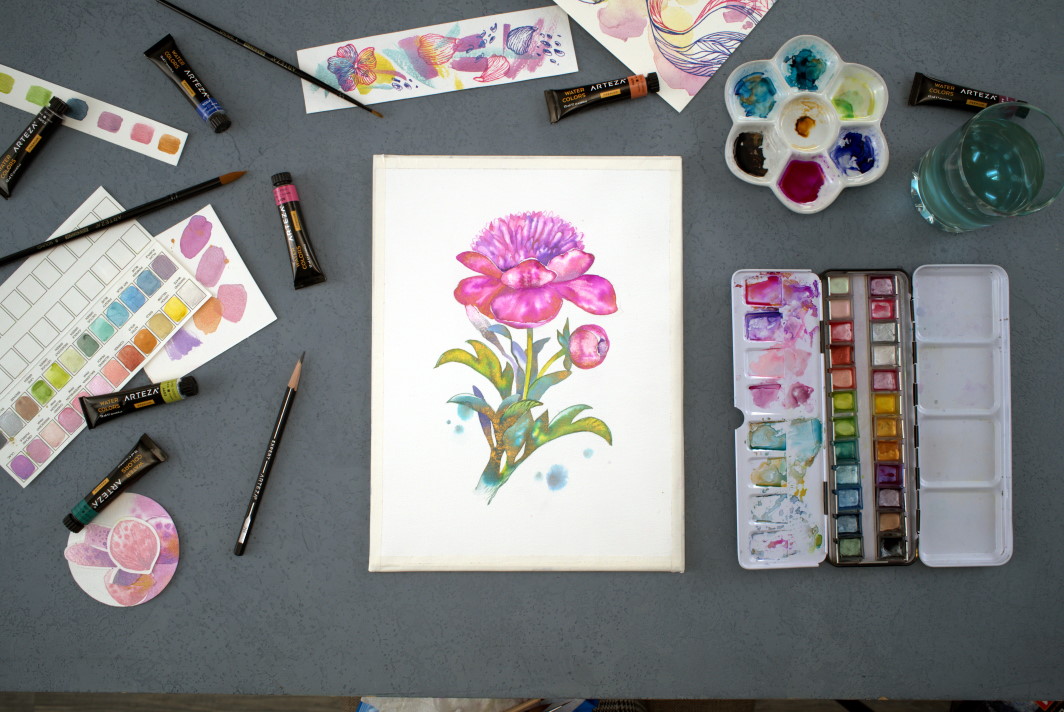
The last step is to elaborate further on the details of your peony flower. Add contour lines to your leaves and petals, as well as the central part of the flower bud. Create these finer lines and details to truly define your peony further. Finish by adding a few splashes of color to complement the base of the peony. Voila! Your stunning peony flower is ready!
We hope you enjoyed creating this lovely peony flower with us. Now that you know how to draw and paint peonies, you can add them to your landscapes and portrait drawings! We can’t wait to see all of the peonies you create, be sure to share your peony flowers with us on social media. Additionally, let us know in the comment section of this article what color the peony you created is!
Did you inspired by this beautiful peony to draw other flowers? Make sure to shop the suggested set below for your next creation.


