
Please join us in creating this vibrant drawing of a sunflower! Today we will be using Arteza’s Premium Watercolor Pad, Real Brush Pens Set of 96, #2 HB Mechanical Pencil, a glass of water, a water brush pen, and a kneaded eraser. While the results may resemble a watercolor or gouache painting, we assure you, we only used our Premium Real Brush Pens to create this work of art. We’ve broken this drawing down into six steps, so you can follow along at home. Before we get started, let’s take a moment to reflect on what makes sunflowers so special!
Sunflowers (genus Helianthus) are native to North, Central, and South America, and are believed to have been first cultivated by indigenous tribes in what is now Mexico and the southern United States between 3,000 and 5,000 years ago.
By 1500, sunflower seeds were taken to Europe by Spanish explorers, which led to this plant becoming widespread. Today, sunflowers are seen as symbols of unconditional love, faith, joy, loyalty, and vitality. The sunflower is of course named after its resemblance to the sun. Akin to the sun, sunflowers are associated with radiating light and happiness.
There is a common myth that sunflowers face each other on cloudy days, as if to say they provide one another with abundance and light. While this is a beautiful idea, the theory has been debunked. However, this cute myth lingers with many, which could be another reason why receiving sunflowers is often associated with brightening someone’s day. If you’re looking to add some sunshine to your garden, plant sunflowers in late spring, once the ground is warmed up. Sunflowers thrive in all 50 states, inviting Americans all over the country to welcome them into their gardens. If you’re looking to marvel at a sunflower, without getting your hands dirty, follow these six steps:
List of Supplies:
6 Steps to Draw a Sunflower
Step 1
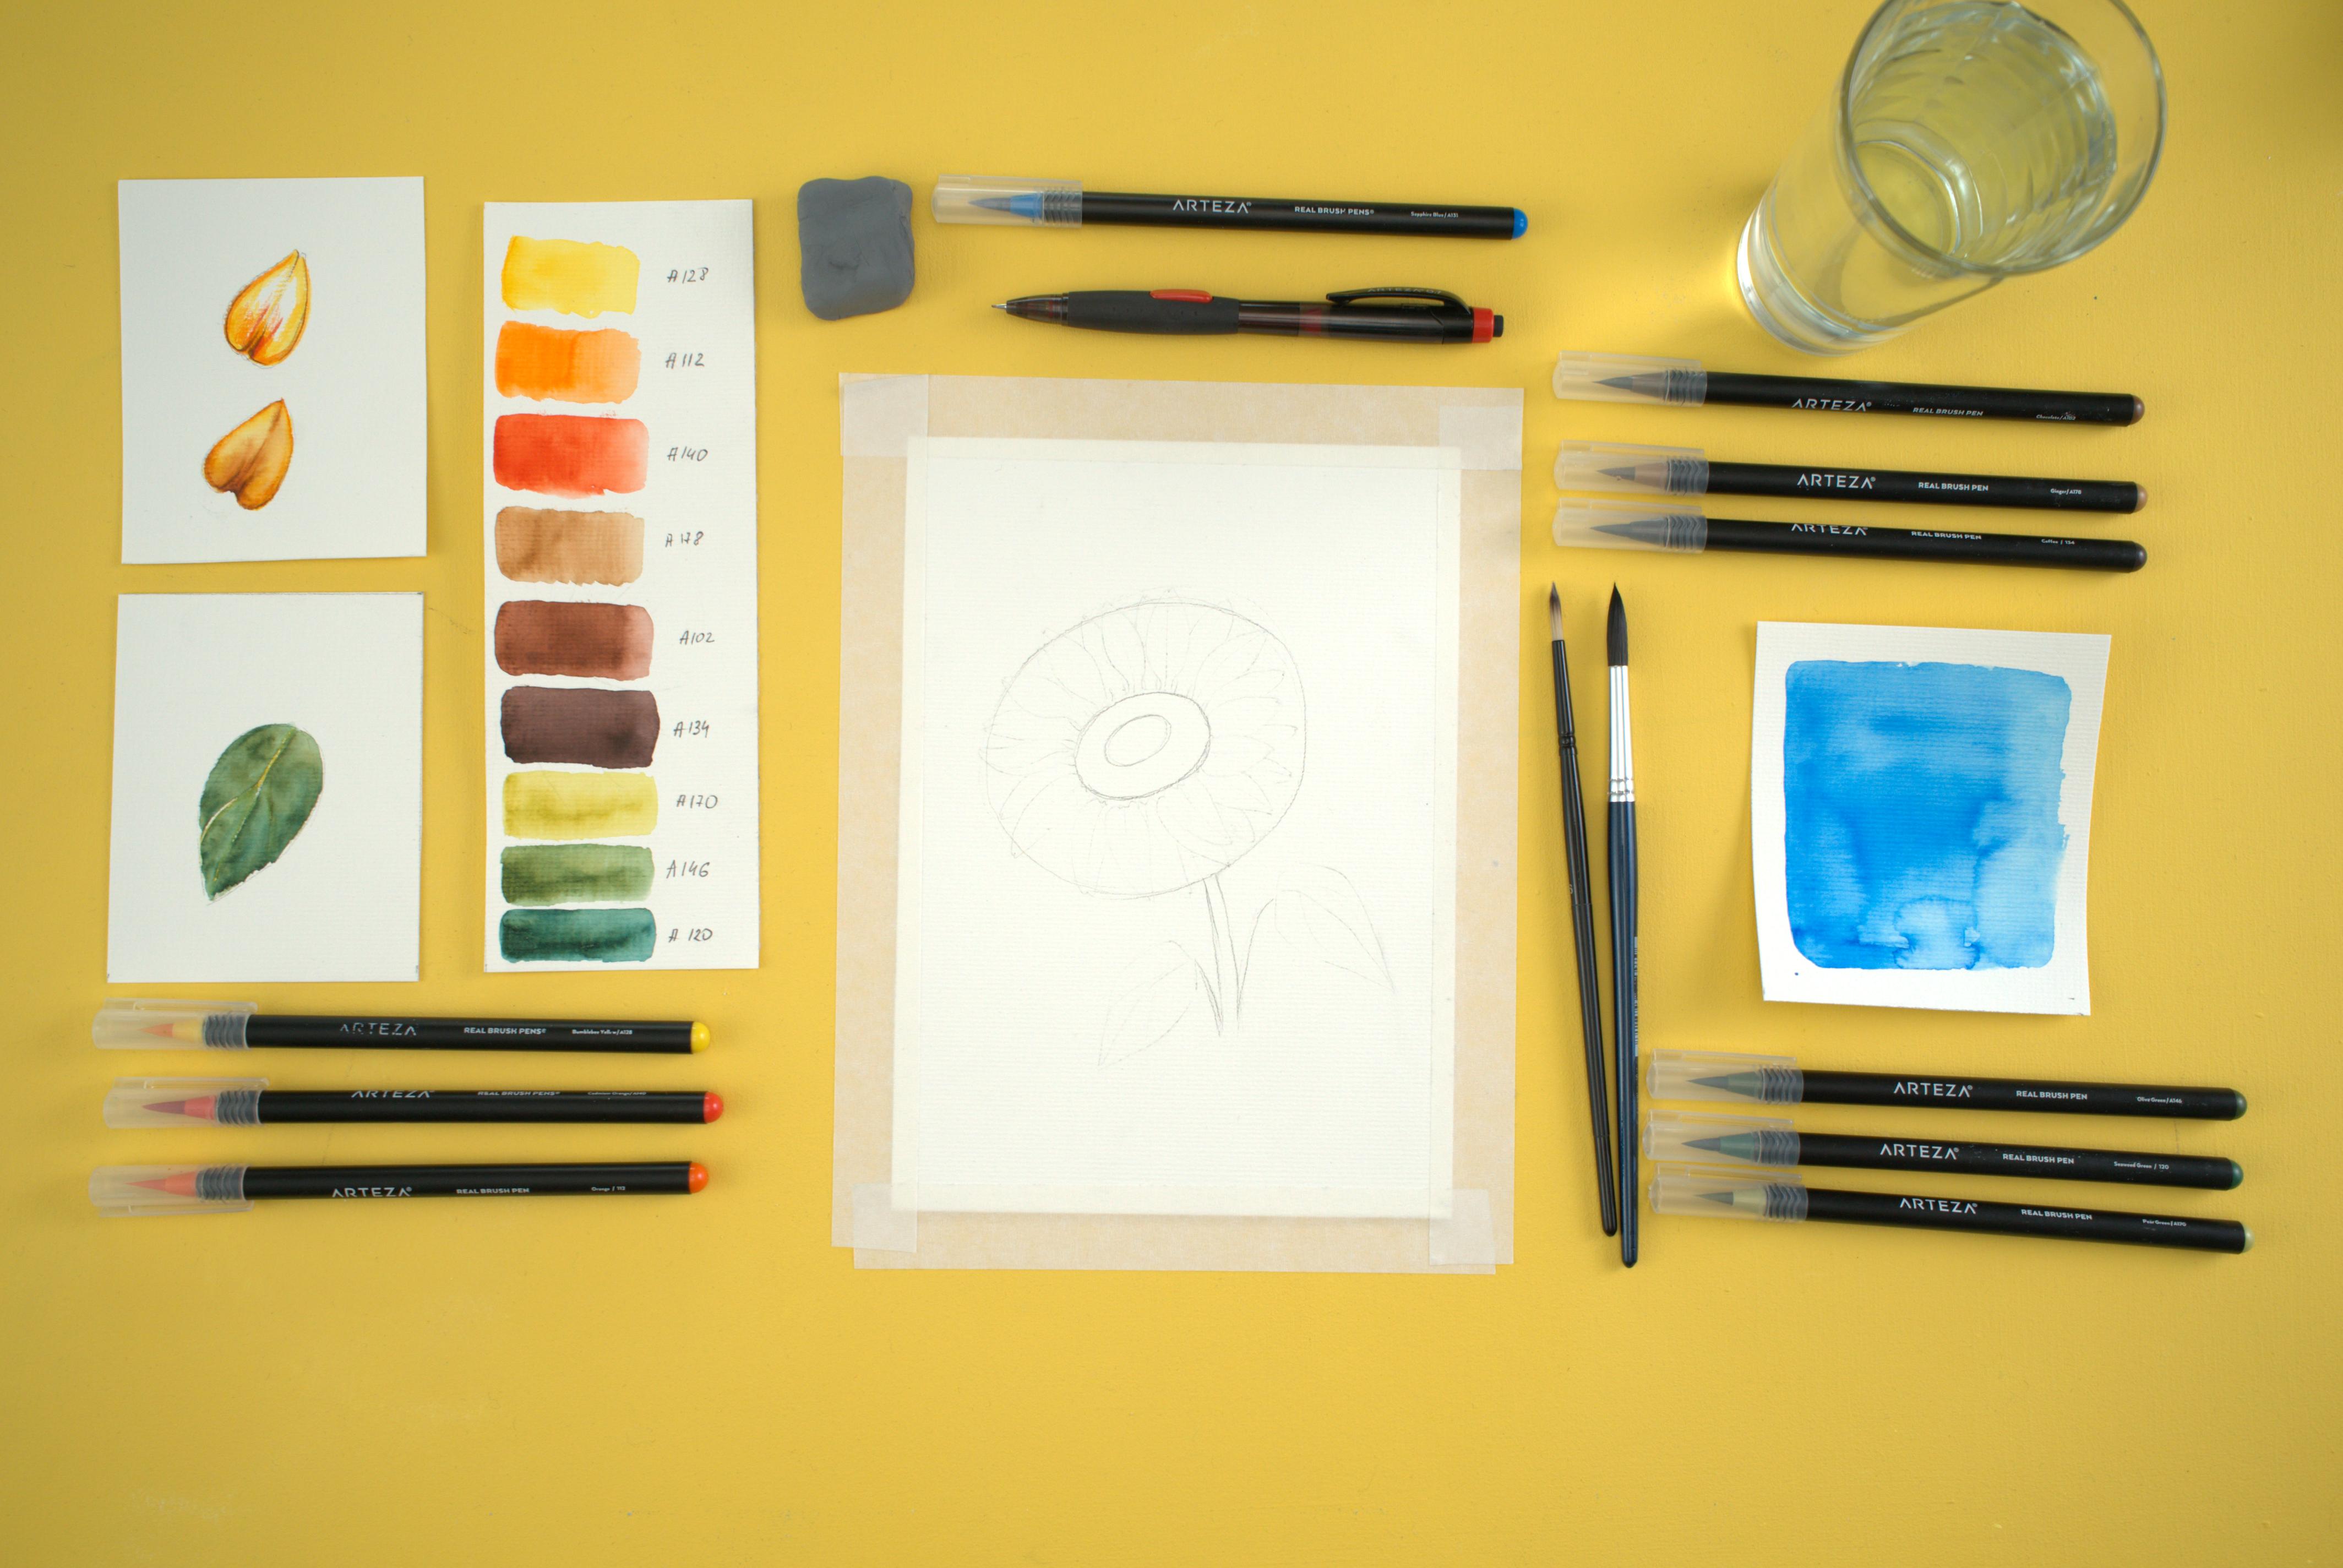
Using a mechanical pencil, create a circle to reflect the size of your sunflower’s head. Then, create two additional circles within your first circle. Draw a stem from your sunflower’s head, create lines of the veins where the leaves will be added later. Add a light sketch of the petals, coming from the center of the sunflower.
Fun Fact: In Greek mythology, in the story Clytie and Apollo, Apollo turned Clytie into a sunflower to avoid having to ever see her again.
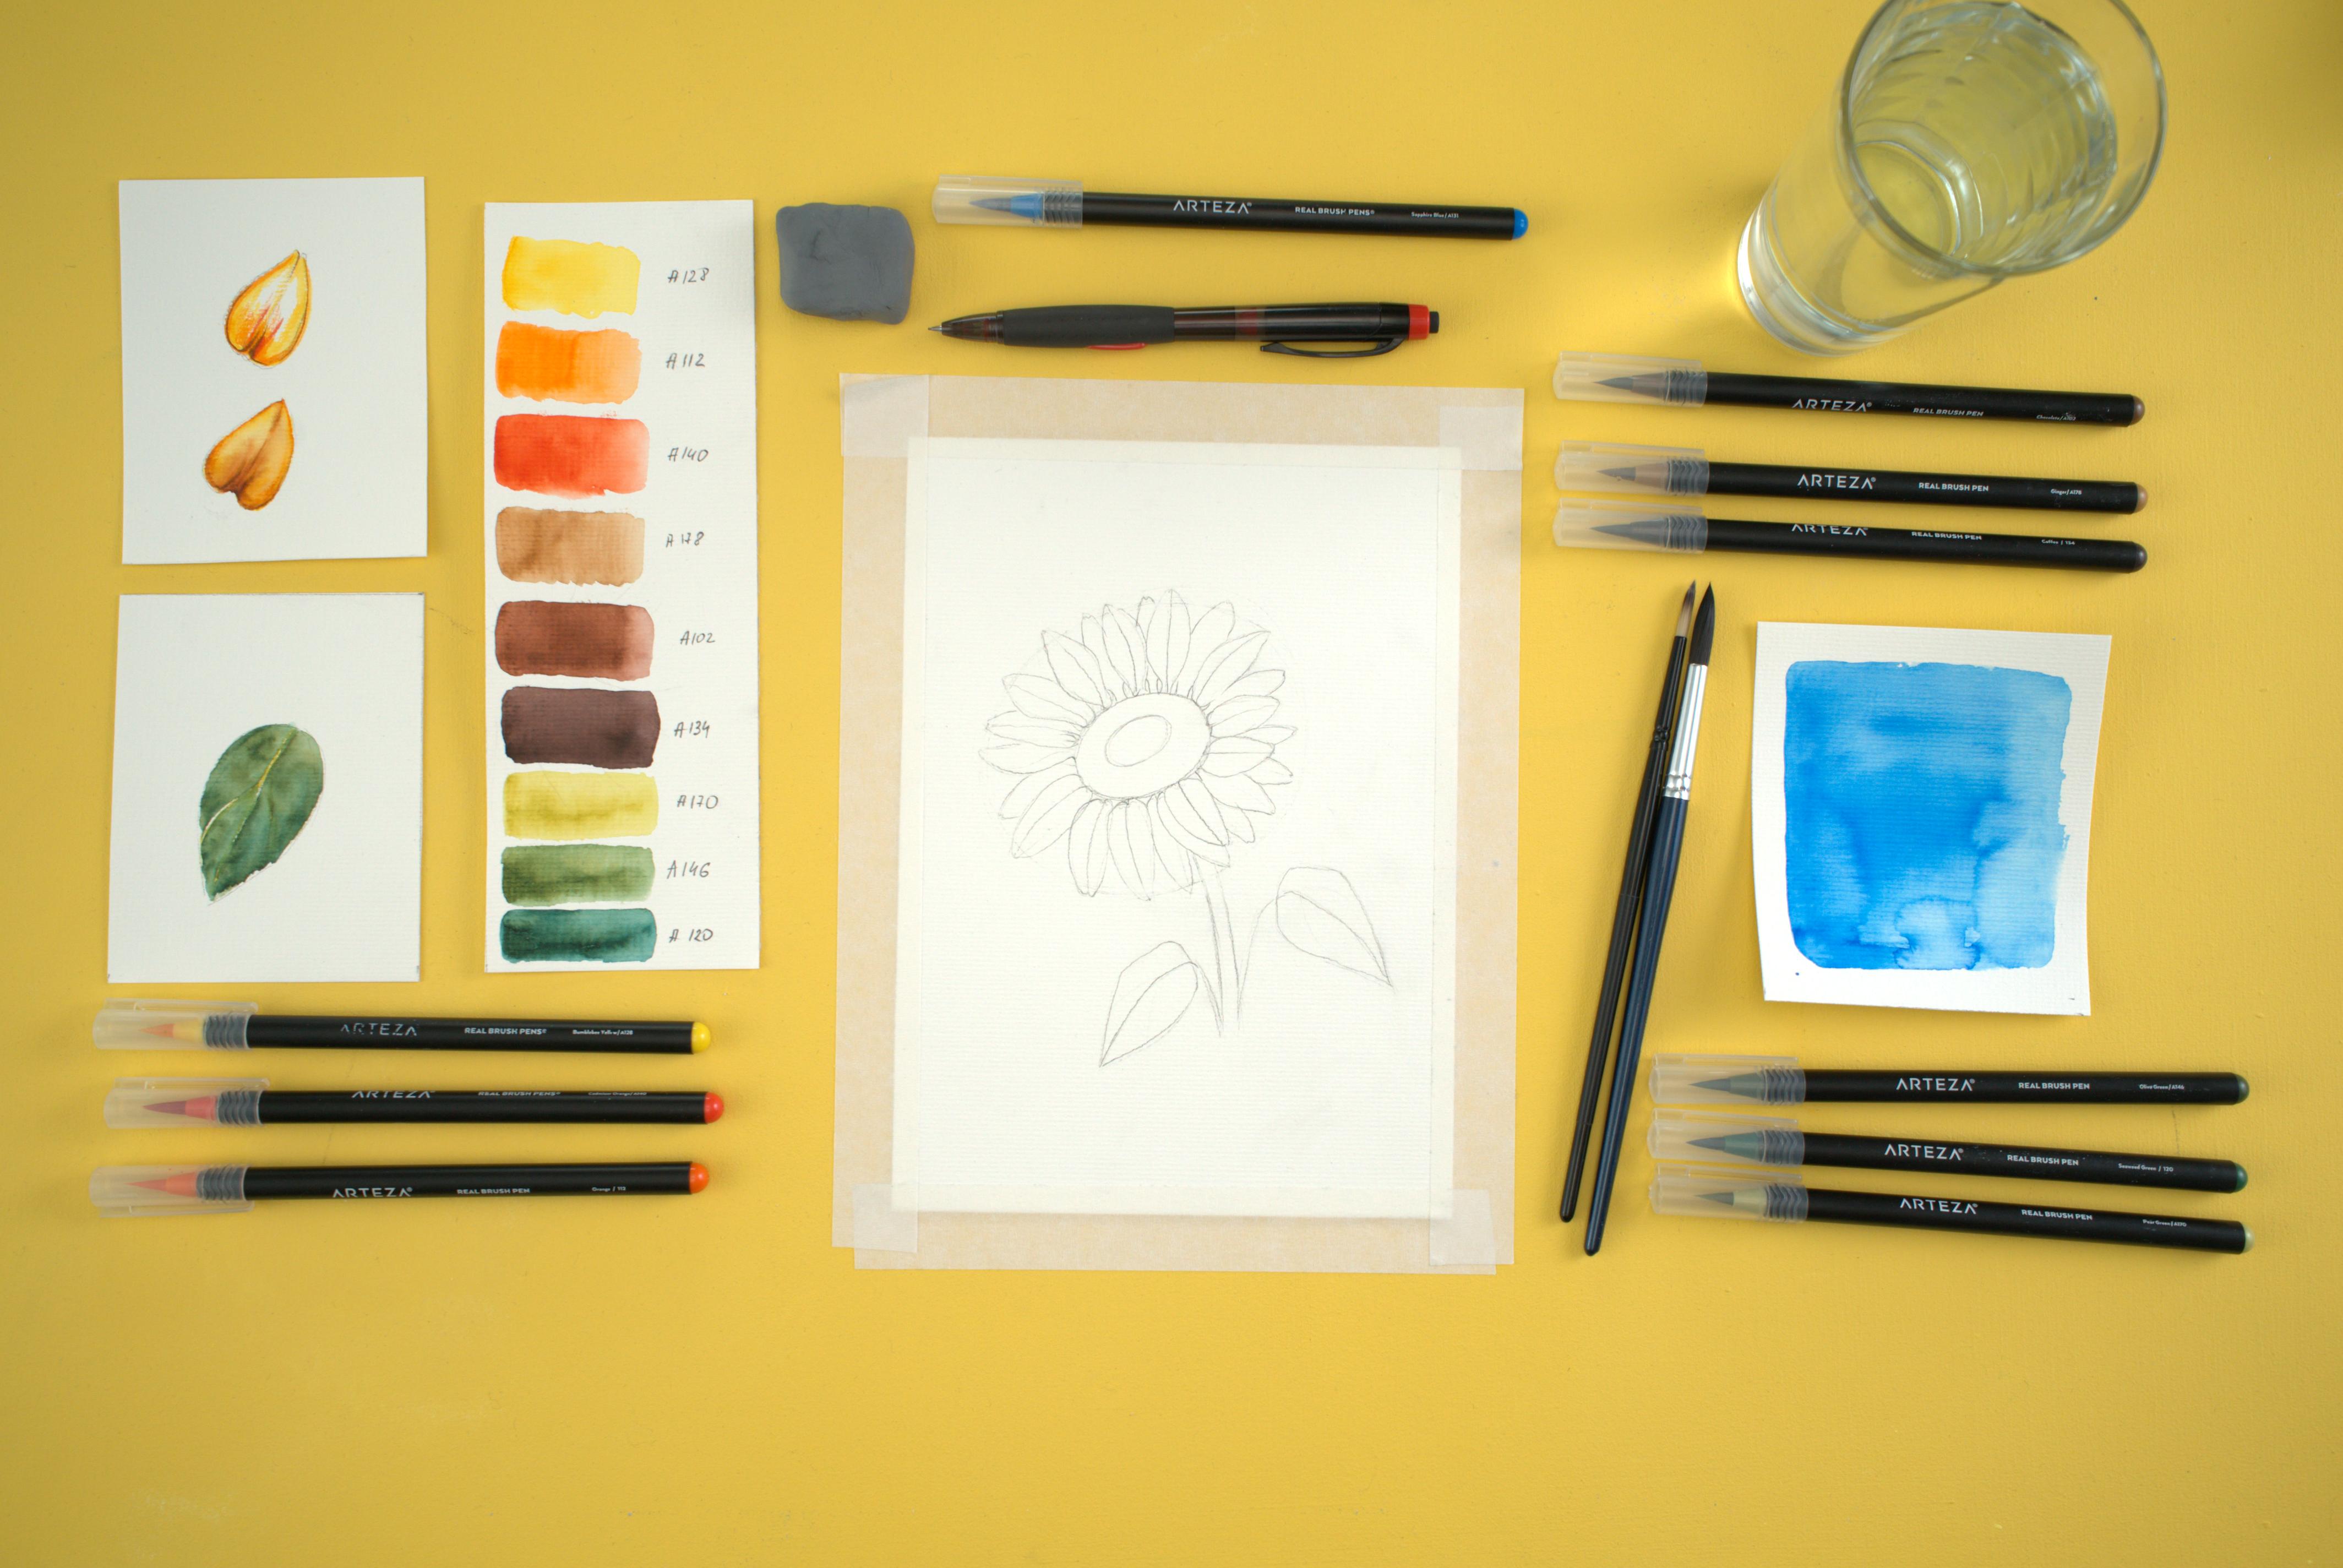
Step 2

Strengthen your sketch by adding outlines to your petals. Add more structure to your sunflower’s leaves. Draw a second row of petals that are slightly hidden under the petals in the top row, this will add more dimension to your design.
Fun Fact: While Vincent van Gogh was known for painting sunflowers, other famous artists also made a name for themselves painting this beautiful flower, including: Alfred Gockel & Diego Rivera.
Step 3
Erase any of the sketch lines that no longer apply. Add any remaining details to the sunflower you’d like at this stage. Next, take your kneaded eraser and remove any excess graphite. Working from a softer sketch will allow your colors to shine brighter!
Step 4
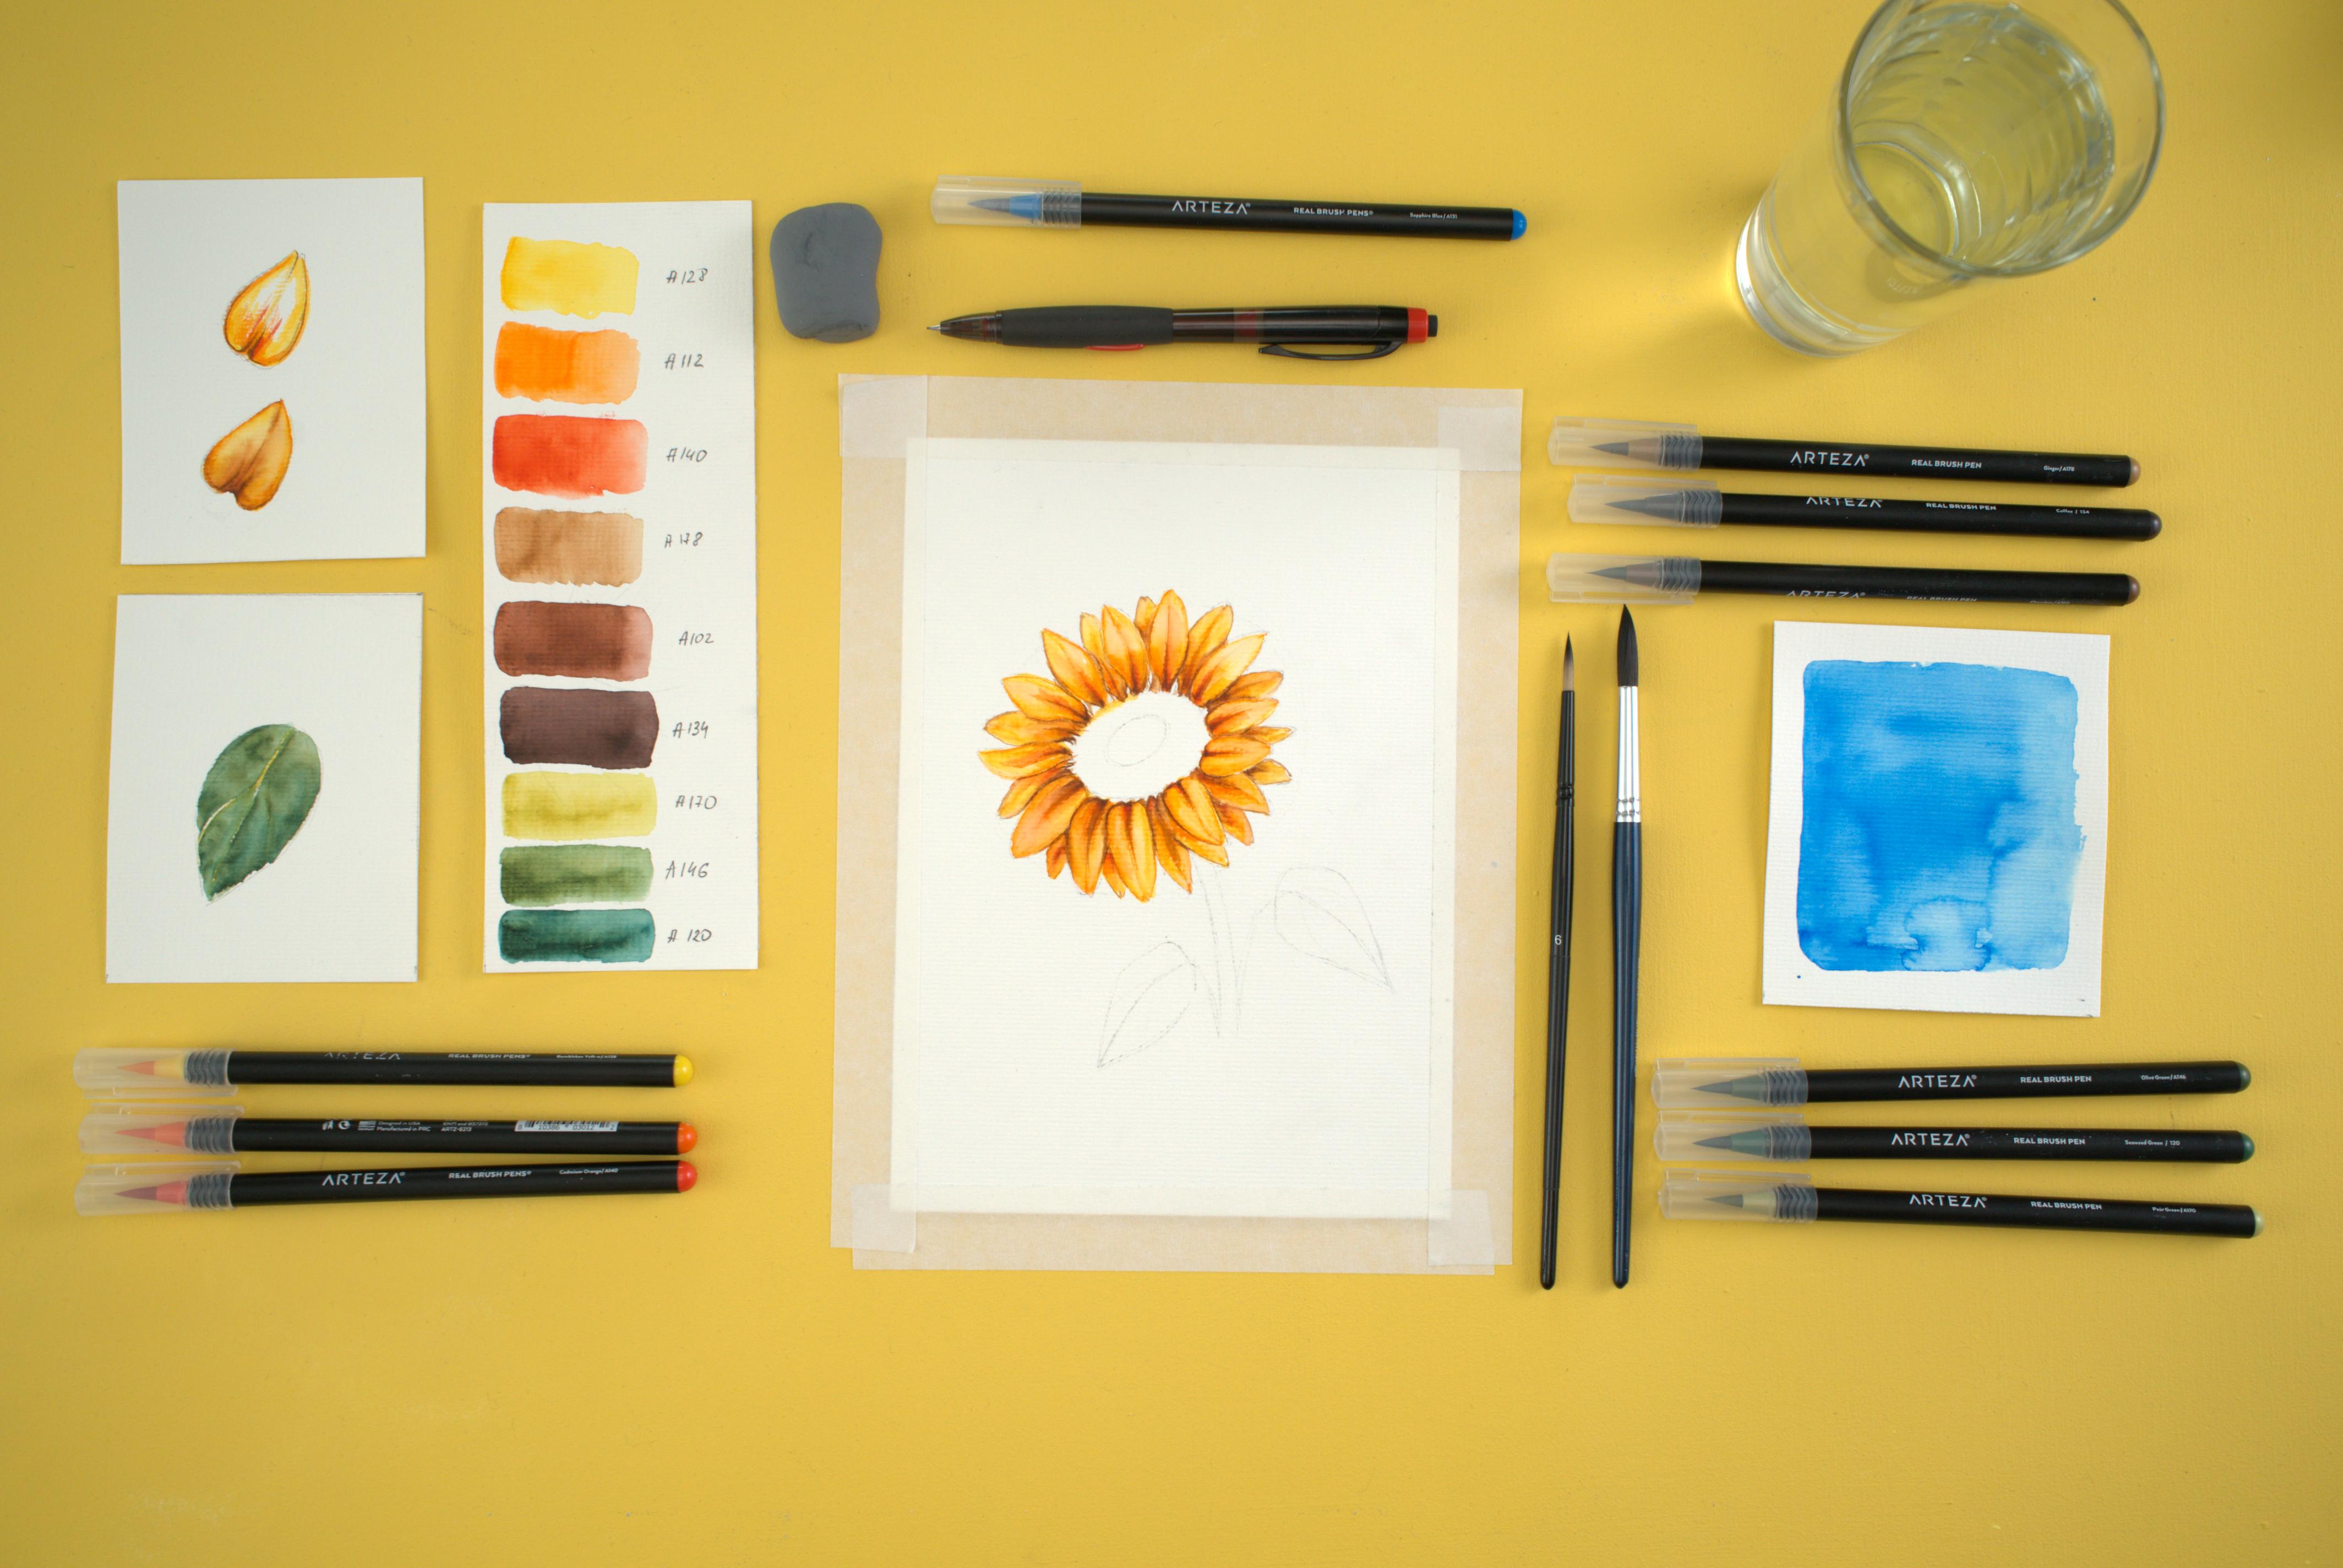
Now that we have a solid sketch, let’s bring this drawing to life! Paint over the petals with A128, or any yellow color in your set. Next, add A112 to the shadows of the petals, creating a striking contrast. Then, add A140 to the base of the petals. We added the shadow of the lower petals with Real Brush Pen color A178.
Fun Fact: Sunflowers aren’t only yellow, sunflowers can also be red and purple!
Step 5

Use A134, or any dark brown you prefer, to paint the middle of the sunflower. Since Real Brush Pens double as watercolor markers, you’ll find they’re an absolute breeze to work with. Use A102 to draw the inner circle of the sunflower. Then, add shades A112 and A128 to emphasize the contour of your sunflower. These finer details go a long way!
Step 6
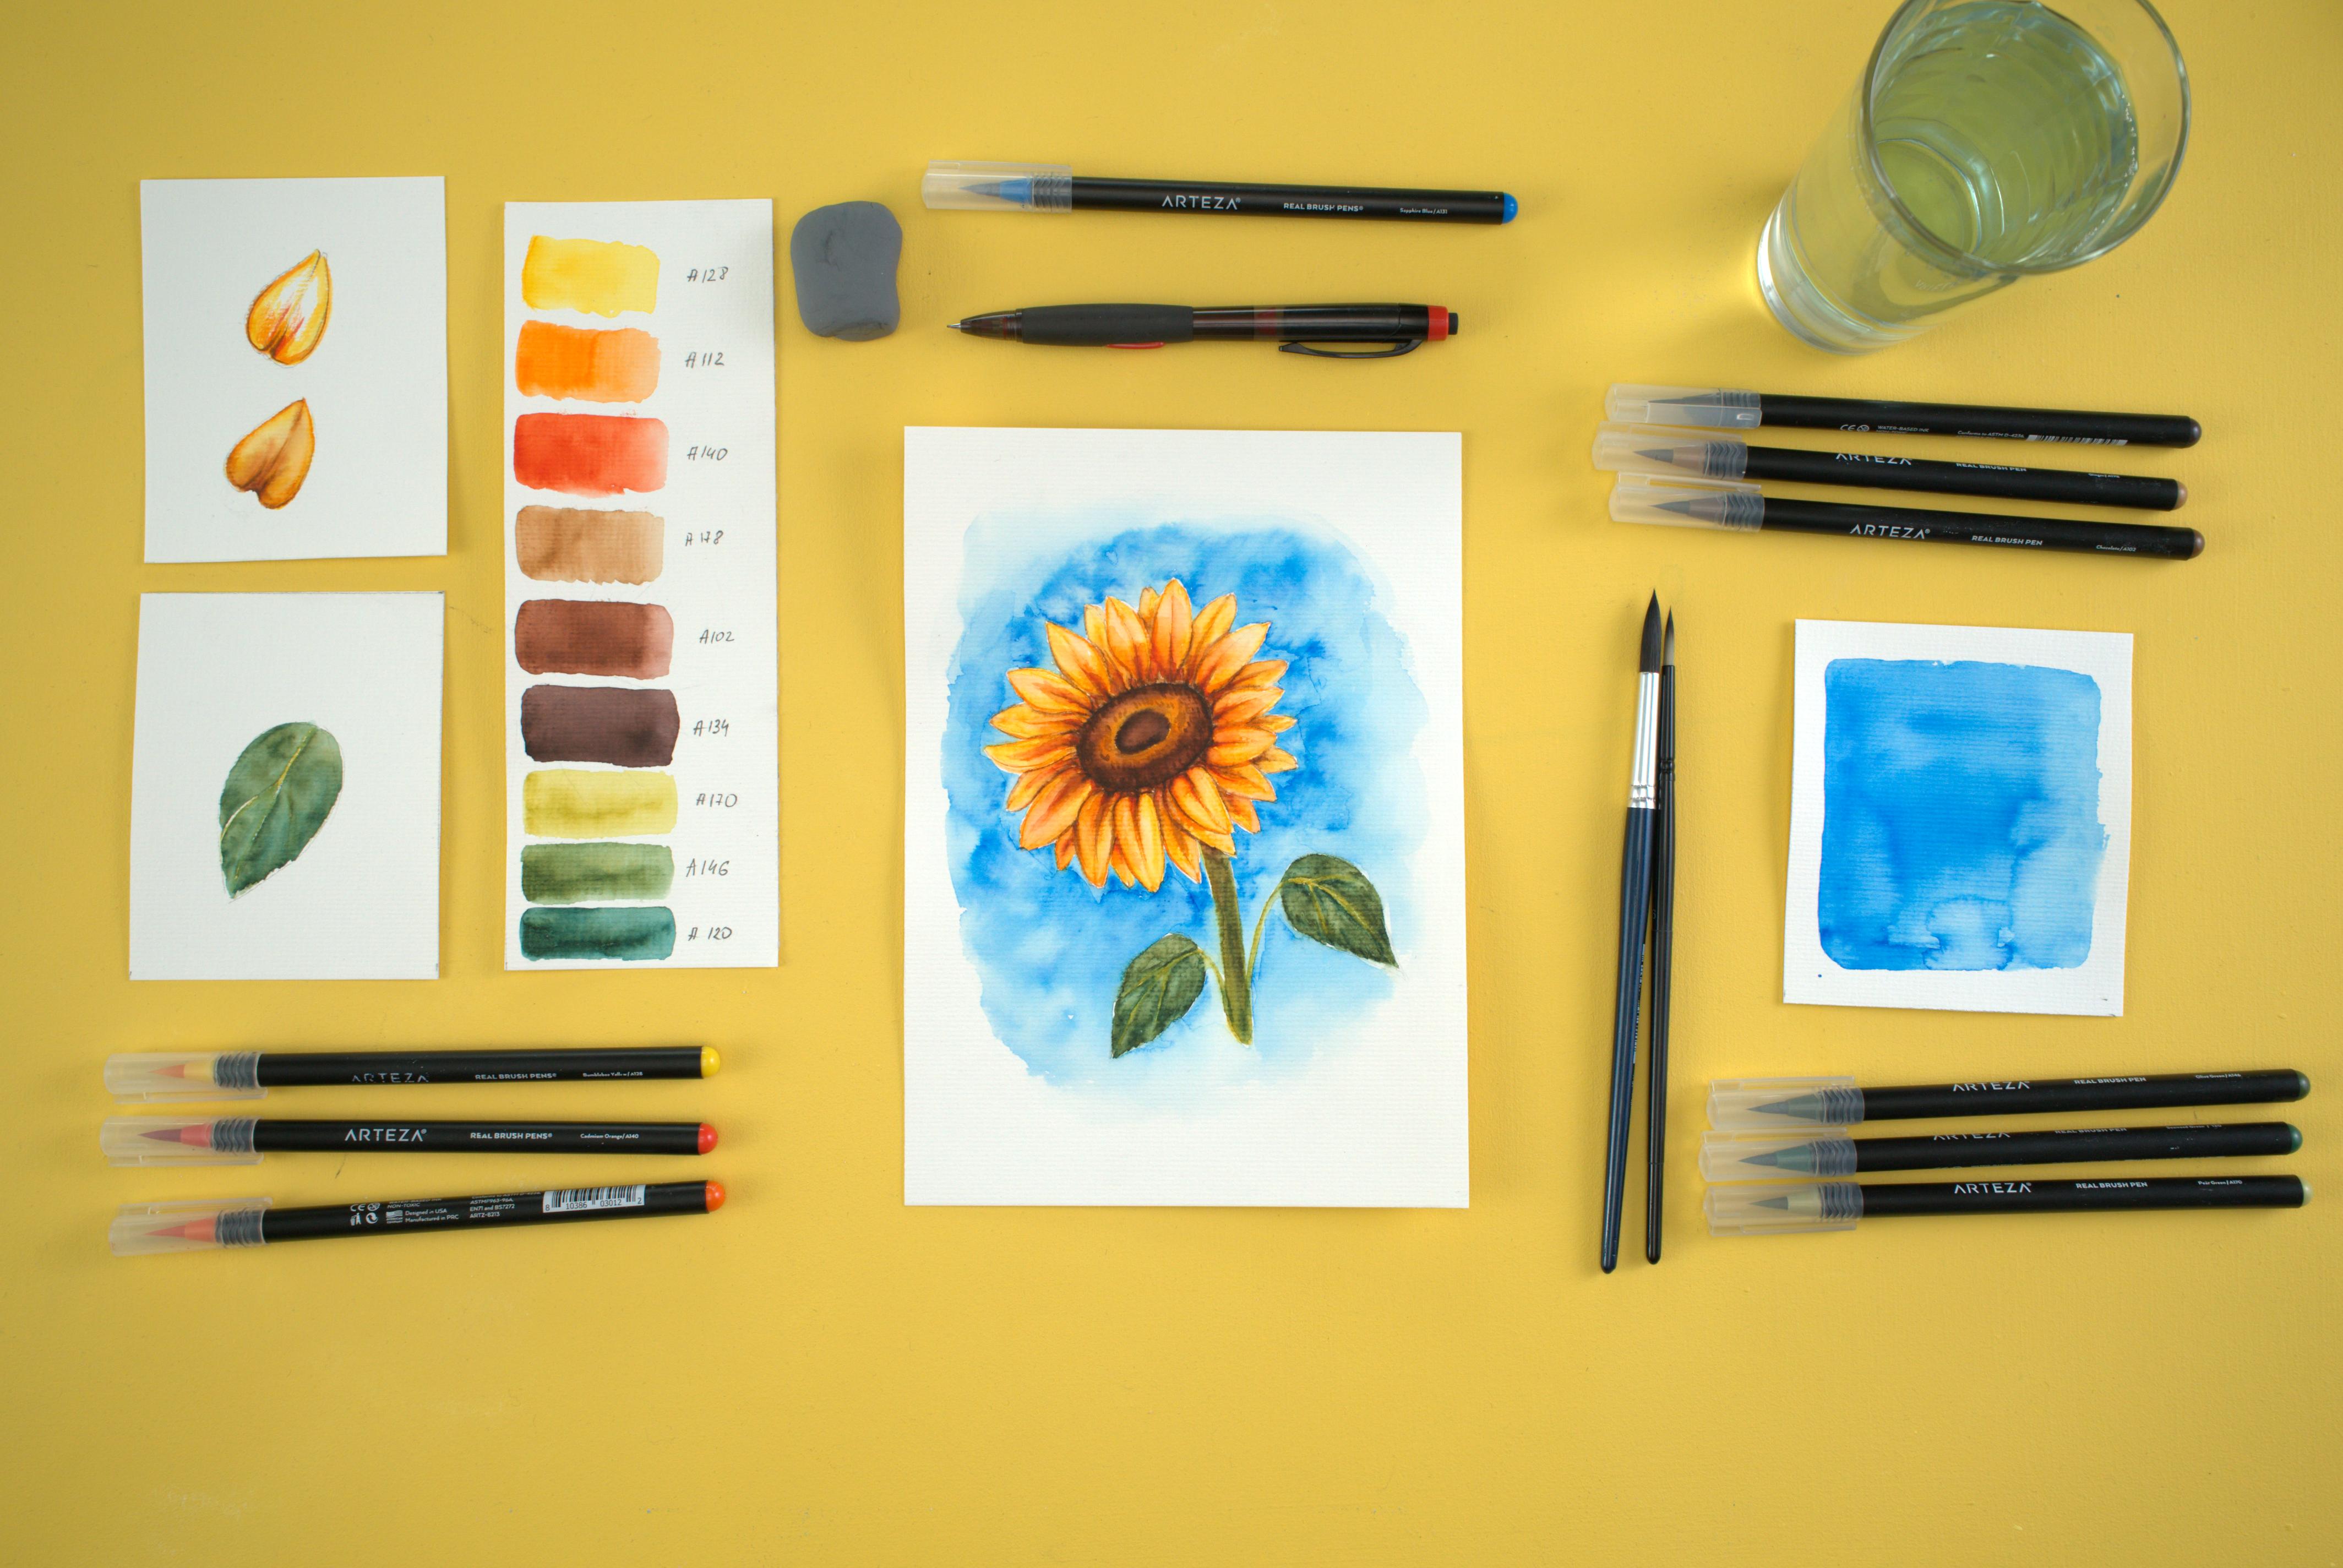
Using A170, a light green, paint the stem and veins of your flower’s leaves. Next, use A146 to paint over the leaves. Use A120 to create smooth color transitions here. Lastly, use whichever color you’d like to complement your sunflower—here we used A133, to resemble a clear blue sky.
Thank you for creating a beautiful sunflower with us today, we hope you found this article insightful, entertaining, educational, and encouraging. Let us know how your sunflower turned out in the comments section of this article, and tag us on social media! Be sure to check out our YouTube video that complements this article above!
Are you feeling inspired and want to create more art? Shop our site for your next creation.


