Table of Contents:
Let’s Get Started Painting with Watercolors
Painting with watercolors is considered a tried-and-true medium for those who love to paint. Other mediums just cannot capture or duplicate the luminous quality you can achieve with watercolor. Each layer of paint you apply enhances the layer before it and it is this see-through characteristic that watercolorists everywhere love the most about the medium.
Start with Premium Paint
Whether you are young or old, a newbie artist or an old pro, Arteza gives you the great quality paint you need when learning how to paint with watercolor. The Arteza Watercolor Paint 60 Color set was designed to make your watercolor practice easier and more fun than ever. With this set, you have all the best variations of the primary colors and neutrals, but you also get a wide range of shades of those colors. How cool is this? All these colors to play with mean hours of fun times mixing all the hues of the rainbow and more!
Arteza Watercolor Paints are safe to use and do not require special or toxic chemical substances for cleaning your brushes. Clean-up is very easy by using common soap and tap water. Most colors don’t permanently stain clothing and can be easily washed out in the laundry. Best of all, the 60 tubes of paint come in a handy kit with the tubes organized in separate trays to keep them all together and organized and ready for your next painting session.
Don’t Forget the Paper
The last thing you want is to have your beautiful painting end up on a buckled piece of paper. That’s what you get when you use thin papers, so it is important to use high-quality paper made especially for watercolor painting. The Arteza 32 Sheets Watercolor Pad is the ideal paper to choose since it is able to withstand the application of as much water as you need to achieve the results you want. It comes in a glue-bound pad, making it easy to protect the paper from dents, dirt, or tears. This double-sided paper has a smooth side and a textured side, allowing creative freedom to decide how you would like the finished painting to look. It is acid-free, which means your work will not fade, but be around for a long time.
Now that you have the paint and paper, grab some small, medium, and large size brushes along with some water and let’s get some step-by-step instructions from a professional watercolorist. After watching the video and reading the steps, we know you’ll be on your way to creating your very own watercolor masterpieces.
Step-By-Step Guide
Step 1: Sketching
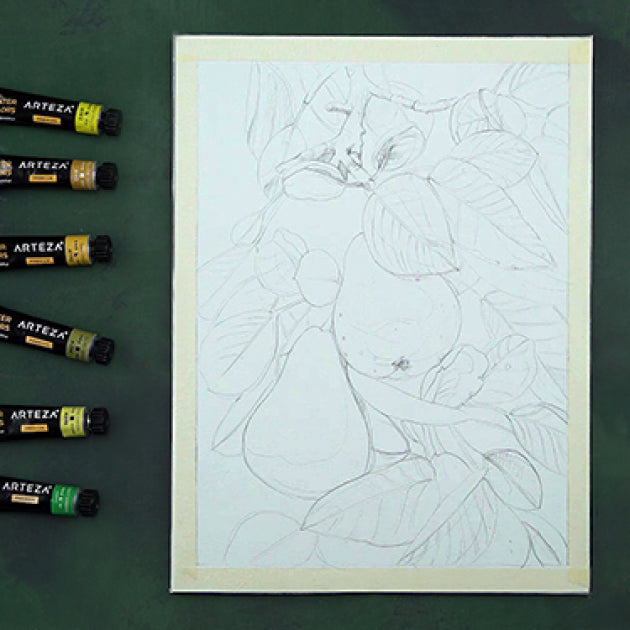
Begin by taping all edges of paper to prevent it from moving while the paint is wet. Taping off the edges also creates a crisp, white frame around the picture once you’re finished and you remove the tape. Make a faint sketch of what you would like to paint, adding in as many areas as possible where you will be adding colors. The artist recommends also adding the shapes of the shadows to the sketch as well.
Step 2: Adding Color
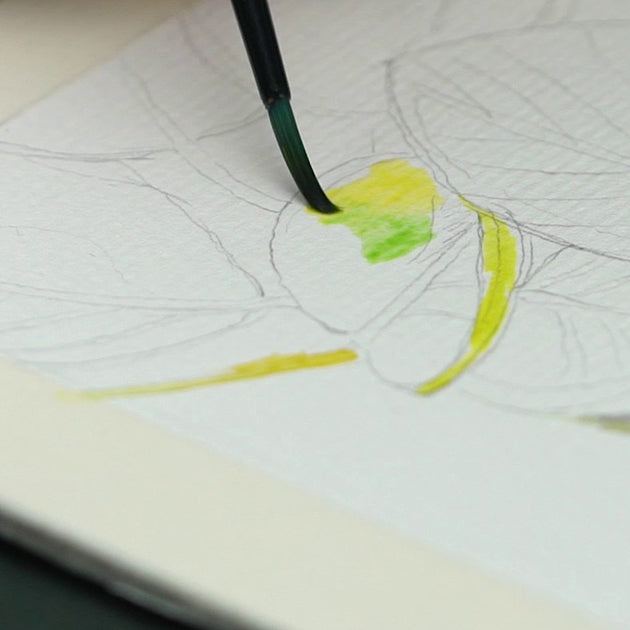
Traditionally, watercolors are applied from light colors to dark colors. This technique helps the artist retain their lightest colors as they work each overlay of color. It also gives the painter more control of the “value,” the lightness or darkness of a hue, as they establish their vision of what they are painting. As you watch the video, you will see that the artist also begins her paintings by using the lightest shades of paint and continues working her colors in the traditional way. Since she is right-handed, she starts her work on the left top of the paper and works down her picture to the bottom so that she doesn’t accidentally smudge or erase her sketch.
Step 3: Painting in Layers

As she works down her piece and paints each item, she identifies the lightest and darkest areas, adding layers of paint to increase the contrast. As the paint dries, she adds another thin coat to give every object volume as well as 3-dimensional feel. Where two hues meet, she adds more water, melding together the different colors. She uses smaller brushes for adding details, dots, and irregularities, creating a life-like look.
Step 4: Painting the Background

Once the leaves, stems, and pears are complete, the artist fills in the background with a dark color which makes the foliage, stems, and fruit stand out. Finishing the background last keeps those edges of the focal point of the painting from blurring as well as gives it a chance to dry, eliminating the spreading and mixing of the background and foreground colors.
Step 5: Adding More with Watercolor Pencils

A fun way to finish your watercolor painting is by using watercolor pencils to add even more richness to the piece. Our artist uses these pencils in cool purple and blue shades. By coloring a few thin layers over the dry area, she adds more saturation into her shadowing, which gives those areas and other details of the painting more texture and depth.
There you go! Now you know how to paint like a pro with Arteza. Watch the video as often as you like to practice what the artist did. Before you know it, you'll be imagining and creating your own original works of art.
Here are some frequently asked questions that may also help you.
FAQs
How can I prevent unwanted color mixing?
Start each color change by just adding a little water at first. You can even test how liquid it is by doing a few brushstrokes on a scrap piece of paper similar to what you are using. If needed, add a little more at a time, practicing on your scrap paper. Another trick is to not wet the paper too much. Touching wet paint to wet paper results in a “bloom” of paint occurring with the paint spreading uncontrollably.
Also, when the paper is wet, try keeping some blank space between your objects and the background. This is a fool-proof way to prevent unwanted mixing.
With plenty of experimentation, you can teach yourself to control how much water you apply in order to prevent the paint from moving in the wrong direction. This is the best method to help you decrease the chance of, and eventually preventing altogether, the unwanted mixing of colors.
What colors should I choose for painting shadows?
When trying to decide what color to paint your shadows, a good thing to keep in mind is that shadows aren’t necessarily always gray or black. Your eyes actually see the color of the object reflected in the object’s shadow. For example, the shadows on the pear in the painting in the video have shadows of the leaf, which have a bit of the leafy green color, only darker, within it. To give your painting an authentic look, look closely at the color of your subject and use that hue in a darker shade.
How can I improve my shadow drawing?
Observe and think about how the light is falling on your object and see what tones and colors the object has in different areas. If the light is hitting the top of your object, the shadow will appear coming from the bottom of your object. If the light is shining brightest on the right side of the object, the shadow will appear strongest on the left side of it and vice-versa. Shadows can bring realism and volume to your art, so it is important to take the time to study how the light hits your subject and add those darker and lighter areas.
If you have a problem with drawing or shadows, try this exercise: take a lamp and shine it on a simple object (like an orange). Now sketch all the shadows you see on, around, and under the orange, coloring them in according to their lightness or darkness. After you have finished, change the direction of the light by moving the lamp to shine in a different way on your object and draw those shadows.
What else should beginners remember when starting their watercolor journey?
Watercolor paint can be mixed in a wide range of colors, so don’t limit yourself to just a few. A great way to create your own unique style is to experiment with the shades that you have and find the collection of colors you like the best.


4 comments
Hello, if you try Paul Rubens brands watercolor paints. You will like it and never want to use other brands; check our online store link below:
https://paulrubens.aliexpress.com/store/5140092
Hey there Paula,
Our video on how to paint the pear is right above :)
Warm Regards,
Arteza Team
Thanks for your blog information. I’m just learning about watercolor and mixed media. I’d love some more videos with quick tips! Love your products, too!
Love these pears💛💚💙💜! Would really like to see this video in real time!!! Any chance and how?