
How To Create a Rendered Marker Drawing of an Eye with Artist Pypah Santos
Pypah Santos, one of our featured Fuel Your Creativity artists, will take you through the steps to render a marker drawing of an eye using EverBlend Art Markers, Professional Colored Pencils, and Inkonic Fineliner Pens. This beginner-friendly How To article will teach you how to create marker drawings with seamless color transitions. Whether you’re new to working with our alcohol-based markers, or have been for years, this article will provide you with techniques that will assist you in taking your craft to the next level. Now, let’s dive into this exciting How To, instructed by mixed media mastermind, Pypah Santos!
List of Supplies:
- Mixed Media Pad or Sketchbook
- EverBlend Ultra Art Markers
- Professional Colored Pencils
- Inkonic Fineliner Pens
5 Steps to Render an Eye with Pypah Santos
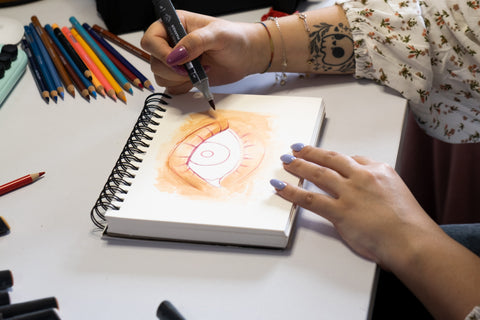
Step 1

After you’ve created a simple sketch of an eye, take the lightest shade you’re going to use for your character’s skin tone to begin; Pypah chose shade R09. Start with the chisel tip to fill in an even coat to color the skin. Once you’ve established the base color of the skin tone, you can then add mid tones, for this step, Pypah recommends using the brush nib of your EverBlend Marker. Add shadows anywhere that may be sunken in (anywhere shadows would typically occur). Leave a highlight in the middle of the eyelid (by not adding midtone to this section). Pypah leaves her highlights untouched after the initial base coat.
Step 2
Taking the same shade you used to create your base coat (R09), blend out the marks you just made. Blending out any areas of transition with the same lighter shade will create smooth color transitions. For this step, Pypah uses the chisel tip of her marker. Next, use the darkest shade (for your character’s skin tone) to create darker shadows. Use the brush nib to create outlines around the eyelids creases and anywhere else you want the shadows to appear darkest. Then, blend the marks you just made out with your lightest shade again. Once you’re satisfied with where your drawing is at, move on to the next step.
Step 3

Take your lightest gray colored EverBlend Marker to color the eye, Pypah’s go-to and favorite shade for this is CG08 (Cool Gray). Start shading the whites of the eye from the top to the bottom, to create this gradient release pressure from your marker as you color down the eye. Also add shadows to the bottom of the eye, along the lower lash line.
Step 4

Now time to color the iris! You can use whichever colors you’d like, Pypah chose shades of green. Whichever color you decide to color the eyeball, make sure you choose two shades to add more dimension and to create a more realistic eye color. Start off with your lightest shade and outline any light reflections then color the remainder of the iris, this acts as your base. Using a darker shade, add shadows to the top of the eye (since the eyelid and lashes cast a shadow). Then, add lines going from the outside and coming out from the pupil. Pypah advises to color the pupil last, so you can easily color the iris. Shade the pupil with the same color you just used. For this step, Pypah uses the brush nib of her EverBlend Markers.
Step 5

Time to add details using colored pencils and Inkonic Fineliner Pens—this step is essential in making your drawings look more realistic. Use a black colored pencil to color the outline of the iris and the pupil. Use cream, yellow shades, and a light blue to add cross hatching around the darker spots of the skin tone. Use pink colored pencils to color the tear duct. Use a gray colored pencil to go over the darker areas (shadows) of the whites of the eye. Lastly, use your Fineliner Pens to accentuate the eyelashes. Continue to add detail until you’re satisfied with your drawing.

Voila! All done! We hope this How To art blog has Fueled Your Creativity! To learn more about artist Pypah Santos, read her artist profile blog here. There’s plenty more Fuel Your Creativity articles and videos to come, stay tuned!


1 comment
This tutorial was AMAZING! Could you do a video on your Color Swatch Marker Card? I seat in your marker bag and would love some info on how you created it and how you use it when deciding what markers to use. Thanks for sharing!