Table of Contents:
Hi! Jamie of @inksnthings here! I started my art journey with hand-lettering a few years ago, then found my way to doodling and then to the world of watercolor. Plants and places are some of my favorites to draw and paint. I try to make time for art every day, even if it’s just 5 minutes. It gives me the opportunity to slow down, notice and appreciate things more.
Growing as an artist is a long journey and I feel incredibly lucky to have found a community of creatives who continually inspire me to keep creating. I’ve learned so much from other artists and hope to share some tips and encouragement with you.
In celebration of Pride Month, here's a fun watercolor rainbow potted cacti tutorial! I love painting things in nature but also adding an interesting illustrative spin on things. You may not find these guys out in the desert, but as creative people, we can stretch the imagination and paint freely.
List of Supplies
- Watercolor Cold Press Paper (140 lbs/ 300 gsm)
- Arteza Tube Watercolors: Crimson, Lemon Yellow, Orange-Yellow, Yellow Ochre, Olive, Deep Green, Phthalo Blue, Violet
- Round Paintbrushes: #10, #4
- White Gel Pen or White Gouache
Let's Begin!
Step 1
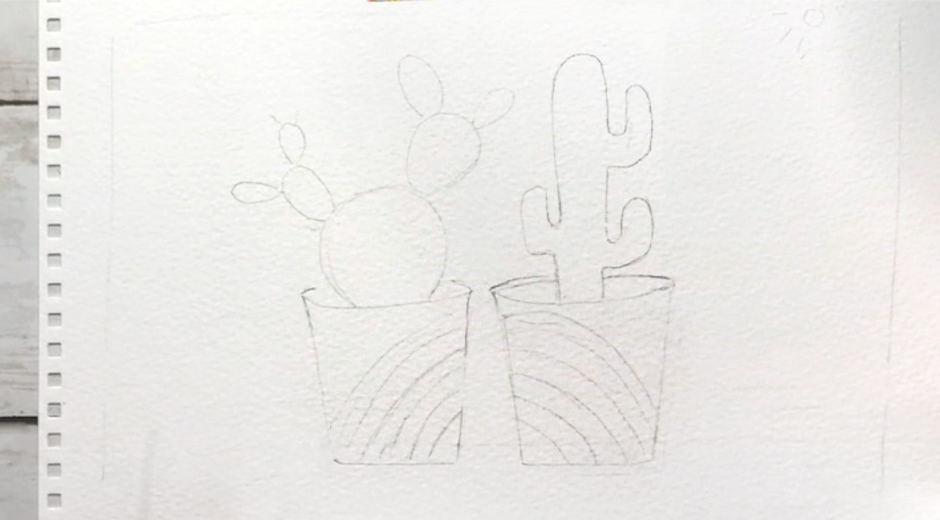
Draw your cacti in pencil very lightly. It helps to include just the outlines and not too much detail. You can also be brave and just dive in with the painting if you’d like!
Step 2
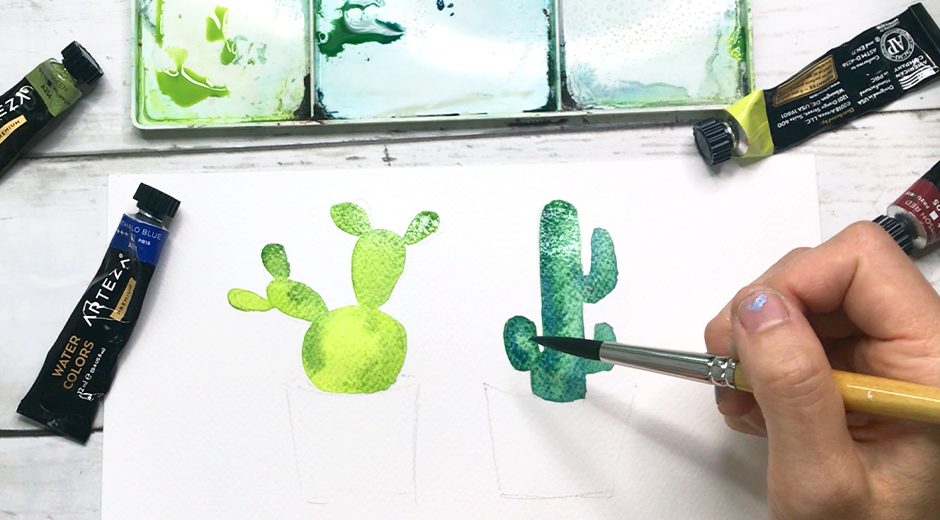
Paint shapes with light shades of your green (add more water than pigment). Drop in darker green on the left side (this area will be in shadow). Adding different values will help give your cacti form and dimension.
Step 3
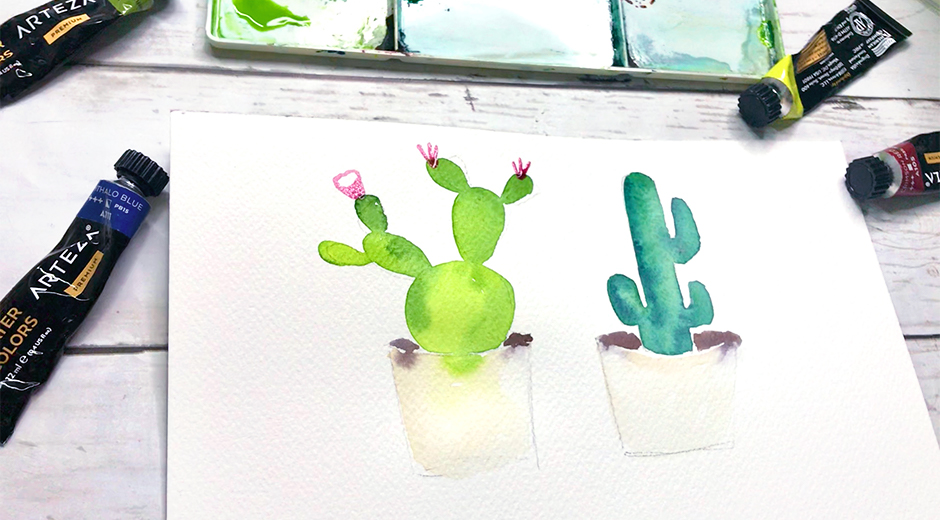
Paint pot shapes with yellow ochre. Keep it light so that when we add the rainbow, the colors will shine through. Next, add the dirt by mixing yellow ochre, phthalo, and crimson, and flower shapes in crimson. Remember, if you don’t have brown, you can mix your primary colors to create a mud color. You can wet the area before dropping in color for a fun blend.
Step 4
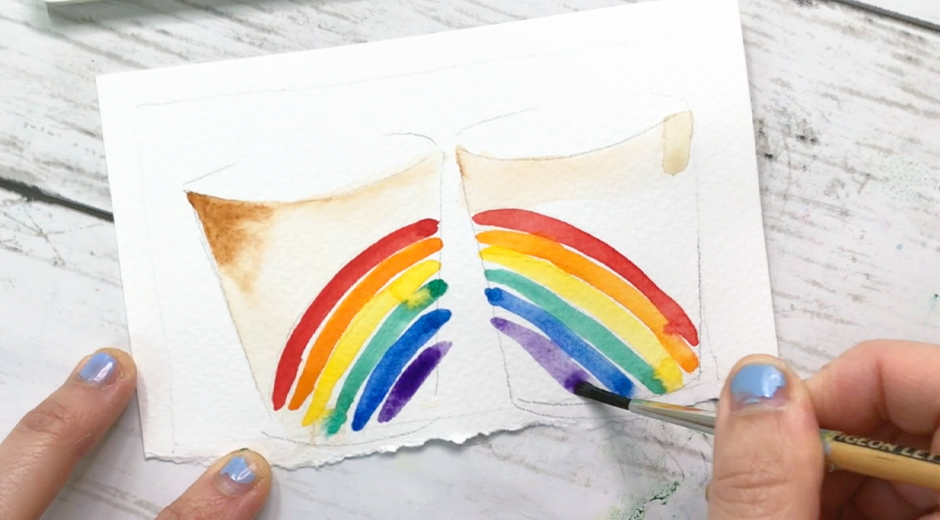
Using a smaller brush, paint stripes of color for the rainbow. I penciled in the area lightly to make sure I had enough space to include six stripes. The pot should be dry before painting your rainbow. Press your brush flat onto the paper for a wider stroke. Make sure to clean your brush thoroughly after each color so the colors are bright. Also, don’t be afraid to let some of your stripes touch. See how my yellow mixed with the green to create a neat blend! It’ll give your rainbow a loose and fun appearance.
Step 5
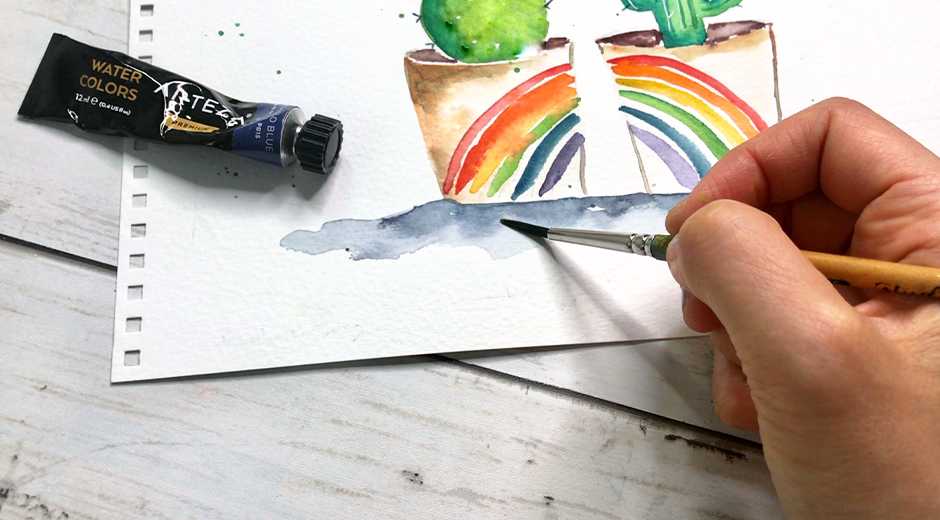
Add shadow to ground your cacti by painting a strip of dark blue (mix phthalo blue with violet). Then, quickly rinse off your brush and blend with clean water to fade out the edges. Make your shadow shape irregular. You can add back darker color right underneath the pot for more depth.
Step 6
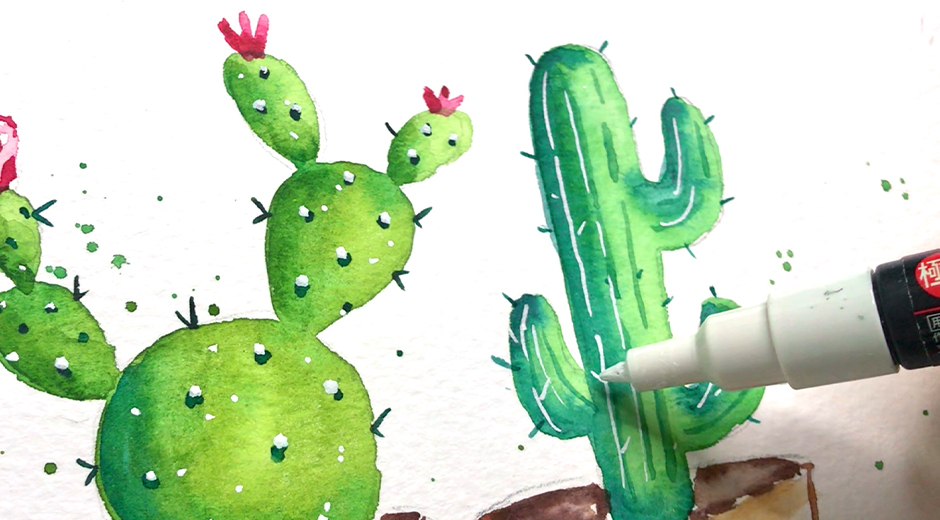
Time to have fun with some details! Take your smaller brush and use dark green to paint vertical, broken lines. Create curved lines for the arms. Add spikes in random spots using very little water and lots of pigment so the spikes are clearly defined. Next, using either a white gel pen or white gouache, go ahead and add dots, lines and even more spikes!
Step 7
Finish up with some splatter by taking a little bit of green on your brush and then tapping your brush with your hand or another brush. Vary the distance from the paper so that the splatter marks are all different sizes. This helps give your piece a ton of energy and lots of excitement.
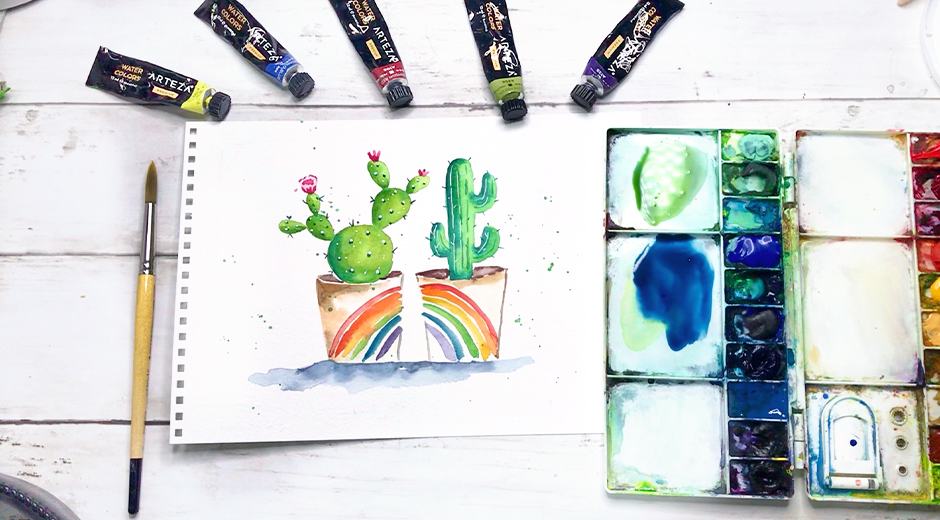
Done! Yay! Hope you had fun. Remember, it does not have to look like mine. Infuse your own style and personality into it. This is just an idea to help you get started and completely make your own. You can add another cactus friend, use wild unexpected colors, incorporate some lettering, add ink—the possibilities are absolutely endless!
Thanks so much for painting along with me! For more tutorials, find me on Instagram @inksnthings. Be sure to tag me so I can see your beautiful creation.


