
Table of Contents:
- Fun & Easy Polymer Clay Earrings
- List of Supplies
- Step-By-Step DIY Earrings
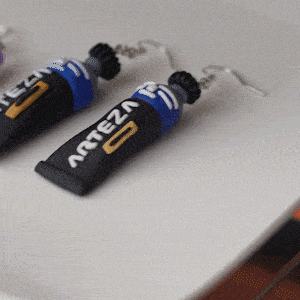
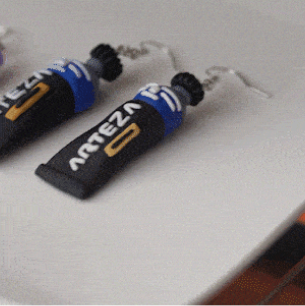
- Pencil Earring
- Paint Tube Earring
Fun & Easy Polymer Clay Earrings
If you’ve always wanted to make your own jewelry, then you’re going to love polymer clay. It’s so easy to use, comes in more colors than you can imagine and bakes to a hard finish in minutes. I make earrings for myself and my friends all the time. They love that I can mold little charms that have a special meaning just for them. After getting rave reviews for these cute earrings, I decided to share how simple it really is to make them.
I think polymer clay is magical. It feels like regular sculpting clay, but you don’t need a kiln or glazes to get the look of fired pottery. You can use your kitchen oven to bake it in and the vibrancy of the colors doesn’t go away once it’s baked. And, once it cools, it’s a hard, unbreakable plastic-like consistency.
When I first started, I only had a few colors that I mixed together to create new ones. But now that I’m thoroughly addicted to this medium, I have more colors than I can count! That’s probably why I would tell beginners to just go for it and buy a set that includes a wide range of hues and some basic clay sculpting tools because if you’re like me you’re going to want to make more and more jewelry. For making unique earrings, I recommend Arteza’s Polymer Clay Set, which also comes with the jewelry findings (wires) you need for them.
List of Supplies
- Polymer Clay
- Arteza Tool Kit
- A Few Sheets of Paper
- Rolling Pin
- Extruder
- Clay Sculpture Knife
Step-By-Step DIY Earrings
These instructions are for earrings in the shape of a pencil and a tube of paint. You can make yours the same for both or different, as I did here. Use your imagination and have fun!
Step 1. Prepare the Colors
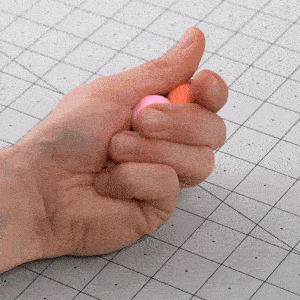
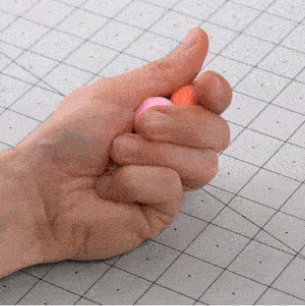
I start by preparing the colors I’m going to use. To soften the clay, I knead it with my fingers. Since this first earring is going to be in the shape of an Arteza pencil, it’s going to be important to show all the details, so I need the clay to be soft and pliable.
If you don’t have the color you need, it’s not a problem—you can mix it. This clay has a very soft texture that even children find easy to use. To get a new color, knead the two colors you’re mixing to a smooth consistency. Then smash them together, adding each color gradually and checking as you continue adding colors until you achieve the desired shade.
Here are the colors I use for each element of the pencil:
- Since the pencil lead is almost black, I add a little gray to get a more realistic color. Then, I roll it into a ball and set it aside.
- Imitating wood is more complex, so I mix beige, gray, purple and yellow into a larger ball than the pencil’s lead.
- To make my pencil look even more natural, I need that thin light layer between the wood and the yellow painted barrel. To get the right shade for this, I combine white with gray and beige.
- The last layer is the yellow painted barrel. This color also consists of several shades. I mix dark yellow with brown, gray, red and purple.
- For the eraser, I combine pink, purple and gray. I use white to attach the eraser to the pencil.
TIP: Try to keep your surface as clean as you can while working. If dust or microparticles get into the clay, they will be visible once baked.
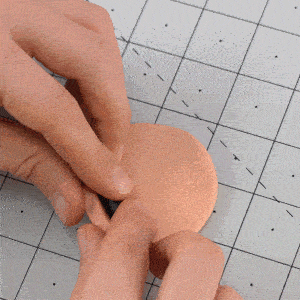
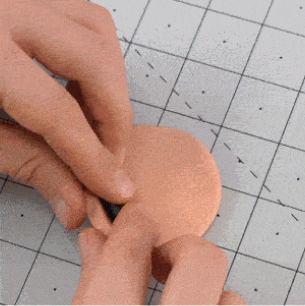
Step 2. Roll the Clay
Before rolling, I place paper over my table. Since the clay won’t stick to the paper, it makes it easier to remove once it’s flattened.
I start by rolling the pencil’s lead into a thin rod.
Next, I roll out the clay prepared for the wood into a rectangular pancake. I place the rod of pencil lead inside the wood and roll it up into one cylinder.
I do the same with the white layer, but make it much thinner.
The last layer is the yellow barrel, which I roll into a rectangle and then wrap around all the other layers.
TIP: If you find that the resulting roll is thicker than you want, just roll it into the desired thickness. You can even divide it into several parts and then use your fingers to roll it into a thinner roll.
Step 3. Chill the Clay
Now, I put the pencil into the freezer. Freezing gives polymer clay a denser texture, making it easier to make accurate cuts. It can be in the freezer for an hour or more. Once out of the freezer, the clay will heat up quickly, so I immediately carve the lead’s point with a clay knife.

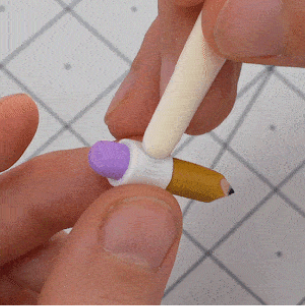
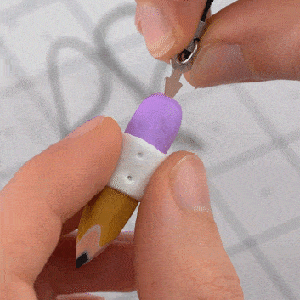
Step 4. Add the Eraser
I make the eraser the same thickness as the pencil. Next, I roll out a small and thin white rectangle that I will use to attach the eraser to the pencil by wrapping it around the base of the eraser. I do this using another sculpting tool. After it’s attached, I apply some texture with the tool to make it look more realistic. For fun, I imitate the logo with tiny black strips.
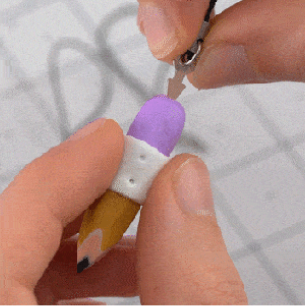
Step 5. Insert the Wire
With a little pressure, being careful not to change the pencil’s shape, I insert the earring’s wire.
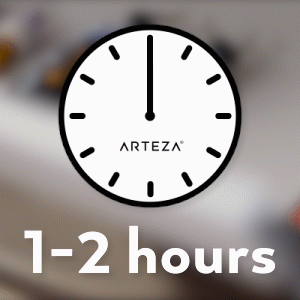
TIP: To avoid losing your pencil’s form, you can put in the freezer for another 1-2 hours before inserting the earring’s hook.
Step 6. Bake the Clay
I place my finished pencil, with the inserted earring hook, into the oven for 10-15 minutes at about 375° F. Since oven temperatures vary, keep a close eye while baking polymer clay to prevent it from burning.
After you take it out of the oven, allow it to cool and it’s ready to wear!
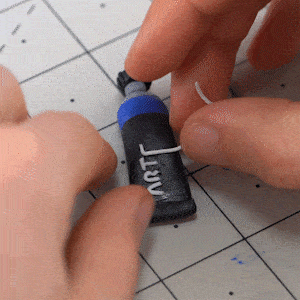
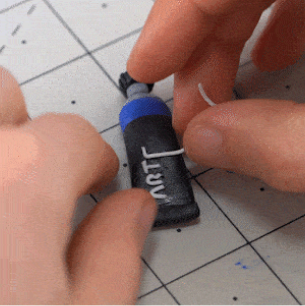
Step 7. Make the Second Earring
The steps to create the paint tube earring are the same as those for the pencil, only this time you will match the colors and details to the paint tube. I recommend using an actual tube of paint as a reference. With the tube in front of you, it’s easier to see the proportions and shape.
When decorating the tube with small elements, such as the logo, I press them with my finger or tweezers.
There you go! I hope this inspires you to discover all the things to make with clay. There are so many earring ideas you can create. You can use it to make beads, necklaces, bracelets, pins and more! I also use it in my artmaking, sculpting it into figurines, bowls, coasters and crafts. Once you get started, you won’t want to stop!
To see exactly how I made these earrings, check out the video and make sure to click on the bell to subscribe to Aretza’s channel to get even more great polymer clay ideas.


