
Table of Contents:
Drawing Braids with Colored Pencils
Giving people in your artwork interesting hairstyles shows their personality, plus drawing hairstyles are fun to do. Braids have always been popular and although they look like they would be complicated to draw, they really aren’t if you break them down step by step like I do.
I think the best drawing medium to use for braids is colored pencils. Their ability to create deep shadows and depth through layering makes them especially good at achieving realistic results when drawing hair. For this reason, I used Arteza Colored Pencils. The highly saturated core of these pencils allowed me to create light highlights, halftones, dark shadows, and all the nuances of color that real hair has.
Step-by-Step Braid Drawing
Each of these three drawings begins with a light sketch of the head and braid placement. To make this drawing, it’s best to use an H or HB pencil, as these pencils have hard lead that will make a faint line. By using this grade of pencil, it will be easier to erase these initial outlines before you start adding color, without damaging your paper. I recommend you read completely through the instructions before beginning your drawing so you’re fully prepared for each new step.
Side Braid with Ponytail
Step 1
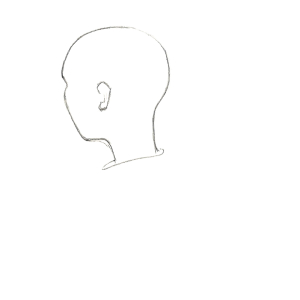
Outline the head, which will be drawn in a ¾ position from the back. Outline the ear.
Step 2
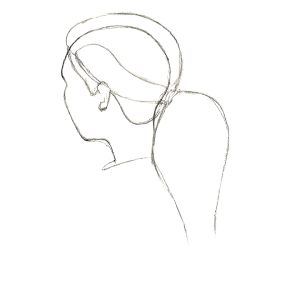
Now add the hair’s outline and add volume to it. Also, make sure the ponytail is shown. Roughly outline a section on the side that will be the braid.
Step 3
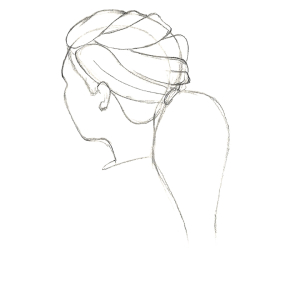
Divide the hair into large strands. Next, place a faint line down the middle of the braid section. This is the braid’s direction.
Step 4
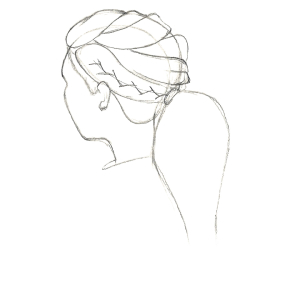
Draw a zigzag line on top of the faint line in the braid section. This is the braid’s center.
Step 5
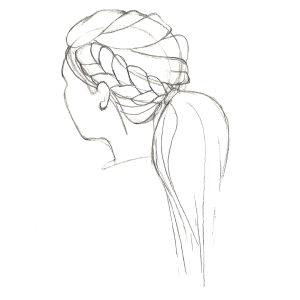
Now draw your braid as it is shown in the picture. I used the initial zigzag line drawn earlier as a reference point for drawing the individual sections of braid. I used smooth lines that follow the head’s natural curve for these. Next, add the stray strands that go behind the ears. Draw the strands of hair in the tail.
Now that the details are in place, erase the initial outlines to prepare the drawing for coloring.
Step 6
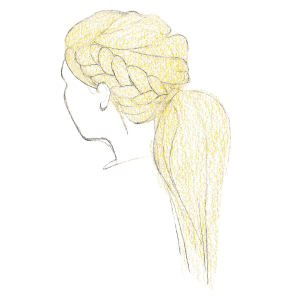
Put in the hair’s color by first creating a light overall tone with A004 Lemon. Fill in the entire hair area.
TIP: When applying the first layer of color, don’t apply too much pressure to the pencil. This layer should be very light, as you will be leaving some of it untouched to create highlights in the hair.
Step 7
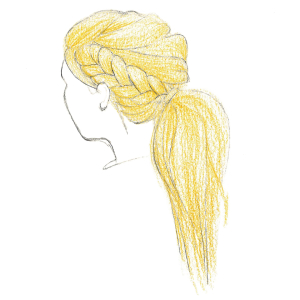
Now, using the same color pencil and keeping in mind where the light would naturally fall on the hair, apply a little pressure to the pencil to add a darker layer of color to the roots, the scrunchy, and the areas under the hair and braid. These areas are where little to no light would fall and where shadows would be.

Step 8
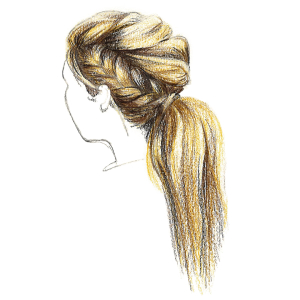
To create the effect of grown-out roots, use A036 Cocoa.

Step 9
Then add some shadows to the ponytail. Use a well-sharpened pencil to draw these details and be sure to make your lines match the hairline’s direction and the head’s shape.
Step 10
Now it’s time for adding darker shadows with A012 Noir to increase the contrast. This is what will make your braid look realistic.
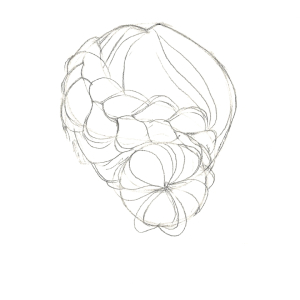
Side Braid with Bun
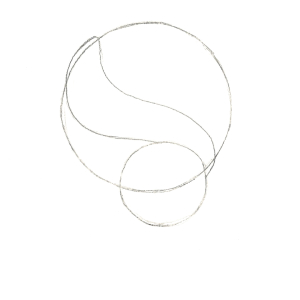
Step 1
Draw the head and the bun using simple shapes. Add the section where your braid will go. By changing the width and direction of your lines, you can create your braid’s thickness, position, and direction.
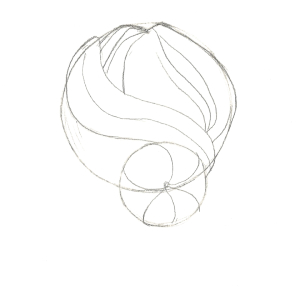
Step 2
Add an indentation at the top of the head to signify where the hair is parted. Place lines following the head’s natural curve to indicate the hair’s movement away from the part. Next, place a line in the middle of the braid section to serve as an auxiliary line, following the section’s curve. Also, use lines to indicate the direction of the strands of hair in the bun.
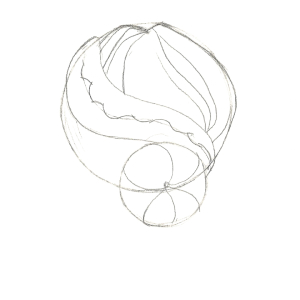
Step 3
Place a zigzag line over the initial line in the center of what will become your braid.
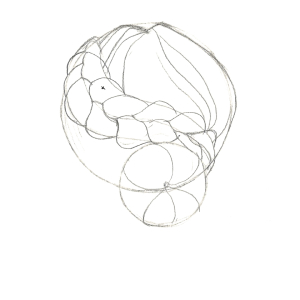
Step 4
Begin drawing the sections of hair that make up the braid. For this, use the zigzag line as a starting point and make continuous lines that curve as they would when forming a braid.
Step 5
Create a messy bun by drawing long and loose strands of hair from the braid and the bun. Following the head’s shape, place some lines in the lower area under the braid to indicate hair. Now erase the initial outlines and the braid is ready to color.
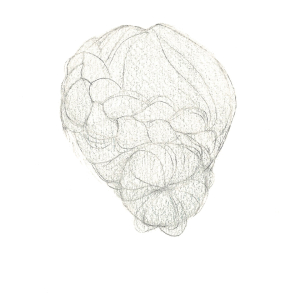
Step 6
Choose whatever color you like for your hair and then cover the entire surface of it with a light tone by pressing gently on the pencil.
Step 7
Next, apply a little more pressure to create a mid-tone under the bun and throughout the hair and braid, where only a little light would fall. Leave plenty of light tone showing, as these are the highlights that receive the most light.
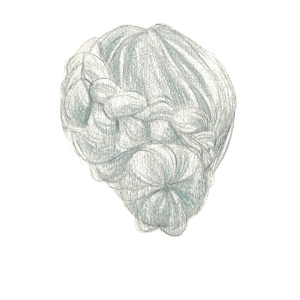
Step 8
Now it’s time to add additional contrast to emphasize the shadowed areas and add dimension to the drawing. Use A012 Noir and place lines in the direction of the hair’s growth. The closer together you place these lines the darker they will appear.
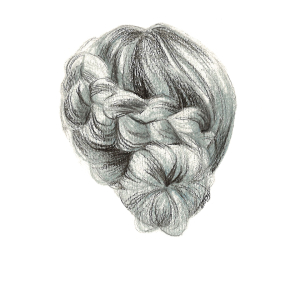
Step 9
To make your drawing appear as realistic as possible, continue using the Noir pencil to add more detail to the hair. Here I have drawn strands that have fallen from the braid near the face as well as marks indicating the girl’s neck and shoulder.
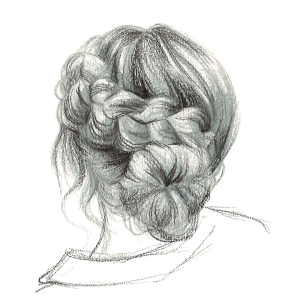
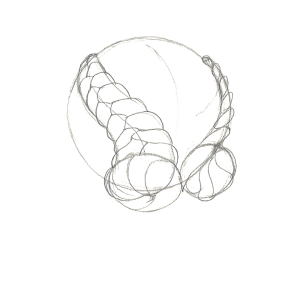
Double Braid with Buns
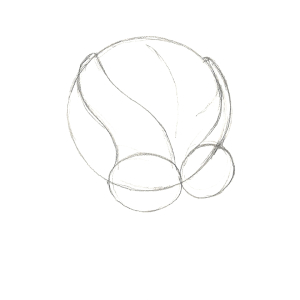
Step 1
Draw an outline of the head and the two buns using simple shapes, placing the two buns close to each other. Make a line from the center top of the head downward, in between the buns, to indicate the part in the hair. Next, draw two sections where the braids will be, ending around the buns. Because the face is turned slightly to the left, the braid section on that side will be wider than the one on the right.
TIP: To add realism to your drawing, follow the head’s shape when placing the hair’s part and the initial braid sections.
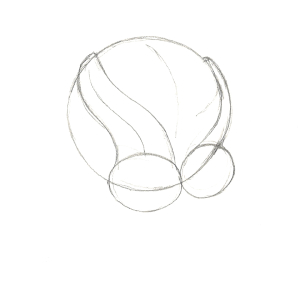
Step 2
Sketch in a continuous line in between the two braid sections, following the outline’s curved direction.
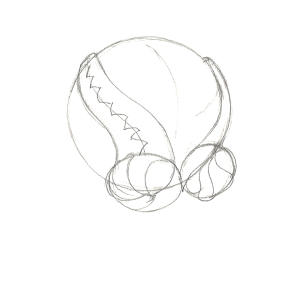
Step 3
Place zigzag lines over the initial middle line. Add the lines in the buns to indicate strands of hair and the direction they are going in.
Step 4
Next, draw the individual segments of hair that make up the braid. Use the zigzag lines as a guide for the placement of these parts. Keep in mind that real braids are made of thick, curved segments of hair. Start with smaller portions at the top of the head and gradually make them larger as they get closer to each bun.
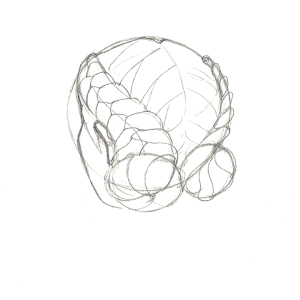
Step 5
Now it’s time to outline the visible parts of the face. With just a few lines, draw the back of the ear.
Erase all the initial lines to prepare the drawing for coloring.
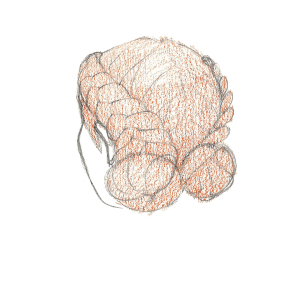
Step 6
I used A073 Blood Orange to color in the hair. Once again, I start with a gentle pressure on the pencil to give the hair its lightest tone.
Step 7
Next, I pressed a little harder to make a layer of darker color, adding a mid-tone to suggest the variety of light shining on the braids. This is especially important around the braid’s sections and underneath the buns.
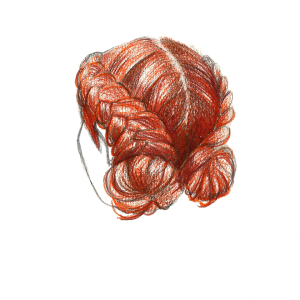
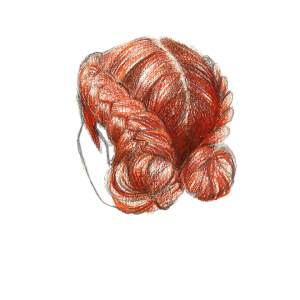
Step 8
To add the darkest contrast and create the shadows that will make this drawing look authentic, I used A048 Sienna Brown and A012 Noir. I added more details, such as the single hairs escaping from the braids, with the same color and a well-sharpened pencil.
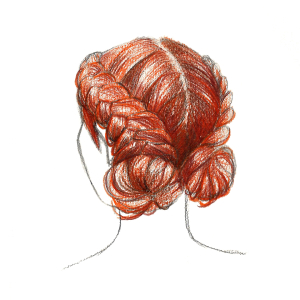
Step 9
Finally, I outlined the neck and shoulders to complete the drawing.
Recommendations
- To give the hair volume, use different values in the same color. Start with the lightest shades and gradually work up to the darker ones. Use darker tones around hair roots and face.
- Draw all the lines according to the direction in which the hair is growing.
- During the drawing’s final stages, add some single hairs as details to make the drawing look more realistic.
- You can mix colors and create beautiful gradients with colored pencils by layering one color on top of another. When doing this, it’s important not to add too much pressure on the pencil or try to use more than 2-3 layers at a time.
- To get the most out of these instructions and create the best drawing of braids you can, it’s important to complete each step, without skipping any.
Just like the color of the eyes or the shape of the nose, a person’s hairstyle truly identifies them. I hope these little tutorials have inspired you to take a closer look at hairstyles, including braids, and have fun adding them to your artwork. And, now that you’ve learned the basics of drawing braids with colored pencils, I'm sure sure you’re going to want to keep using colored pencils to add braids and more fun hairstyles to all the characters and people in your artwork!


1 comment
Can you do one on the side?