
Table of Contents:
- Make This Simple Step-By-Step Cute Corgi Drawing
- List of Supplies
- Step-By-Step Guide on How to Draw a Dog
- Recommendations
Make This Simple Cute Corgi Drawing
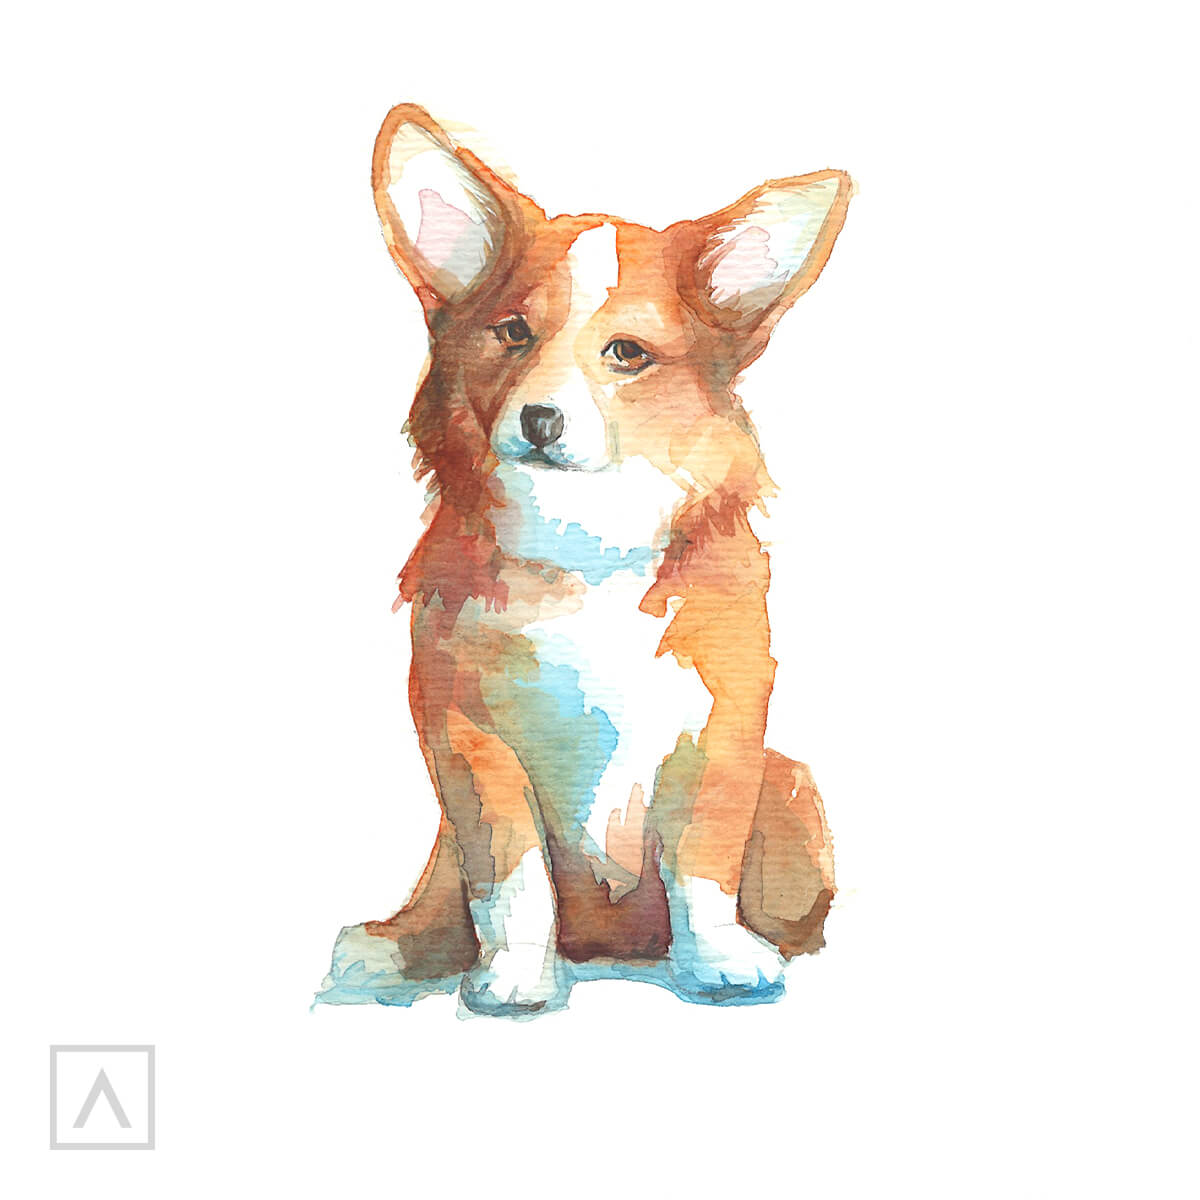
Since I’m a dog lover, nothing makes me happier than drawing and painting them. One of my favorite breeds is the Corgi and I’m here to show you how easy it is to draw one of these adorable pups. Using a simple step-by-step approach, I’ll show you how to first draw the dog, then use watercolors to paint the drawing for a realistic look.
I recommend using a hard pencil, such as an HB or H to draw the initial sketch. Hard pencils make very light lines and this will come in handy when we erase the preliminary sketch and to make sure that the lines don’t show through the paint. For this demonstration, I’ve used Arteza Watercolor Paint. I really love how rich it is and how vibrant the colors are. I also suggest using a heavyweight watercolor paper for this project. Heavier papers can take the moisture of watercolors without warping, buckling or pilling.
Let’s get started! 🐶
List of Supplies
- Drawing Pencils
- Paper
- Eraser
- Watercolor Paint - Sepia (A273) and Crimson Red (A105)
- Paintbrush
Step-By-Step Guide on How to Draw a Dog

Step 1. Start with basic shapes.
I find it easiest to begin by observing the overall shape of my dog and then use simple shapes—circles and ovals—to break down its separate parts. You can draw a circle for the head, and large and small ovals for the body and legs.
TIP: This technique is known as “general-to-specific” and can be used for anything you want to draw.
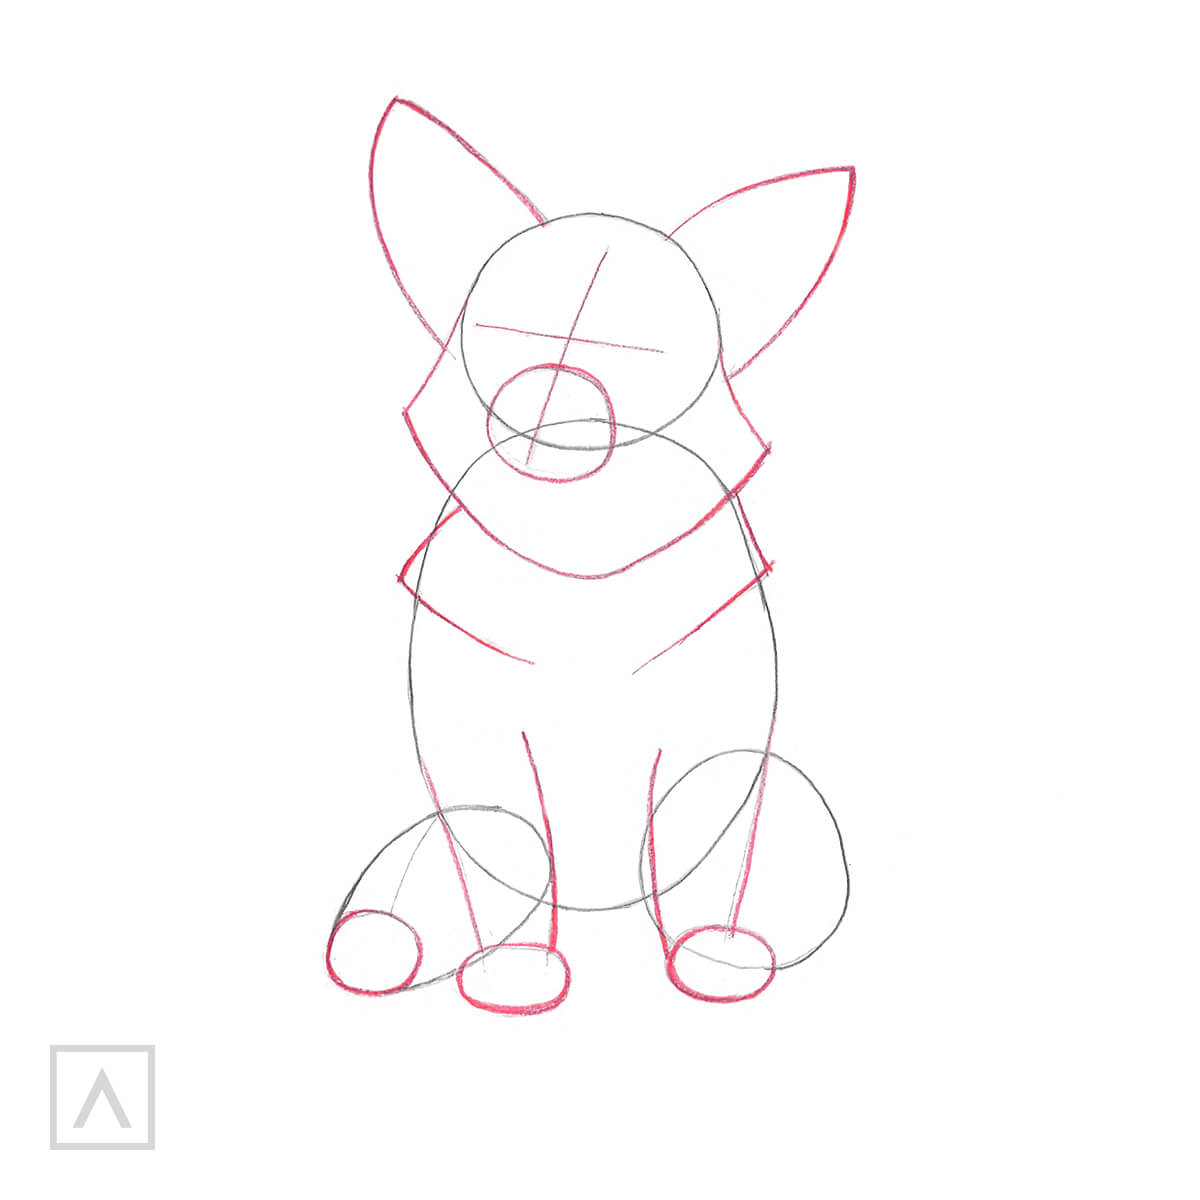
Step 2. Add more complex shapes.
Now, it’s time to add the more complex shapes that will make our little Corgi recognizable.
I start by drawing his big ears and adding a little circle for his nose. I also make his paws and the tip of his tail with even smaller circles. I add some diagonal lines to indicate where the ruffled fur is on and under his neck.
TIP: To make sure his eyes and the tip of his nose are placed correctly on his face, I use a “t” drawn down the center of the head.
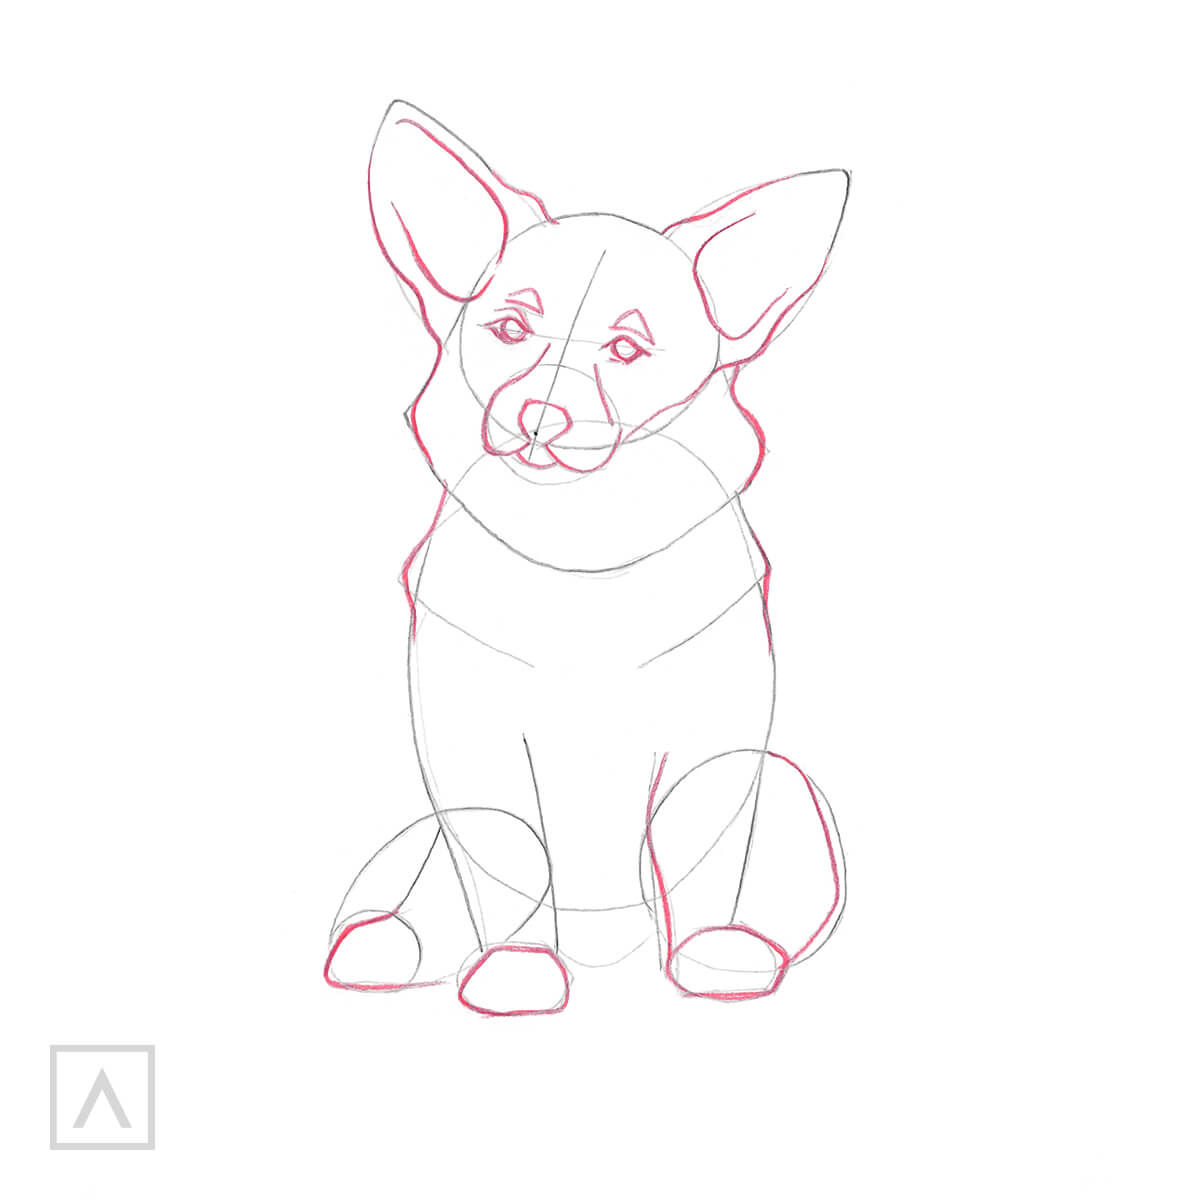
Step 3. Add facial details.
Now is a good time to go over the preliminary drawing with an outline of smooth lines. This will make your little dog look more natural. Next, I draw the eyes, eyebrows, muzzle lines and the nose.
Before I begin painting, I erase the initial construction lines.
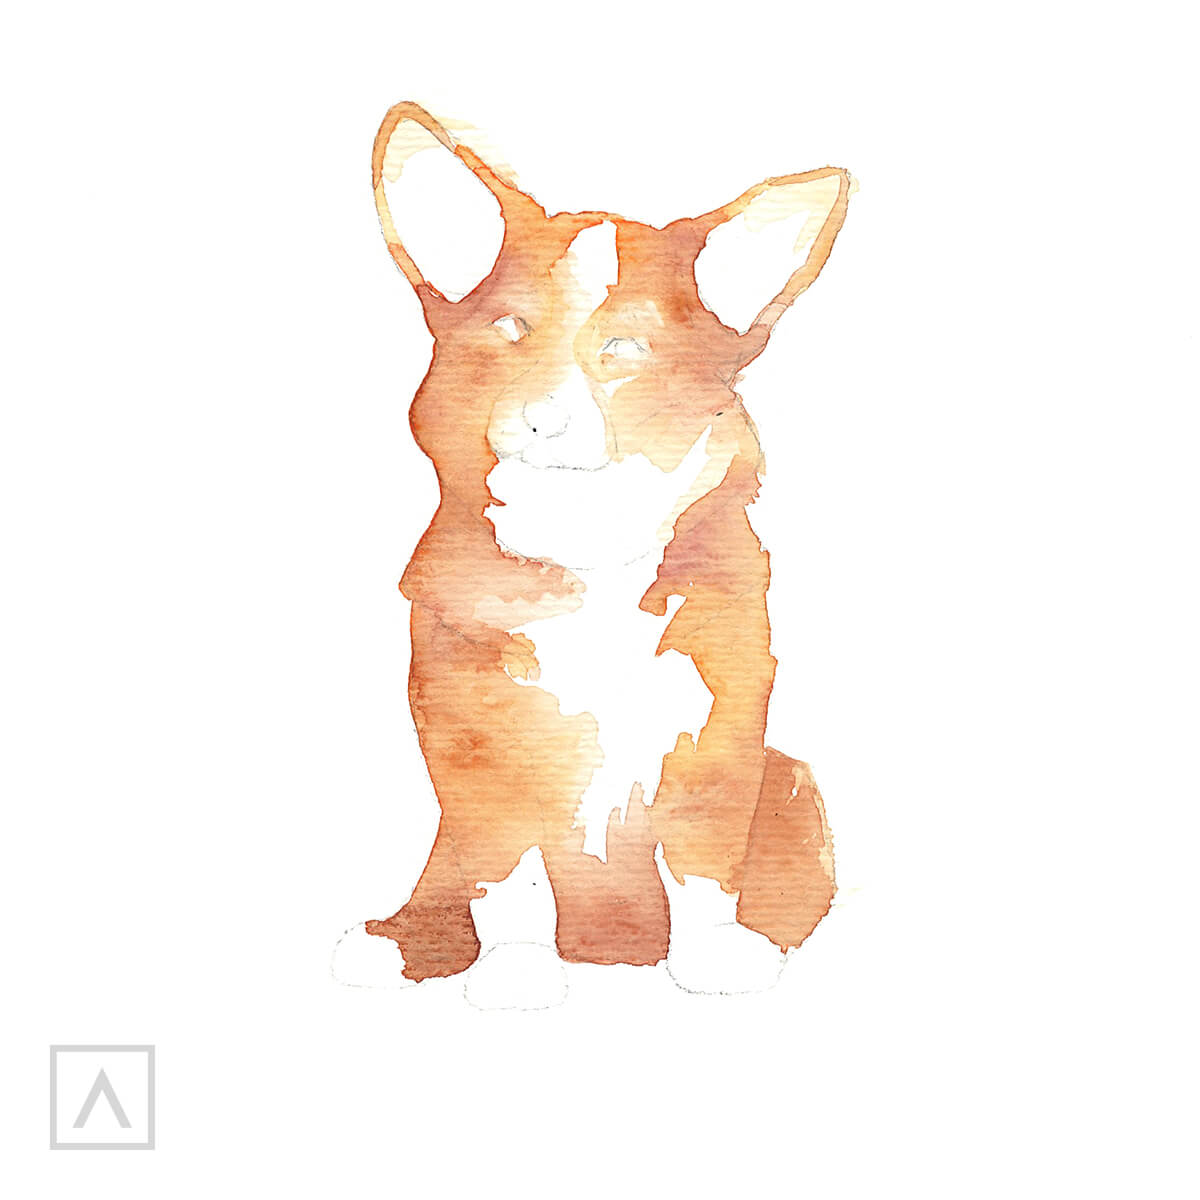
Step 4. Paint the fur.
It’s important to note that with watercolors, you should always go from your lightest colors to the darker ones. That’s why I leave all the areas where the fur will be white blank, letting the white paper act as the white fur.
I start with a very thin coat of Sepia (A273) paint and cover the rest of the body, also leaving the eyes and inside of the ears blank.
I let this first layer dry completely before adding more of the same color over the areas where there would naturally be shadows—the base and sides of the ears, sides of the neck and body, the tail and along the dog’s bottom edge.
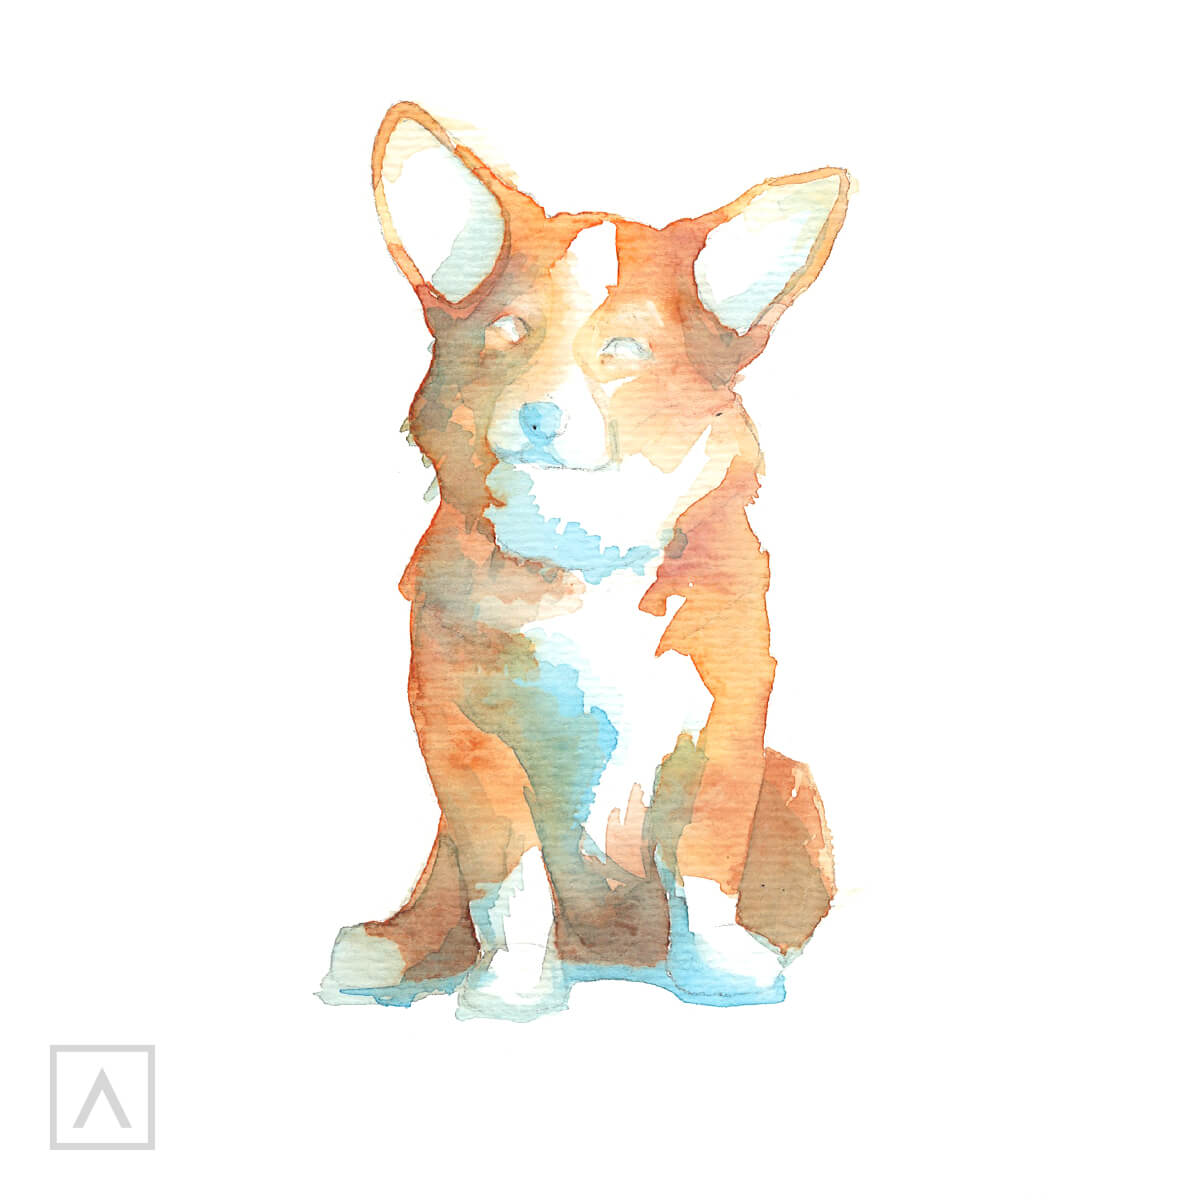
Step 5. Increase the contrast.
By adding more contrast to the painting, the Corgi will appear more three-dimensional.
The best way to do this is to add a contrasting color and increase the tone in the shadows. I do this with a mixture of Sepia (A273) and Crimson Red (A105).
Finally, I add the details to the face.
There you go!
You now know everything to make cute dog drawings!
Recommendations
- Since every step builds on the previous one, it’s important not to skip any steps.
- When working with watercolors, it’s necessary to work on the principle of light to dark because it’s difficult to lighten watercolor paints once they are applied. By building up your shades with light layers in the areas you want to be darker, you’ll have a better chance of retaining the lighter shades.
- Always wait for the paint to completely dry between the steps. If you don’t, the additional watercolor paint will mix with your first layer and you could end up with a color or look you don’t want.
Drawing this Corgi dog is a great practice to get you started on a cute dog drawing. You can also use these steps to draw any breed of dog you want! You can use your own pet, your friends’ pooches or pictures from magazines or the internet to get lots of practice. Once everyone finds out you draw dogs, you’re sure to have requests for personalized pet portraits!
I’d love to hear how it’s going, so please leave me your thoughts and comments in the section below. Until next time— happy painting!


2 comments
Hello Bonnie,
Thank you for your suggestions and insight! We’ll be sure to pass this along for our future blog tutorials and creators. If there is anything we can do for you, we’re only a brush stroke away! :)
Thank you for this tutorial. I enjoyed it, but I think that there are several colors and steps left out. For example, the picture shows blue-green shadows, but that was not in the directions or list of colors. Also, the eyes on the painting are very different from the drawing.