
Table of Contents:
- Painting a Starry Night Landscape with a Road
- What You Will Need
- How to Paint Your Road Landscape Step-by-Step
- Your Finished Painting
Painting a Starry Night Landscape with a Road
Everyone’s artistic journey looks different, and in this post we’ll show you how to paint a composition that can represent your road or path using one-point perspective. At first, the sketch may look simply like some lines put together but once you start adding the surroundings and details, you’ll be able to bring your scene to life. Our scene is filled with a forest and a galaxy, but your scene could be filled with anything you want. The most important part to remember is that everything is based off of the ‘disappearing point’ in the center of the composition. Grab your acrylics and keep reading to recreate this interesting painting or to get ideas for your own artistic journey painting.
What You Will Need:
- Acrylic Premium Artist Paint, 22ml Tubes - Set of 60:
- Stretched Canvas, Premium, 8 x 10 in - Pack of 12
- Flat and round synthetic brushes
- Cloth or napkin
- #2 HB pencil
- Cup of water
- Sponge
- Palette
How to Paint Your Road Landscape Step-by-Step
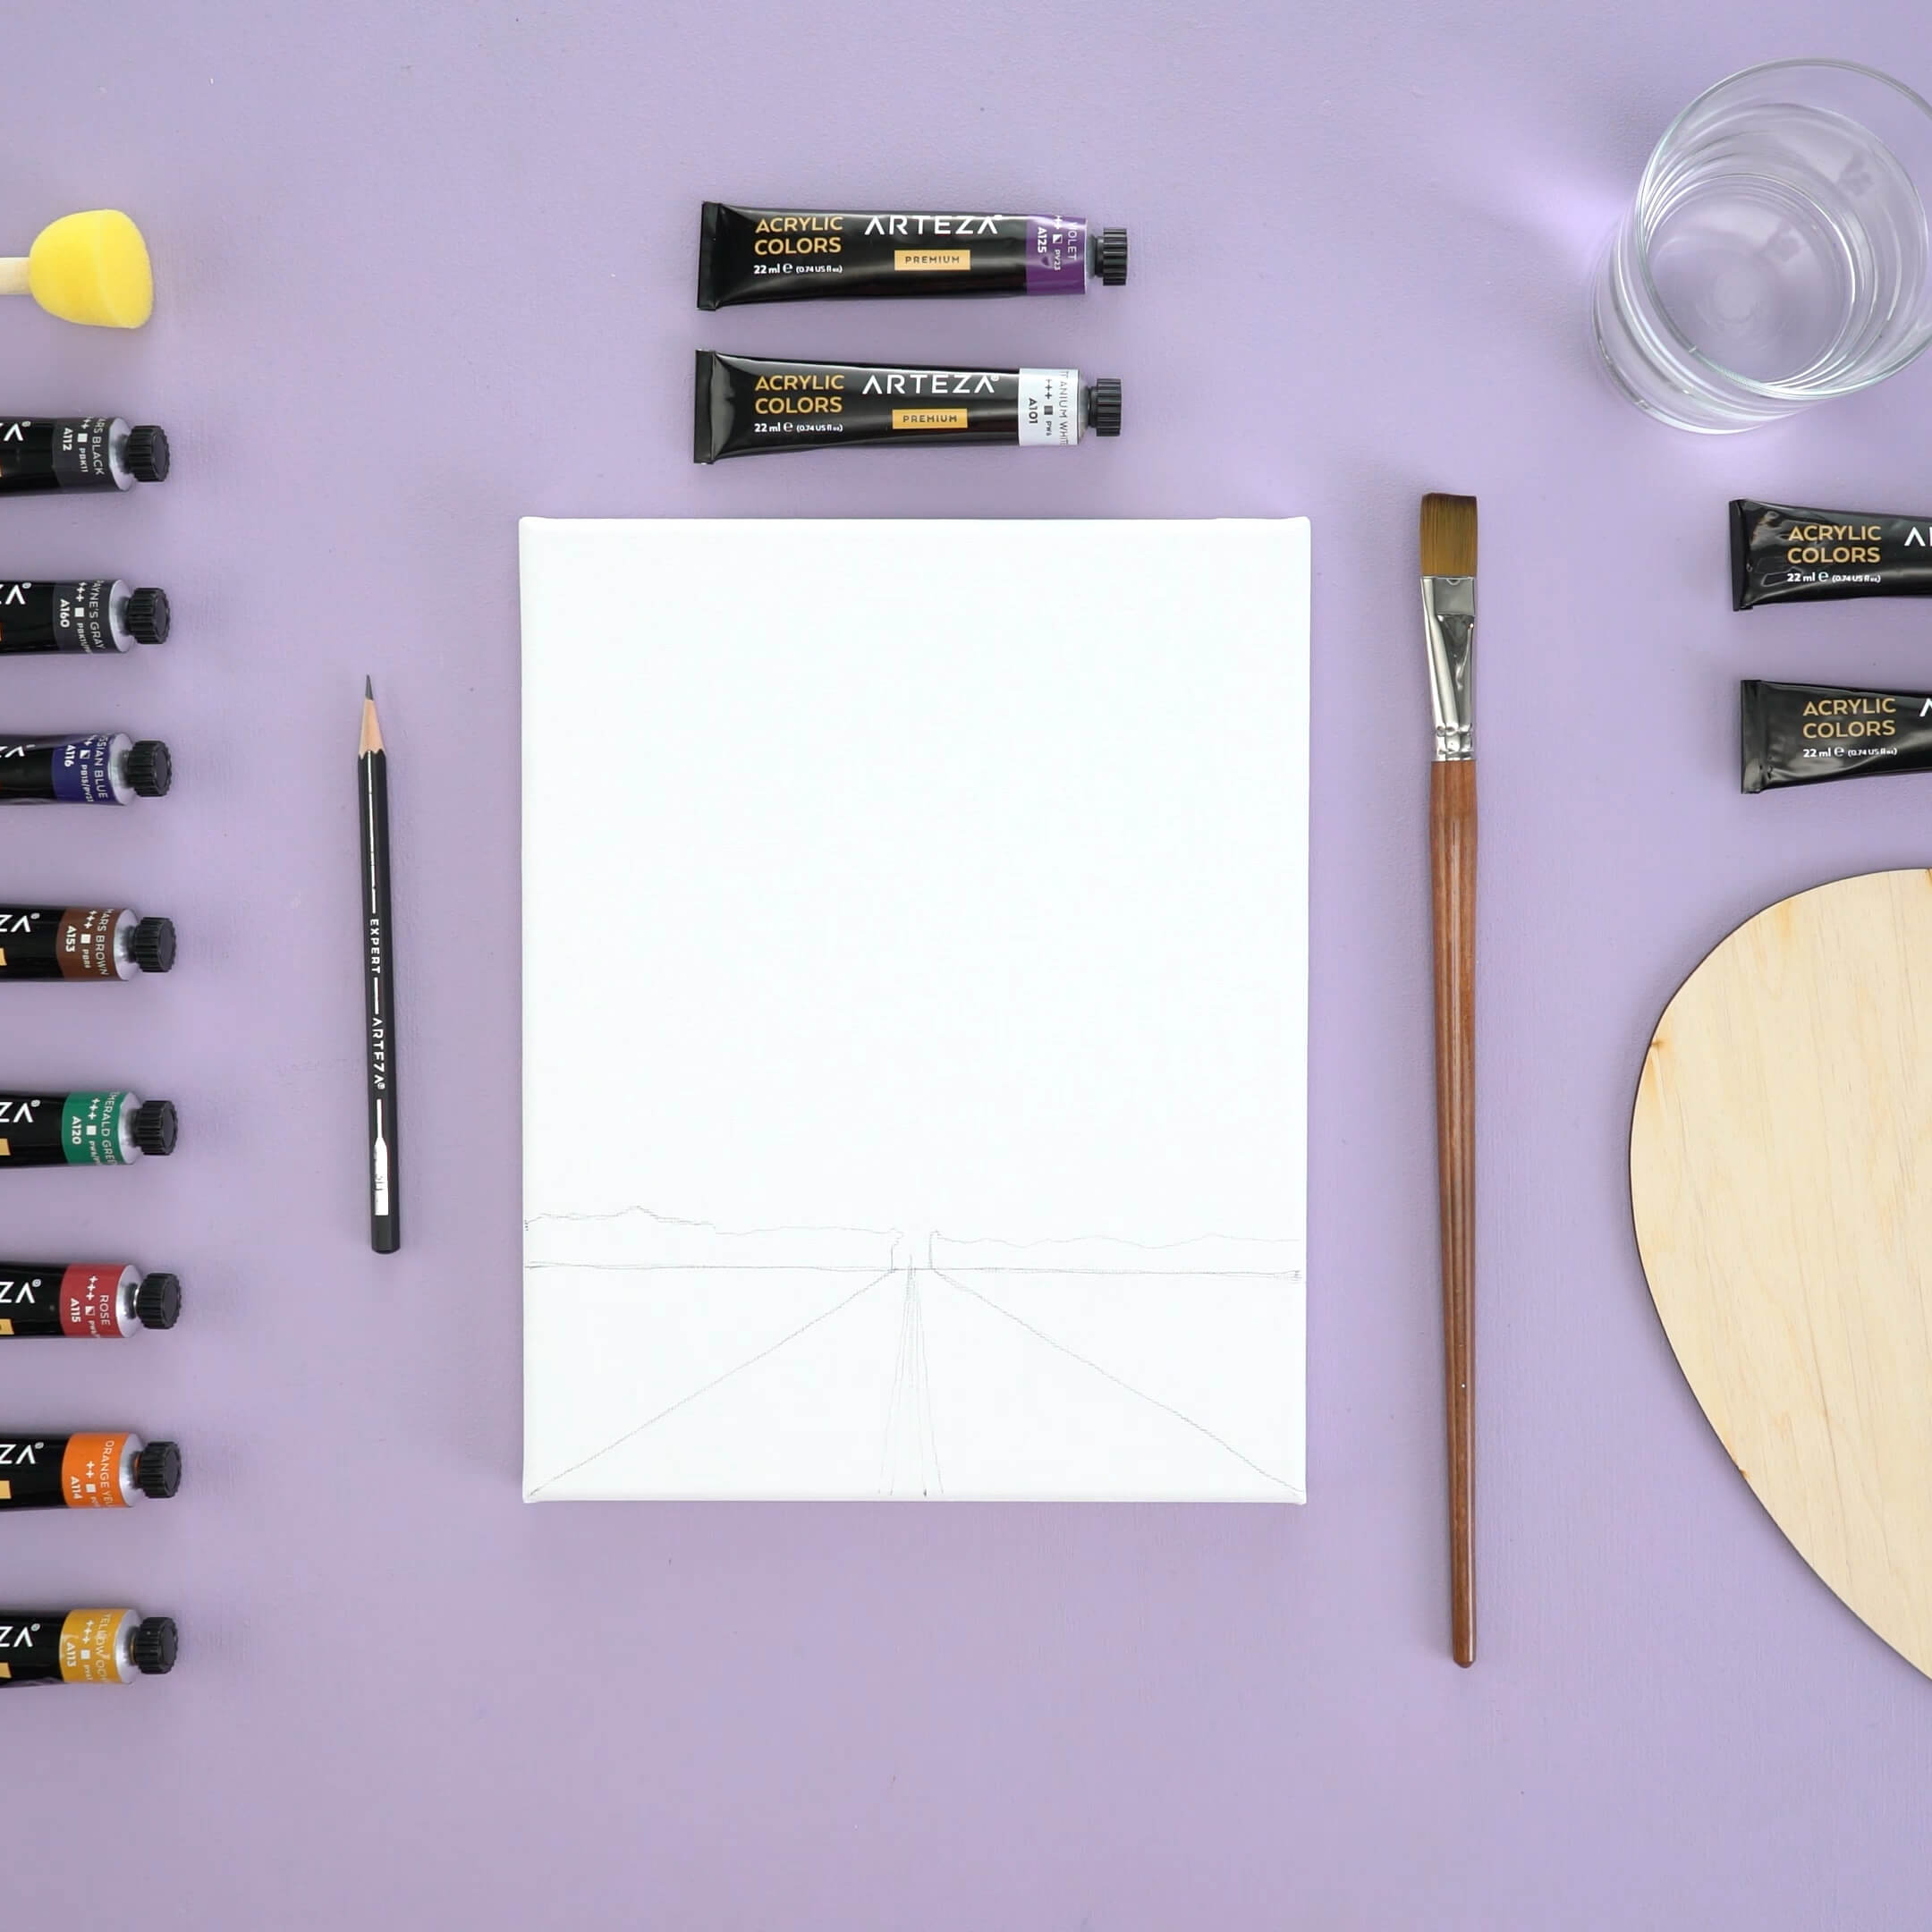
Step 1. Sketch your composition
Create the horizon line then find the center. Draw two angled lines from the center to represent the road. Add a straight line towards the center, then add lines to the right and left of this center line. Sketch a slightly jagged line to represent the forest on the horizon.
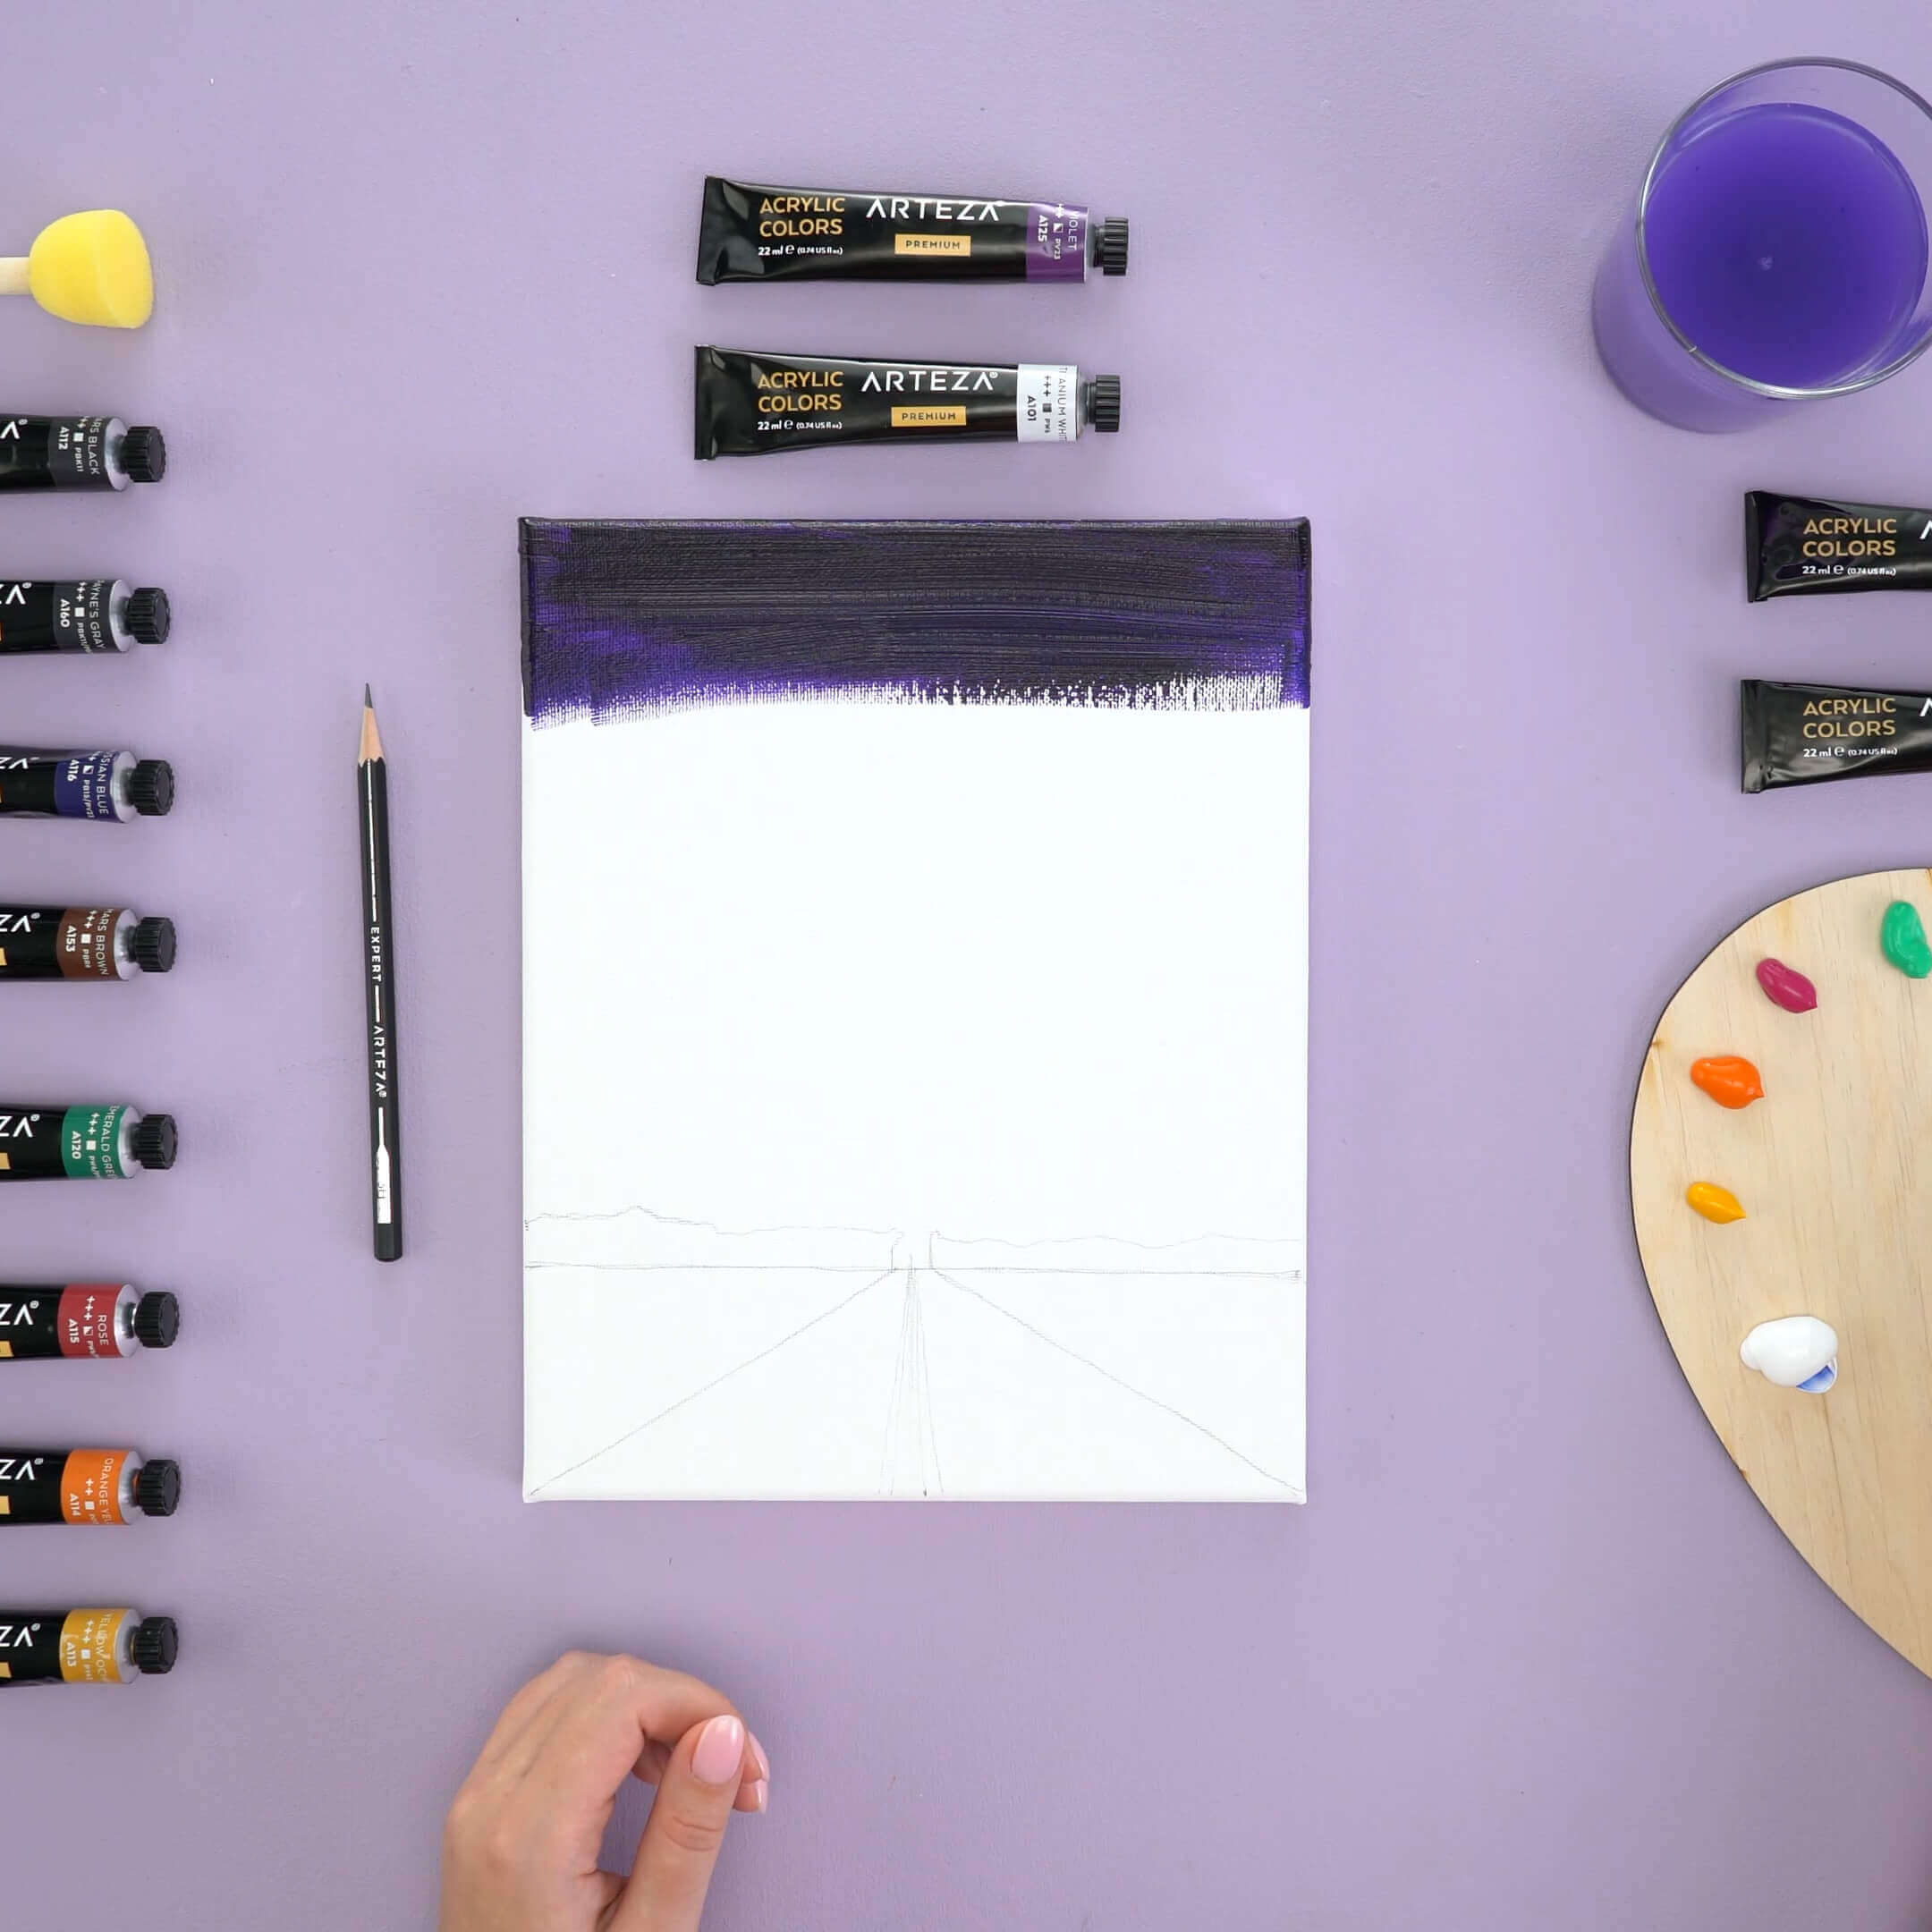
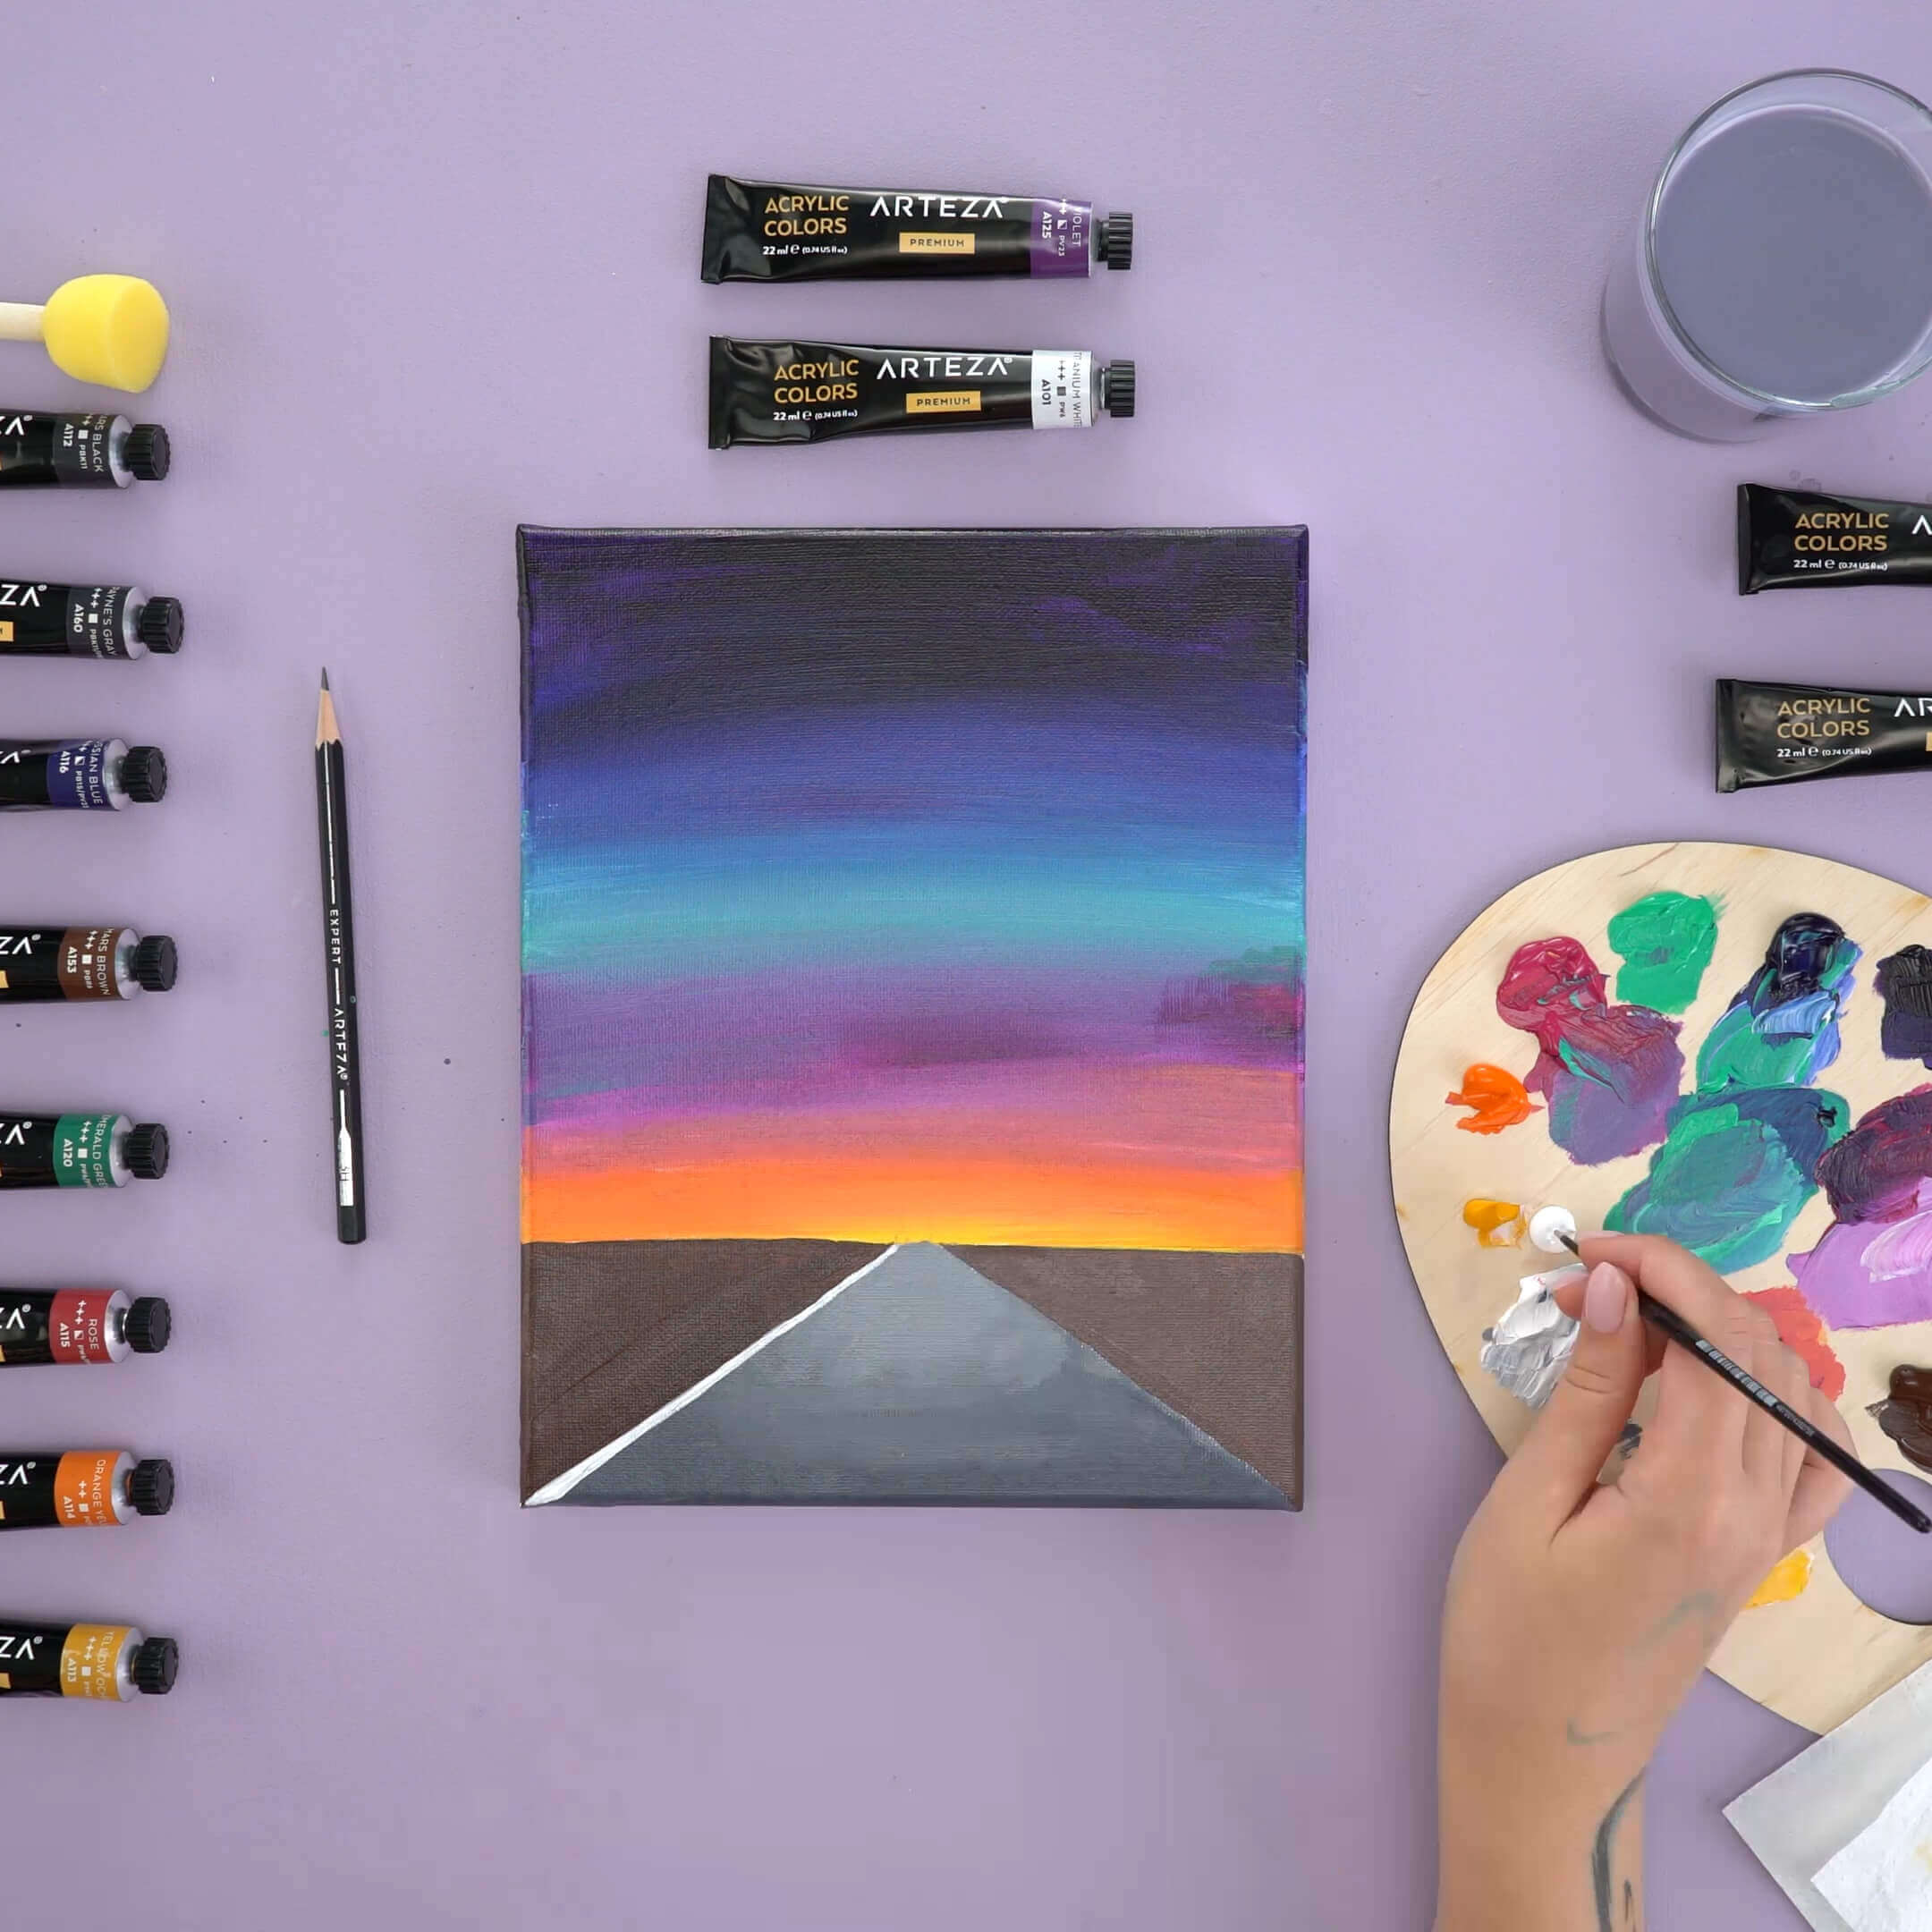
Step 2: Draw a gradient in the sky from dark to light
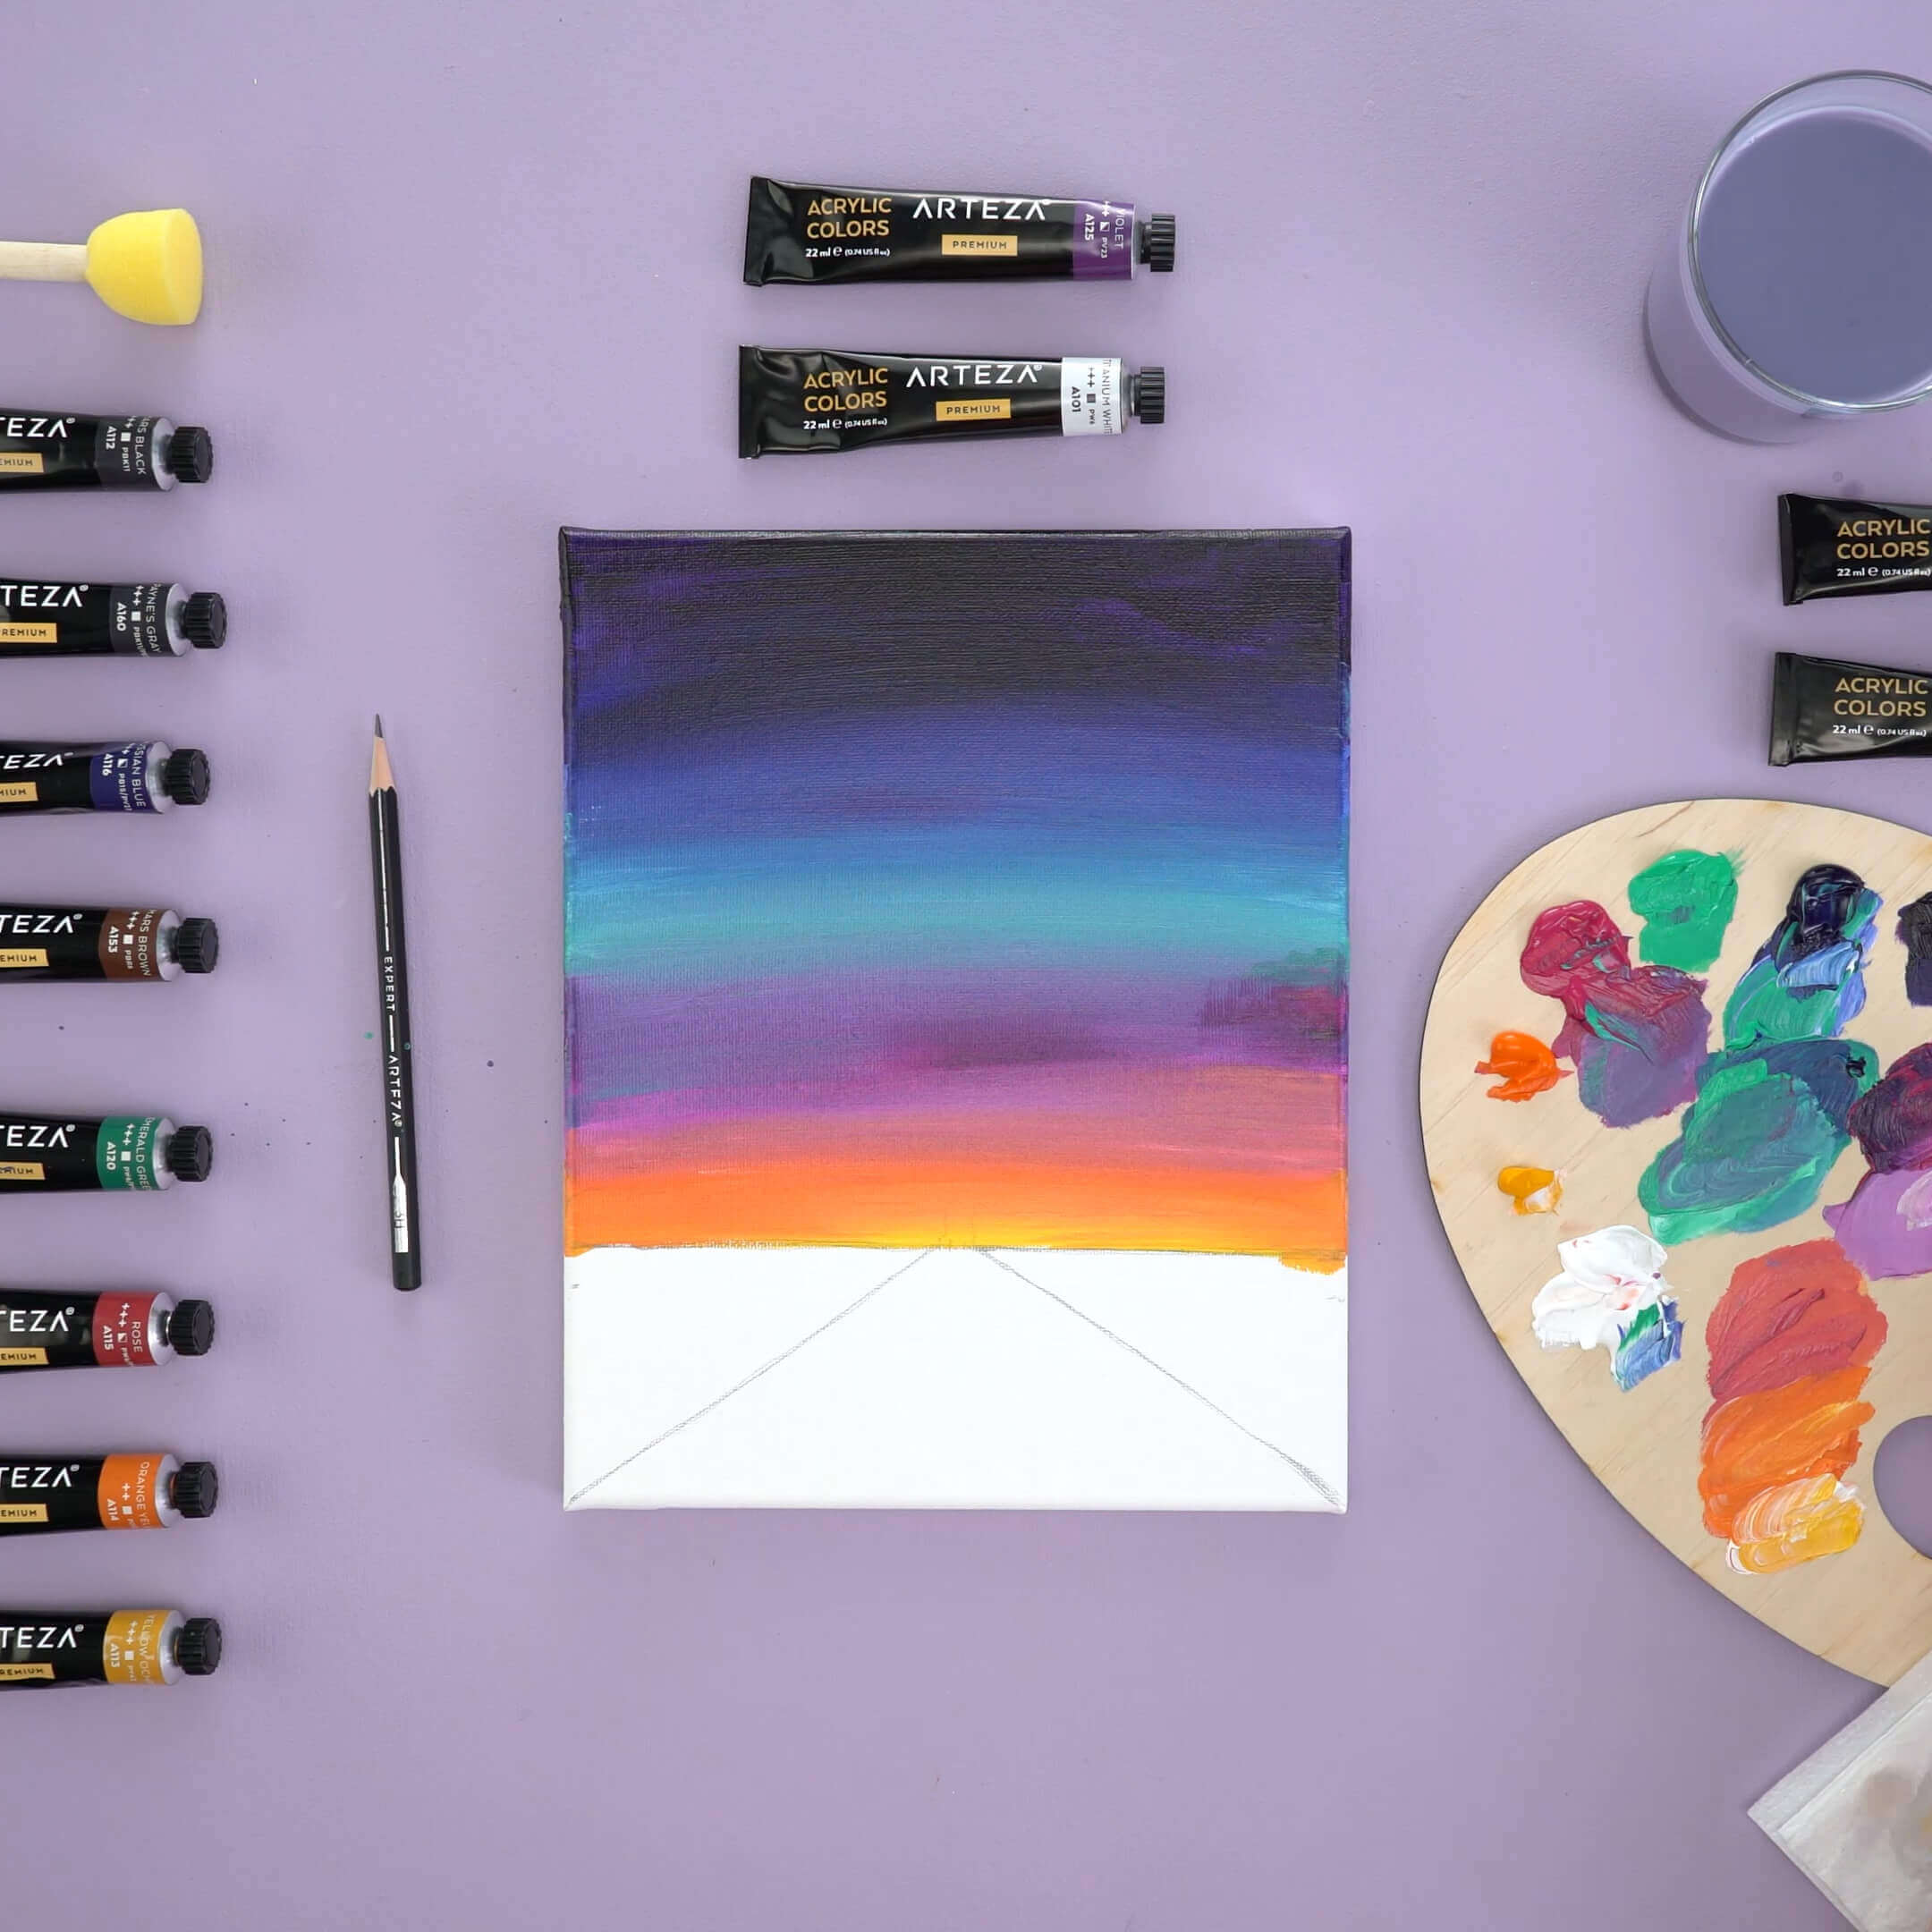
Apply A112, A125, A116, A120, A115, A114, A140, A101 onto the palette. Start painting a gradient from dark to light to represent the sunset. Start with A125 then gradually add A116 and blend it with A101. Use quick, light brushstrokes to blend the colors into each other & get a smooth transition. Add A120 to the blue, and blend the colors with each other like you did before. Clean off your brush and blot it on a napkin before using a different color.
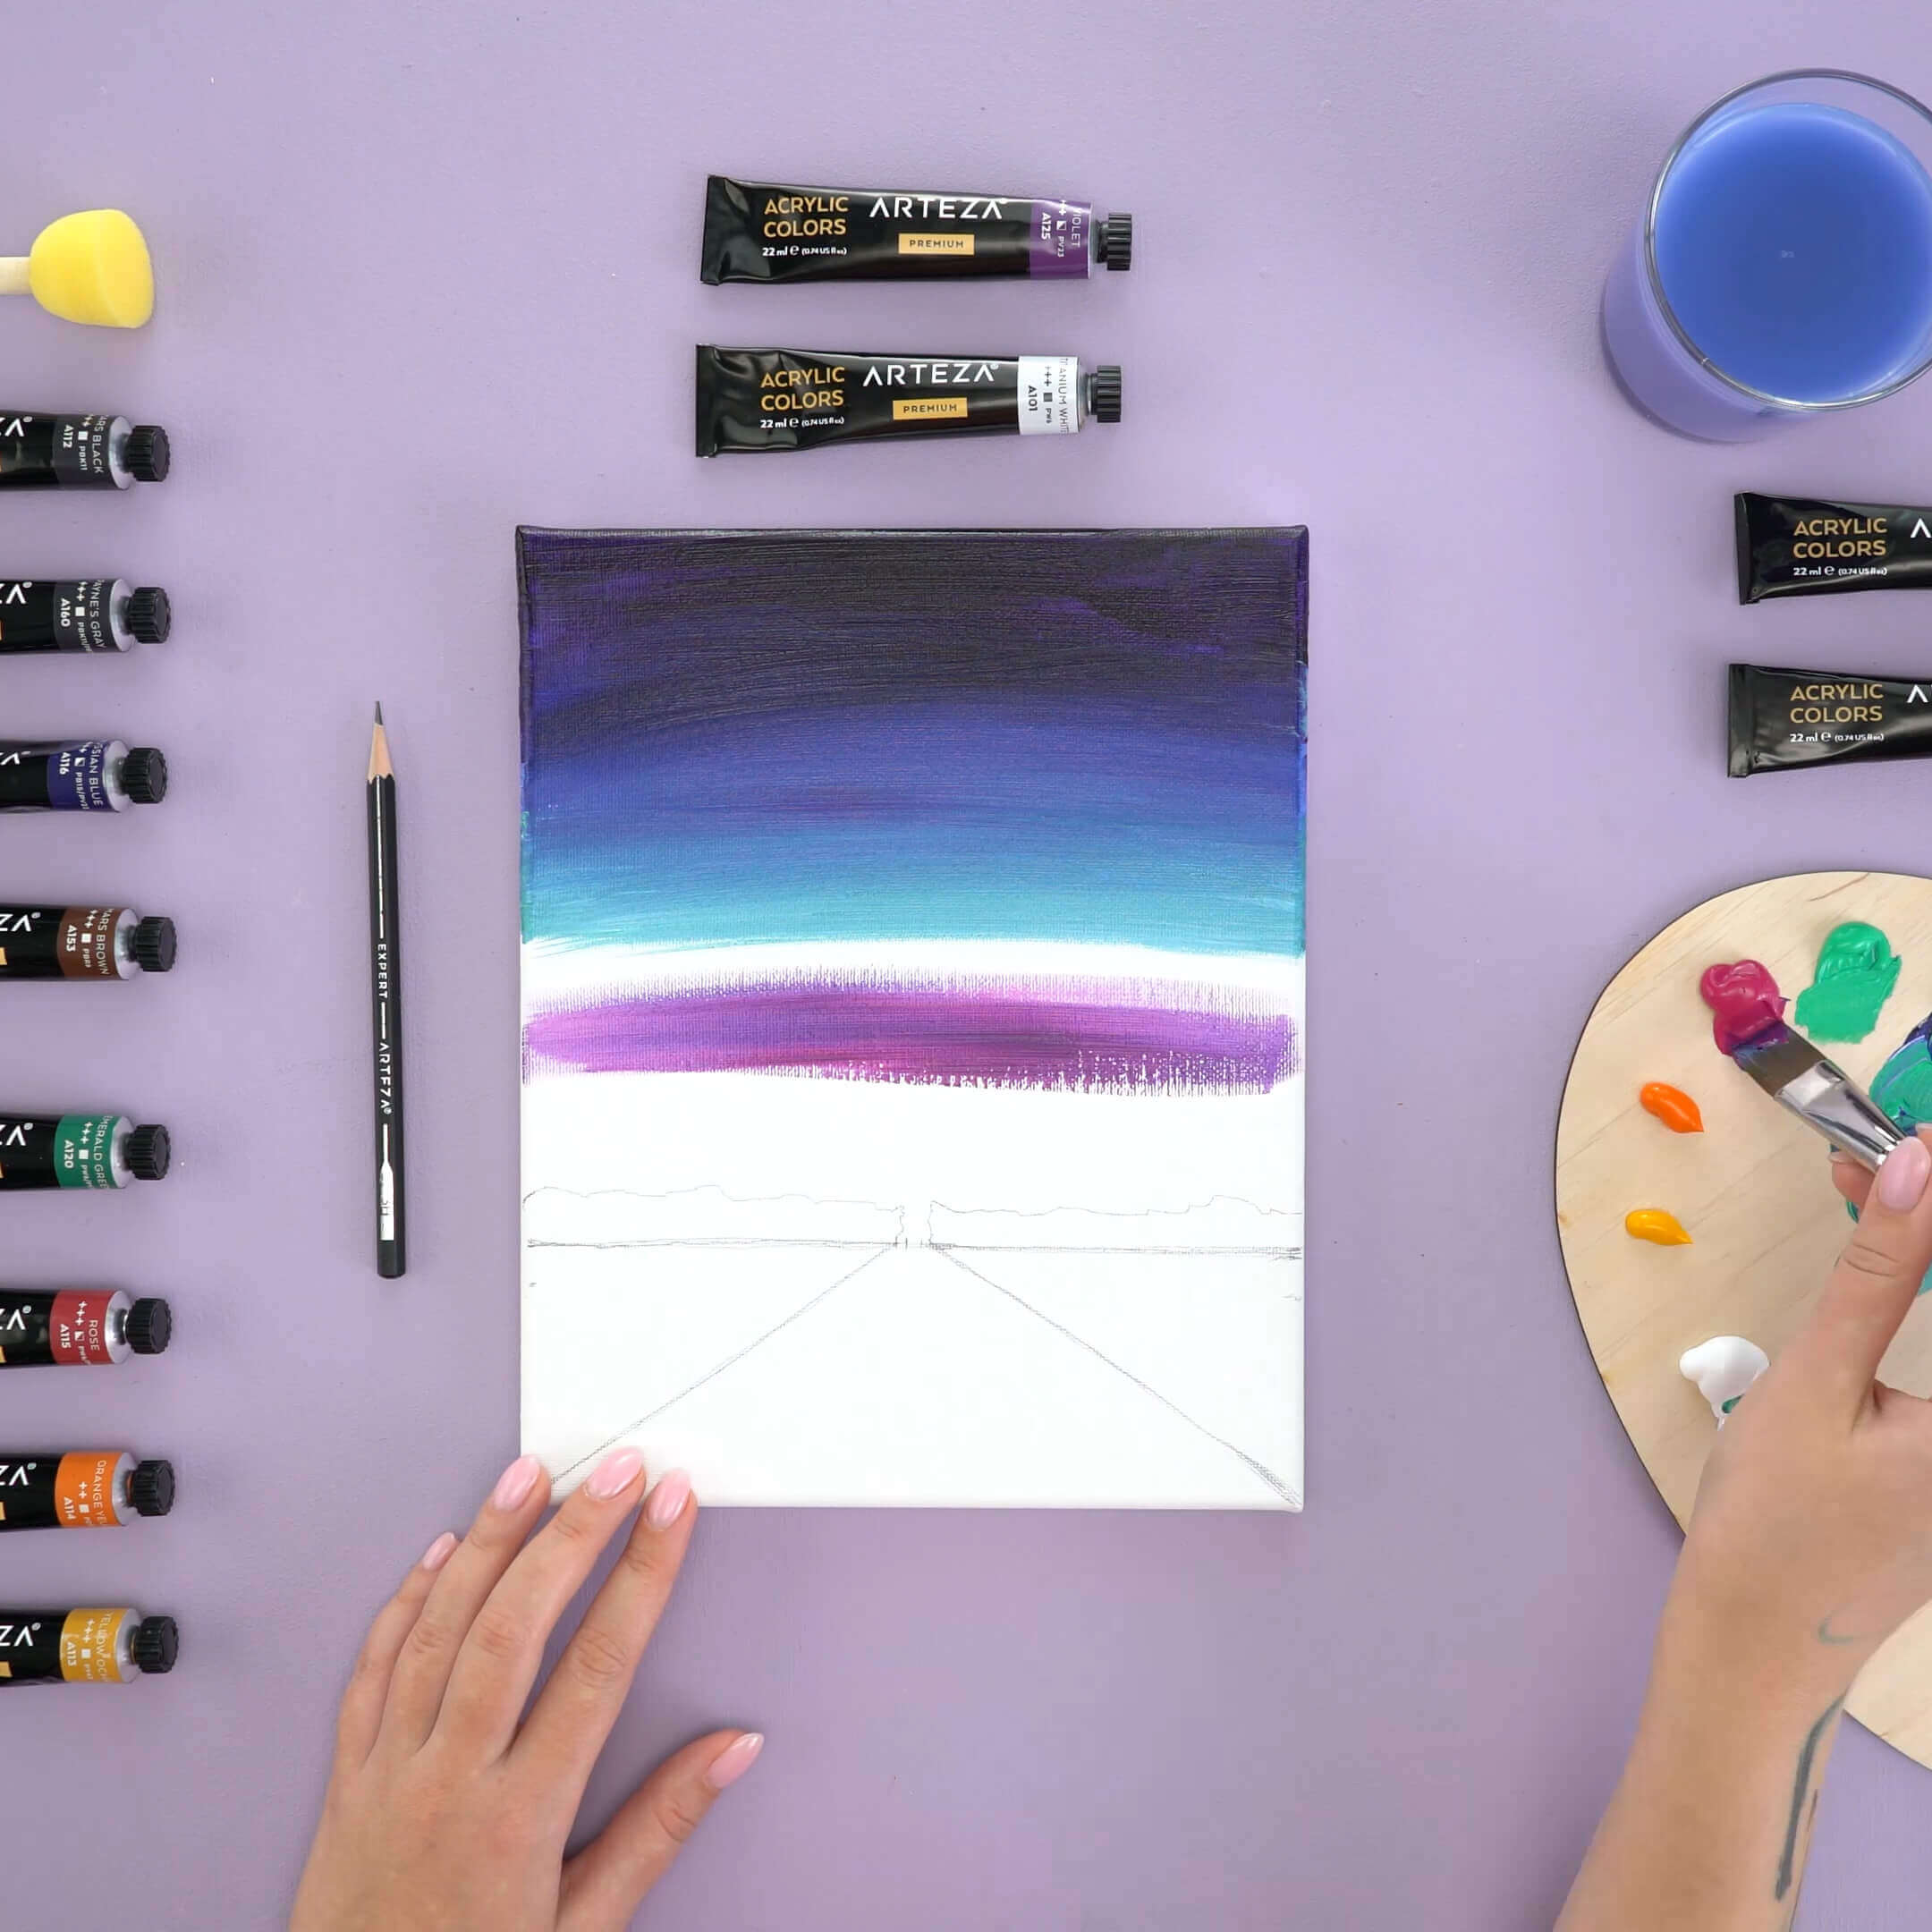
Step 3: Quick brush strokes & painting over the edges
Mix A115 with A125. Leave some space between this color and the green part of the gradient, so you don’t create a muddy color as you apply the pink tone to your canvas. Add some white after this. Blend A120 & A101 to create a gradient between the pink and green. Use quick brush strokes like you did before. Mix A114, A101 & A115 and go over the lightest part of the sunset. Mix A114 & A101 then add some A140 with A101. If you're painting on Arteza Stretched Canvas, don't forget to paint over the edge of the canvas so you don’t have any white areas on the sides.
Step 4: Road painting
Now it's time to paint the road. Squeeze out A160 and mix it with A101. Paint the part of the road that’s closer to the horizon lighter. Then add more A160 & A112 as the road gets closer to you. Take a moment to make the part furthest from you a bit lighter and the area near you a bit darker. This added contrast heightens the sense of distance in your painting.
Step 5: Detailing the road
Paint a field on the sides of the road by adding A153 to the palette and mixing it with A101. Squeeze A113 and A148 onto your palette so you can use them later. Use a thin round brush with A101 to paint the lines for the curb. The lines will be wider towards the bottom and thinner when they’re close to the horizon. Mix A140 with A101 then paint in the yellow dividing stripes in the center. Similar to the curb lines, they’ll be thinner towards the horizon. Don't get too much paint on your brush, you want to make your lines thin. You can thin the paint slightly with water for a cleaner line.
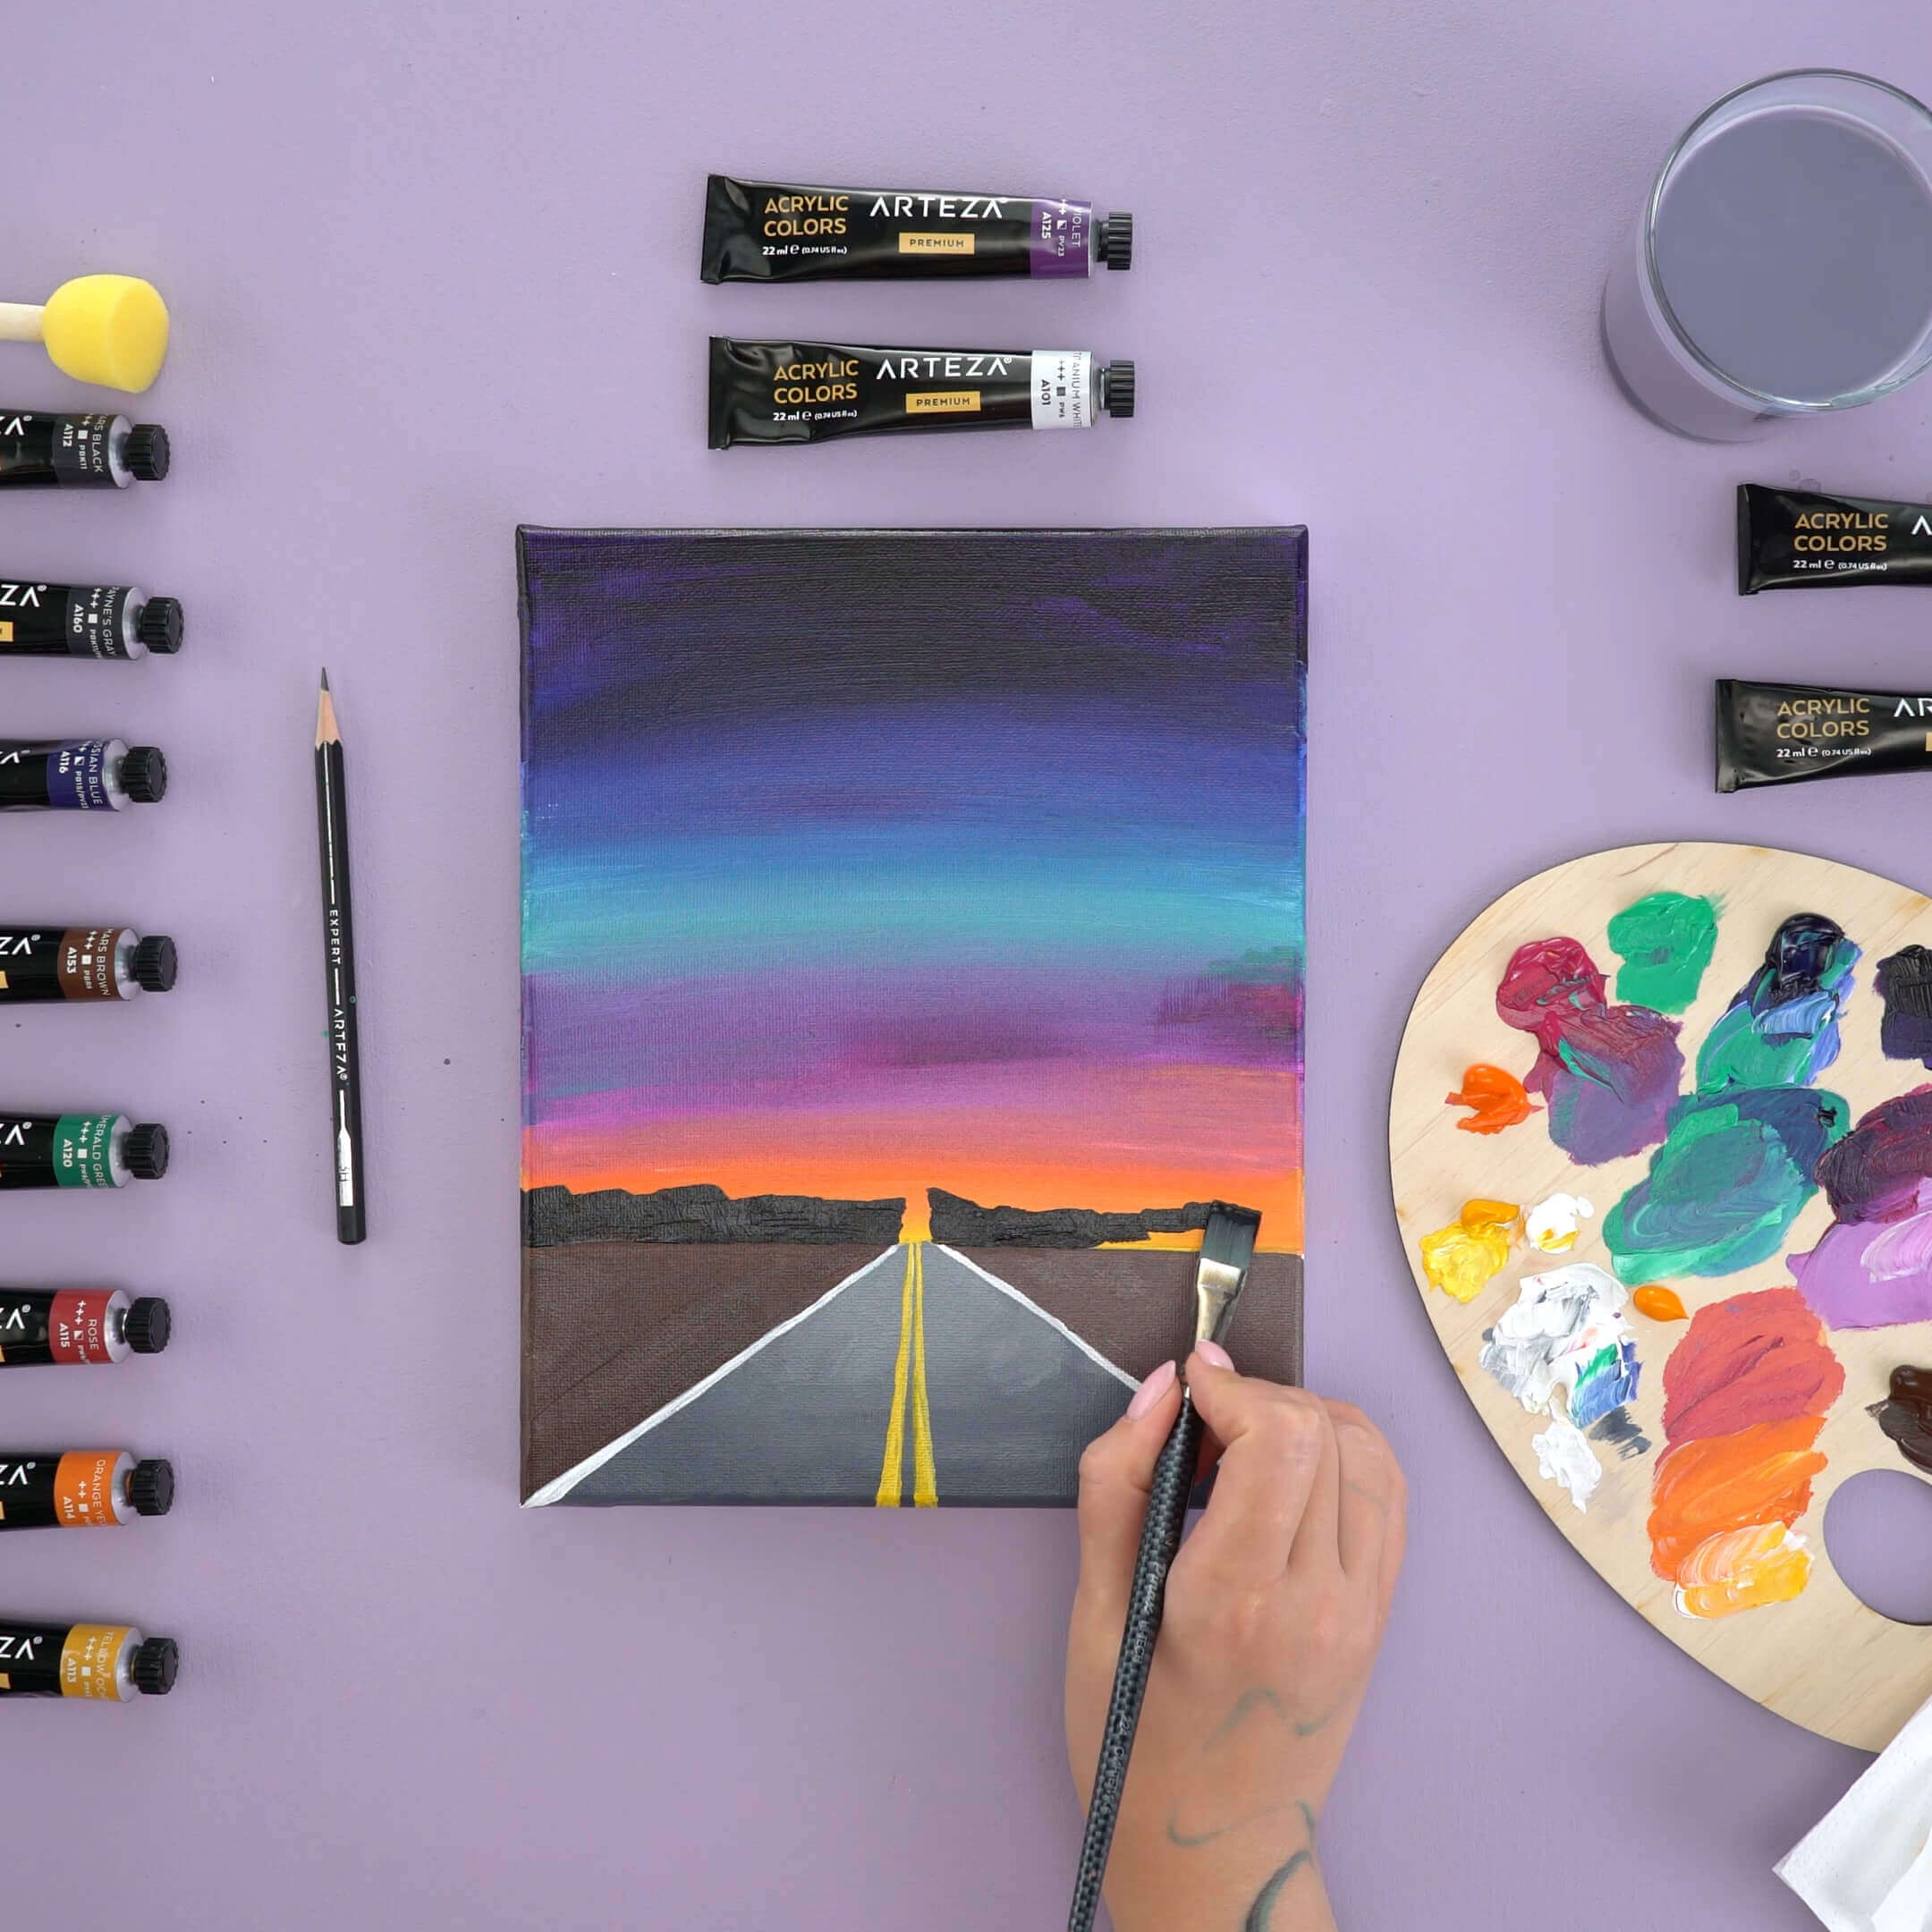
Step 6: Forest painting
Use A112 to create an uneven silhouette for the forest and fill it in.
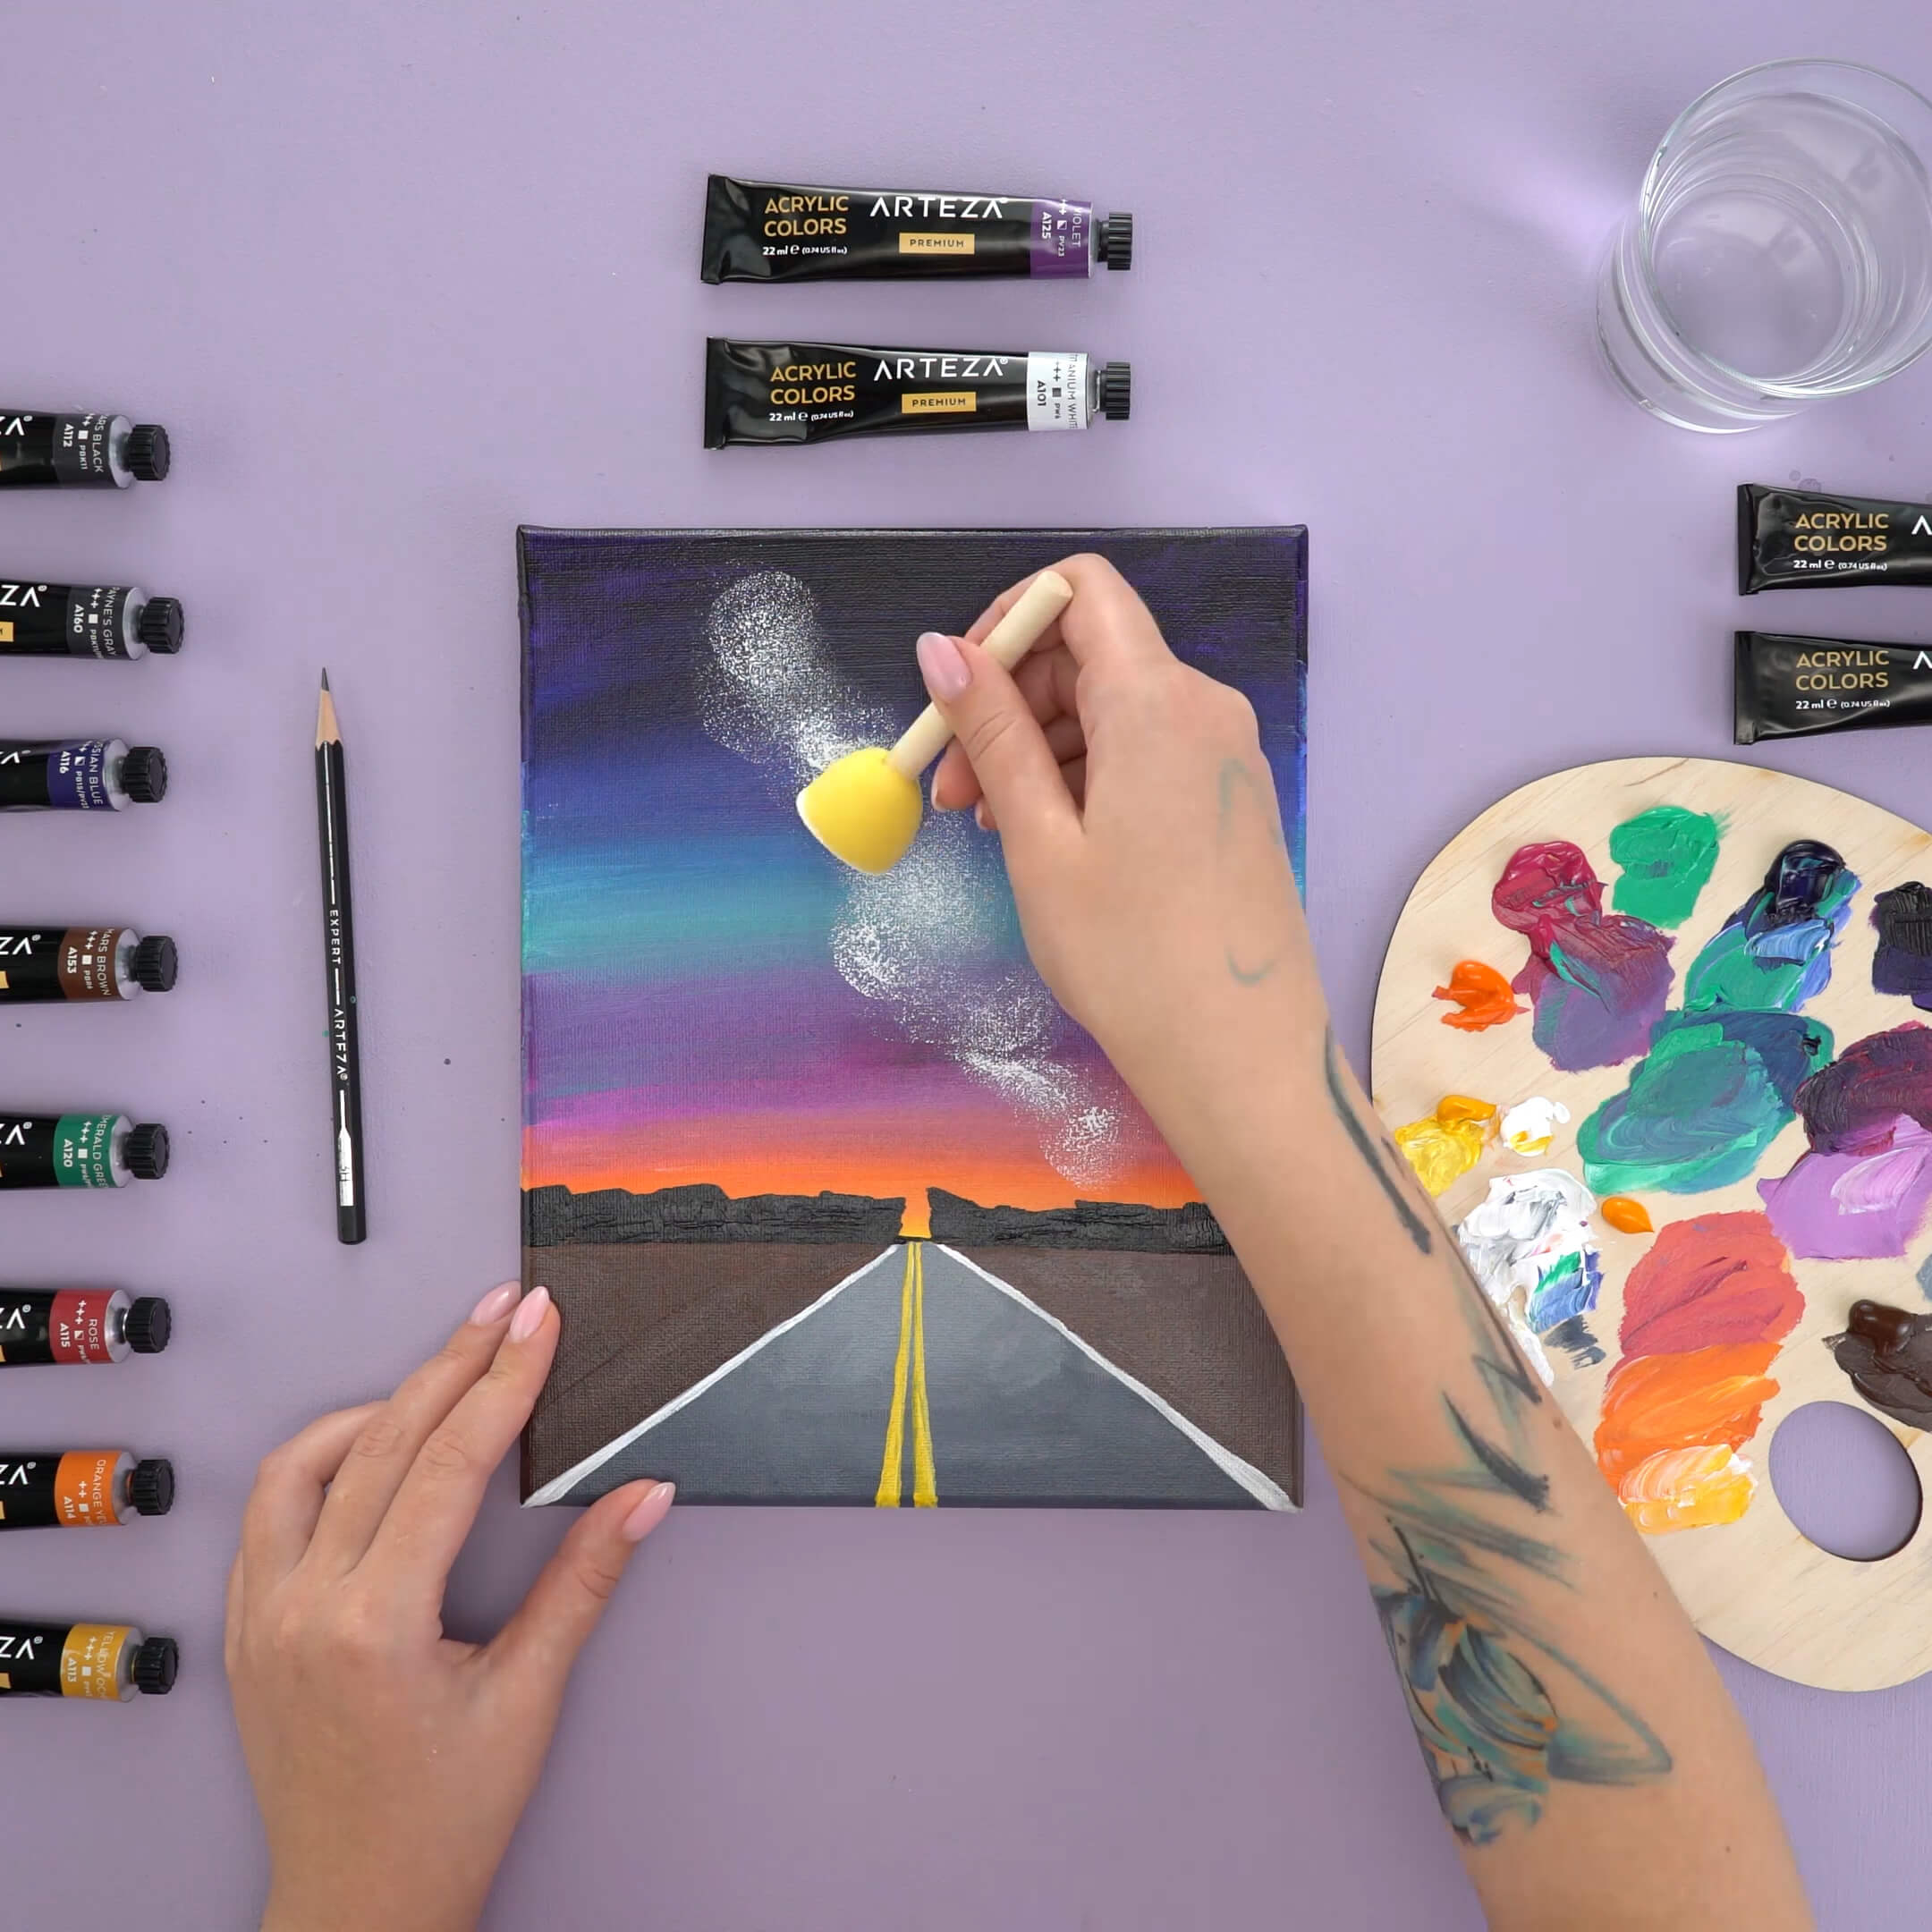
Step 7: Draw the milky way with a sponge
Next, move on to the starry sky. Squeeze out A101 and dab some onto a sponge. Blot the sponge on the palette to remove excess paint then stamp out an area for the milky way. Tilt the sponge to stamp with different intensities to make the painting diverse. Add A125 and paint the shadowed side of the Milky Way. Add some shades of pink & blue to create some interesting areas of color in the Milky Way. Blot the sponge on a napkin periodically to clean it off and remove any excess paint. You can use a dry, rough bristle brush to add details to the galaxy.

Step 8: Painting background
Dip the sponge into A153 & A112 to add some bushes to the field. Create some light areas on the bushes with A113. Go over the stripes on the road using A140 & A148 to create an orange tone. Add some lights along the road with A101.
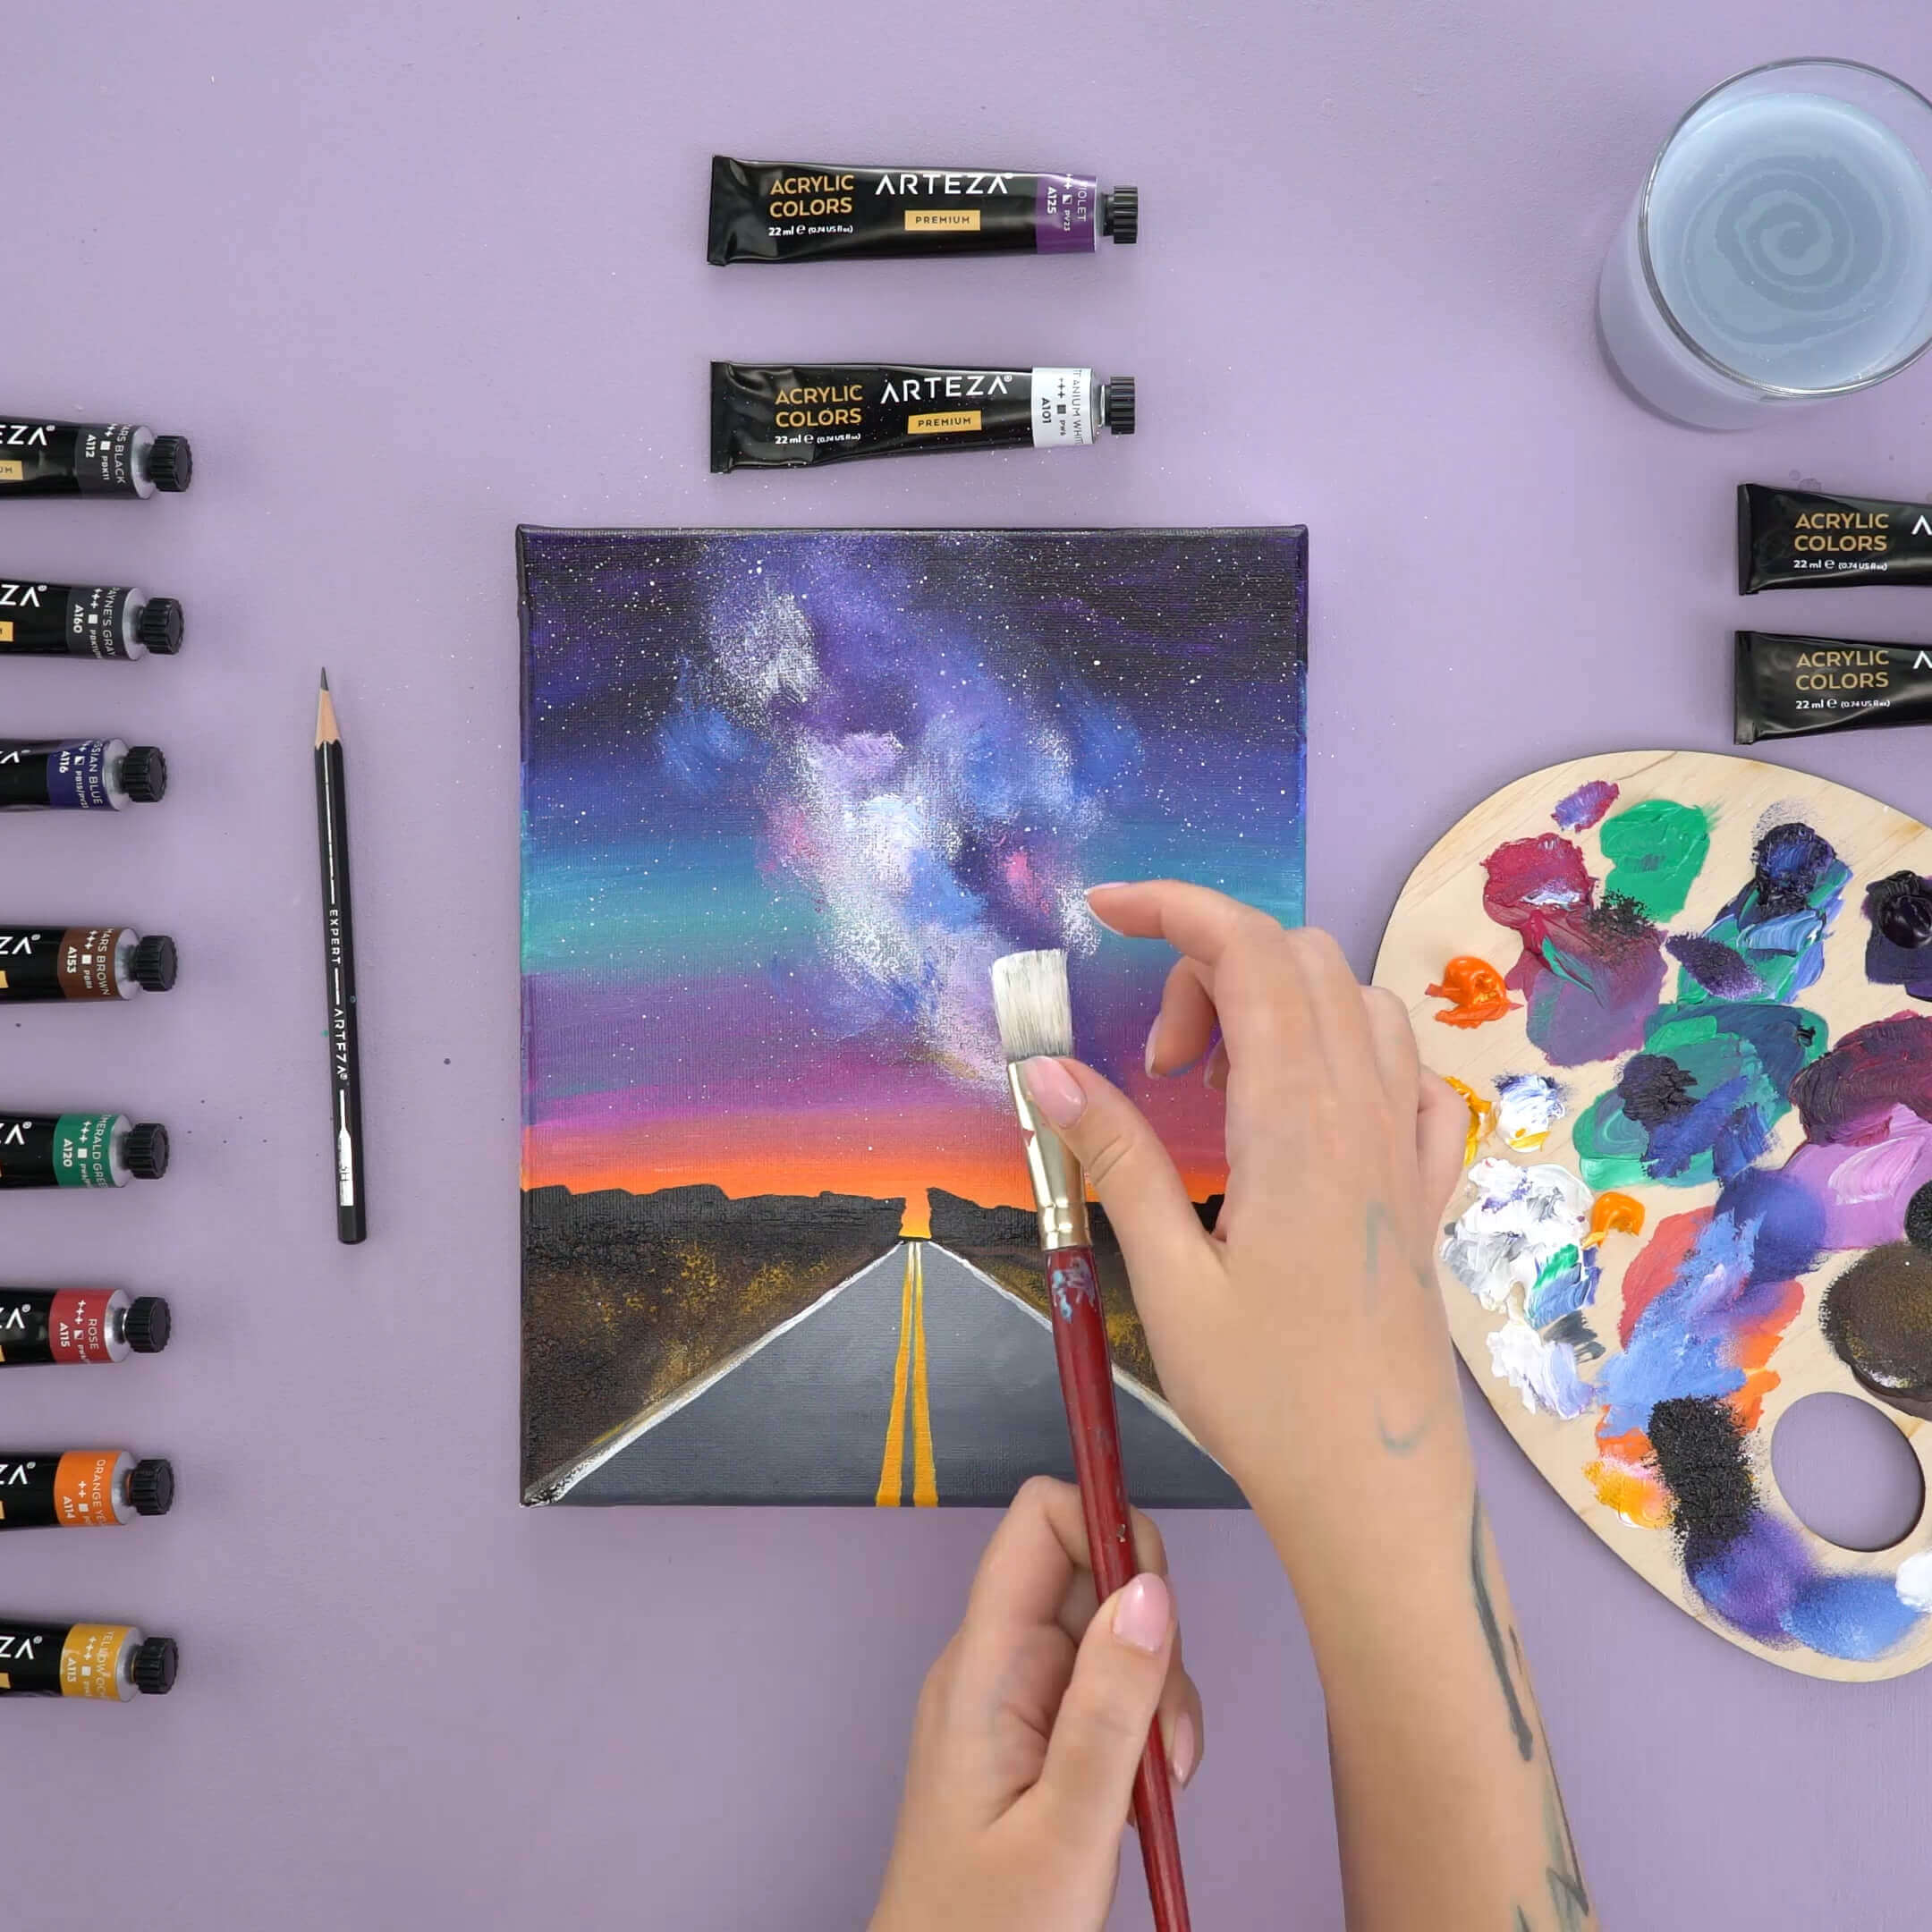
Step 9: Placing stars
Dilute A101 with water, then pick up some paint on a rough, bristle brush. Gently flick the bristles to spray the paint onto the sky. You’ll get splashes of different sizes depending on the amount of paint on a brush & the intensity of flicking. Add some larger stars with a thin round brush and A101.
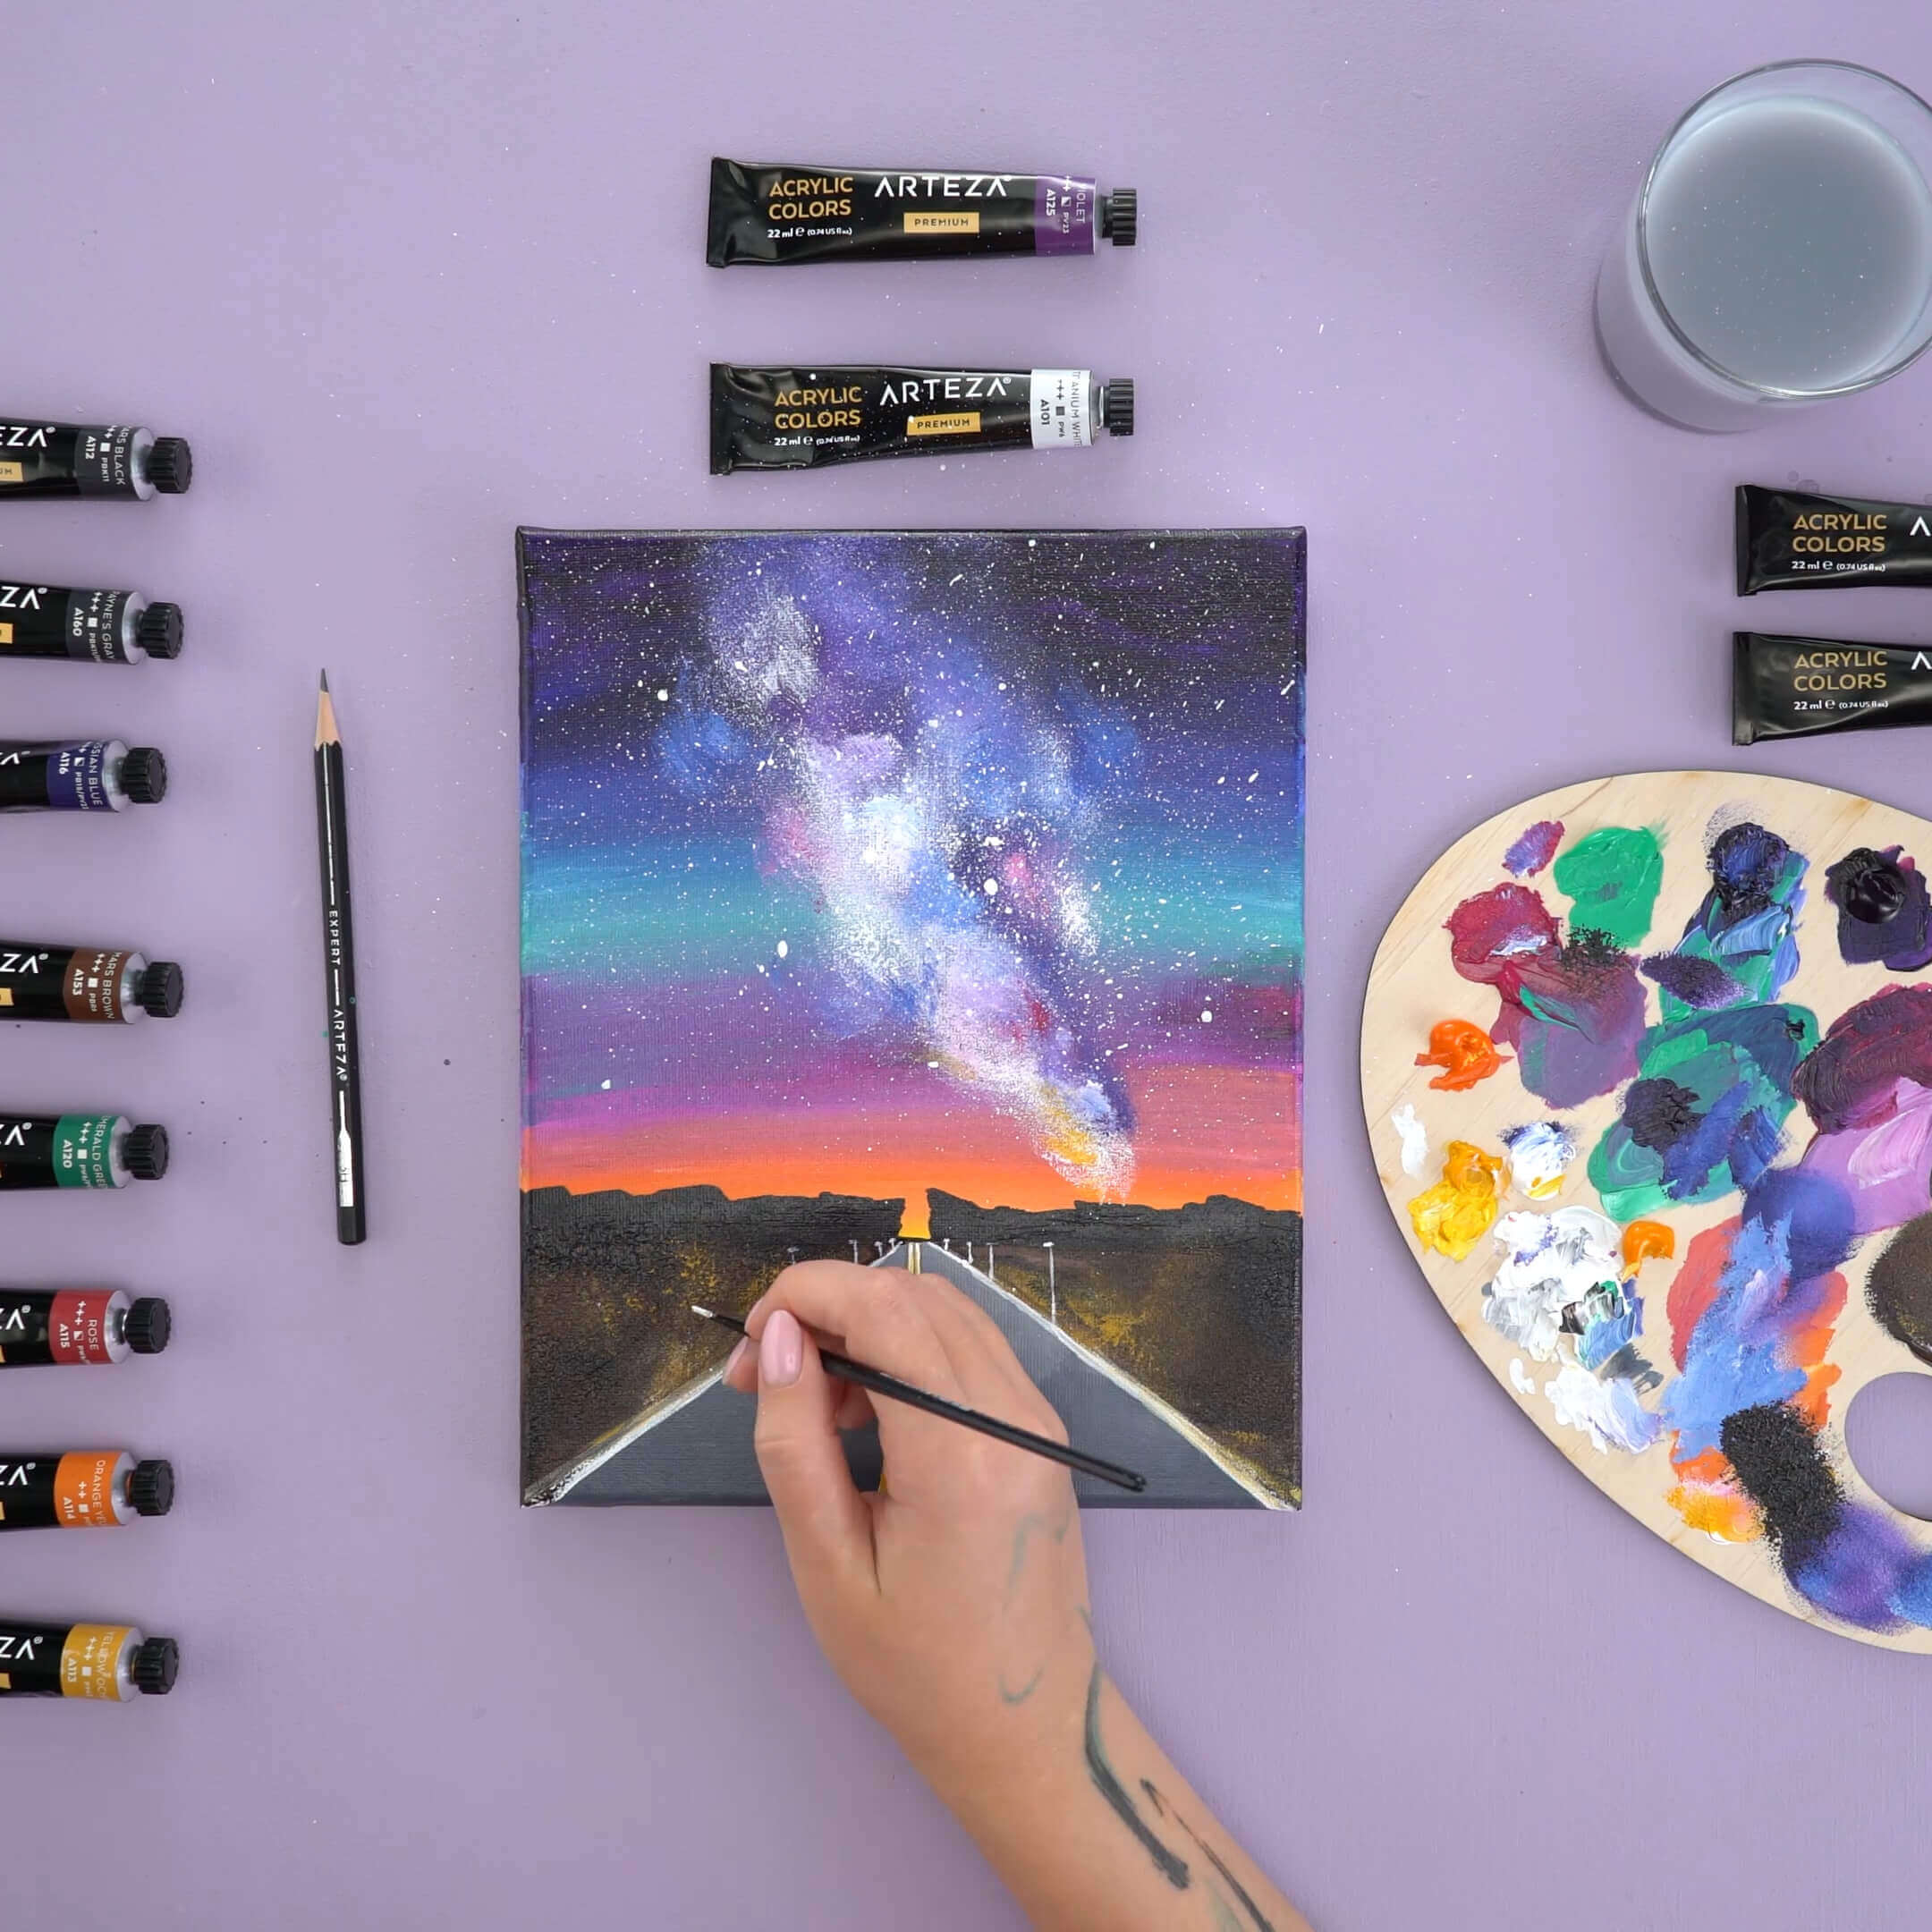
Step 10: Drawing poles
Draw poles along the road using A101. As they get closer to the horizon, paint less of them.
Conclusion: Your Finished Painting
Now that your painting is finished, when you look at it, it’ll feel like you’re standing on a road surrounded by a forest and a mystical galaxy. You can adapt this scene to whatever your road looks like, it can be fantastical or it can be realistic. Your road doesn’t have to look exactly like our painting or even other artist’s roads. This is your creative journey and you are the driver on this road. One-point perspective is a good introduction into the world of creating perspective in your drawings. If you’re feeling comfortable with this technique, you can explore other ways to add depth and dimension to your drawings using perspective.


